- Client ID
- Client Secret
- Scopes Requested
- Shopify Developer account, also known as a Shopify Partner account. You can create one here.
- Shopify development store. Learn more about creating a development store here.
- Shopify application. Learn more about creating a Shopify application here.
Add the Redirect URL to your Shopify app
Paragon provides a redirect URL to send information to your Shopify app. To add the redirect URL to your Shopify app:- Log in to your Shopify Partner Dashboard and select your app.
- Navigate to App setup > URLs > Allowed redirection URL(s)
- Add your app’s Initial Redirect URL to “App URL”. While testing your integration, you can use your app’s root URL. Once you set up an Initial Redirect to go live, you will need to change this to the URL of your Initial Redirect.
-
Add your app’s Redirect Callback URL to “Allowed redirection URL(s)”. While testing your integration, you can use
https://passport.useparagon.com/oauth. Once you set up a Redirect Callback to go live, you will need to change this to the URL of your Redirect Callback. - Press the Save button at the top of the page to save your changes.
Note: You’ll need a Shopify application to connect your application to Paragon. Learn more about creating a Shopify application here.
Add a development store to your Shopify app
- Log in to your Shopify Partner Dashboard.
- Click Apps on the sidebar.
- Select your Shopify application.
- In the Test your app section, press the Select store button.
- Choose the development store you’d like to connect to.
Note: You’ll need to create a development store if you don’t already have one. Learn more about creating a Shopify development store here.
Add your Shopify app to Paragon
- Select Shopify from the Integrations Catalog.
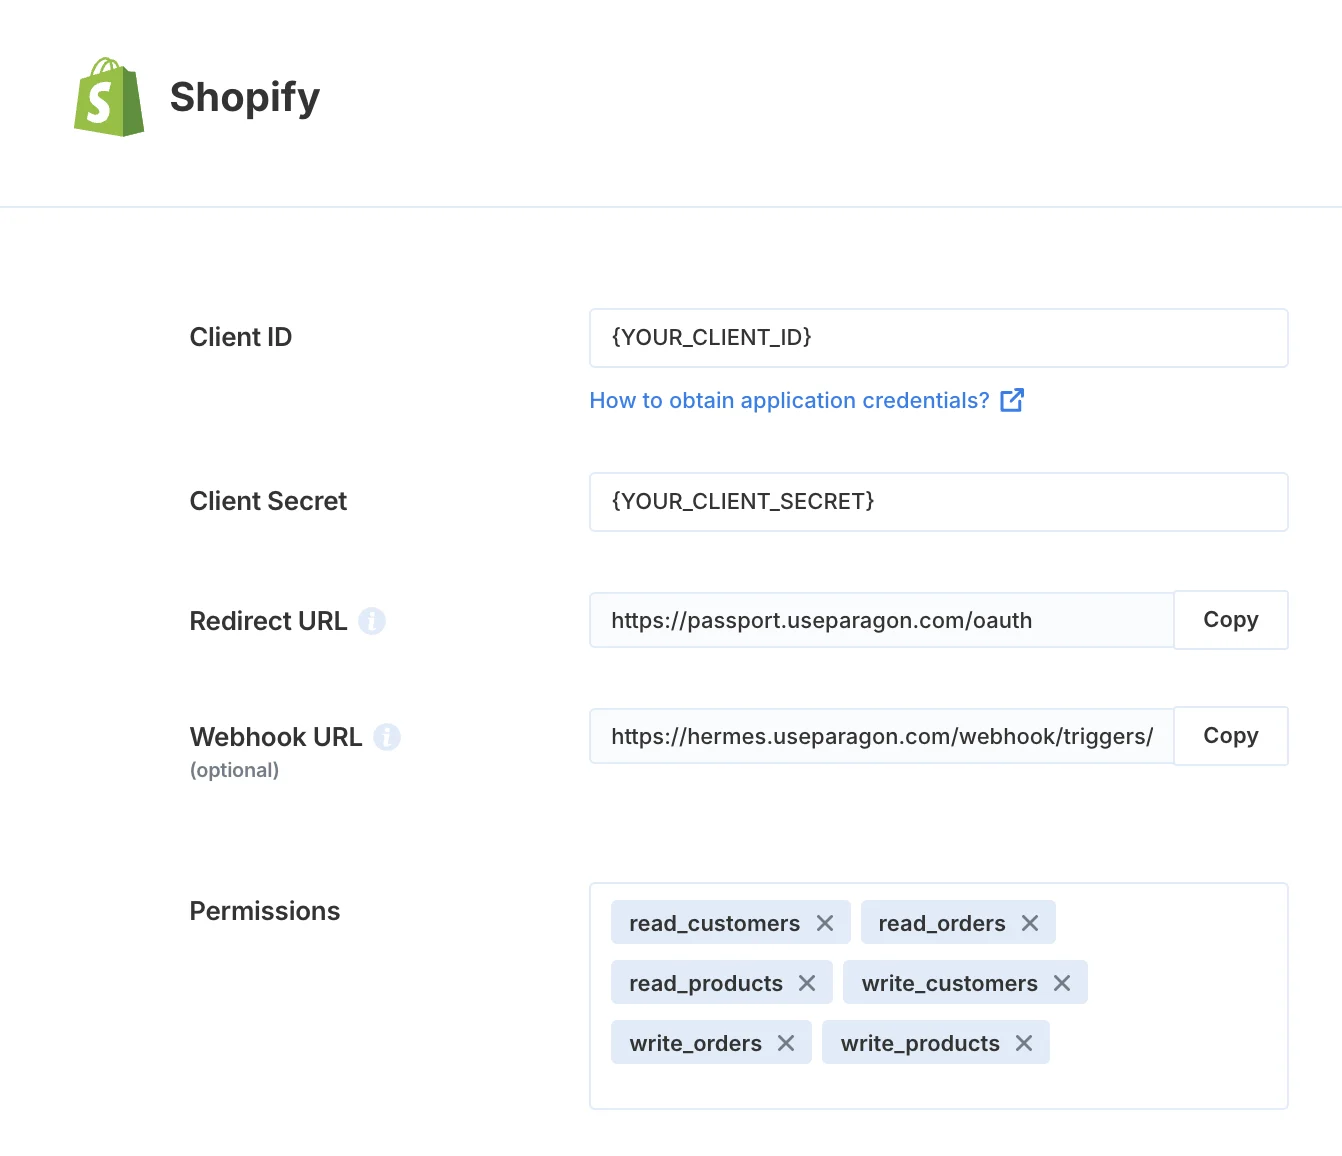
- Under Integrations > Connected Integrations > Shopify > App Configuration > Configure, fill out your credentials from the end of Step 1 in their respective sections:
- Client ID: Found under Apps > Client credentials > Client ID on your Shopify app page.
- Client Secret: Found under Apps > Client credentials > Client Secret on your Shopify app page.
- Permissions: Select the scopes you’ve requested for your application. For a list of recommended scopes, please view this integration within your Paragon dashboard. View dashboard. A complete list of Shopify’s scopes is here.
Note: You should only add the scopes you’ve requested in your application page to Paragon.
Connecting to Shopify
Once your users have connected their Shopify account, you can use the Paragon SDK to access the Shopify API on behalf of connected users. See the Shopify REST API documentation for their full API reference. Any Shopify API endpoints can be accessed with the Paragon SDK as shown in this example.Building Shopify workflows
Once your Shopify account is connected, you can add steps to perform the following actions:- Get Customers
- Search Customers
- Create Customer
- Update Customer
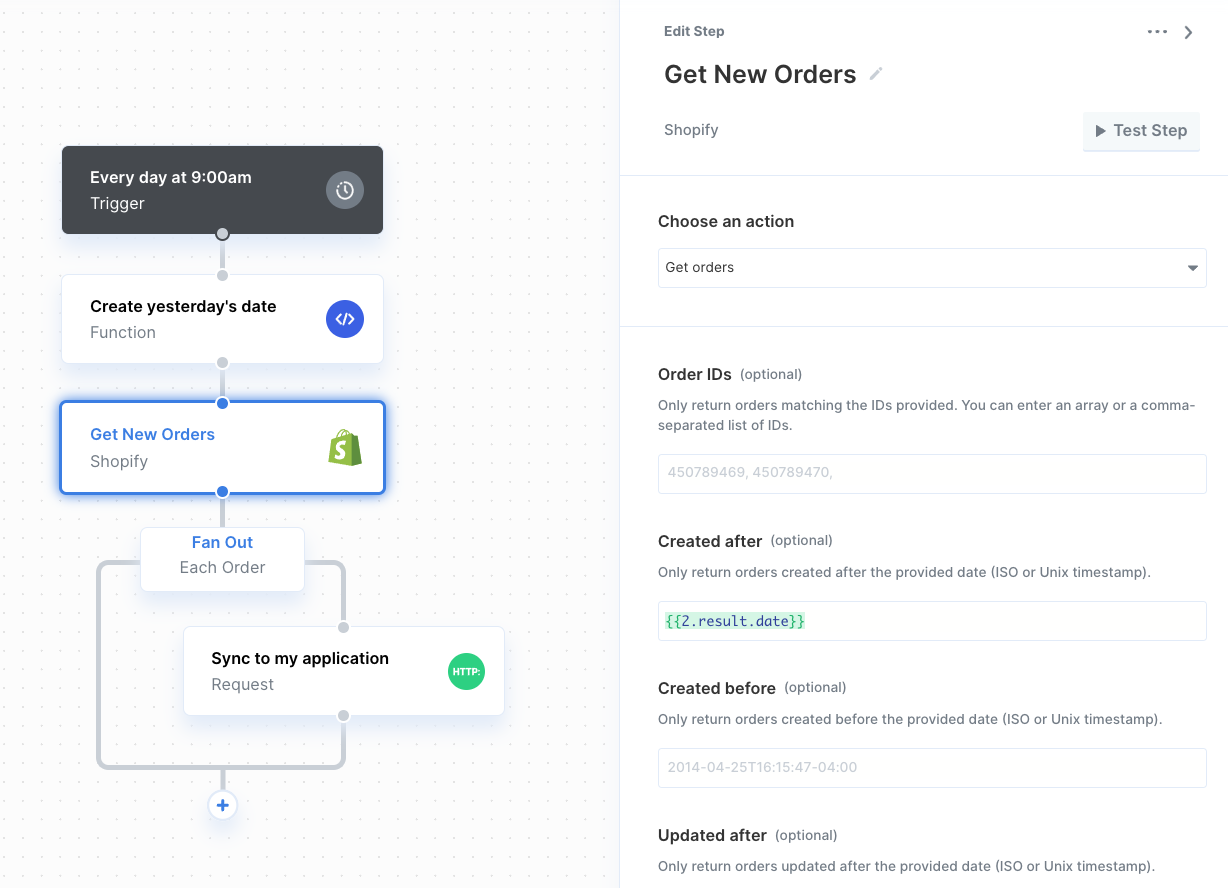
- Get Orders
- Create Order
- Update Order
- Get Abandoned Carts
- Get Products
- Create Product
- Update Product
{{ to invoke the variable menu.
Using Webhook Triggers
Requirement for using Shopify triggers: Configuring triggers for Shopify events that involve customer data requires you as the Shopify app owner to request access to protected data. Navigate to Apps > Your App > API Access > Access Requests to request access before using the Paragon Shopify trigger. Learn more here.
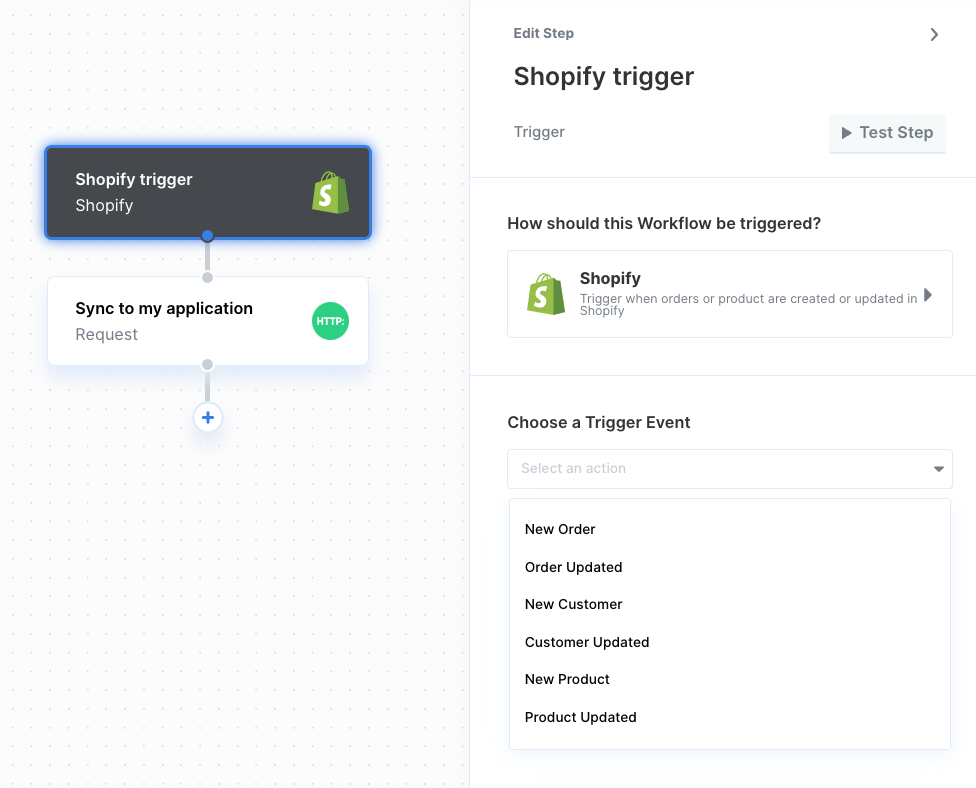
- New Order
- Order Updated
- New Customer
- Customer Updated
- New Product
- Product Updated
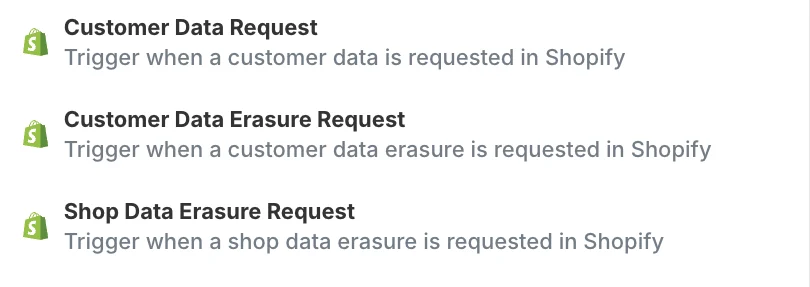
- Customer Data Request
- Customer Data Erasure Request
- Shop Data Erasure Request
Publishing your Shopify app
Required for publishing: In order to list your app on the Shopify App Store, you must implement the following additional features in your integration:For more information, see Shopify’s documentation on publishing requirements.
Setting up Redirect Pages in your app
Your Shopify integration requires two types of pages hosted in your application to support an installation flow that begins in the Shopify App Store (i.e., a user searches the Shopify App Store for your published app and clicks Add app). Here is an annotated version of the Shopify OAuth flow diagram outlining what pages you will need to implement:.png?fit=max&auto=format&n=HSp5hB8tE4Z6e44m&q=85&s=d6fe862370286a8b00393d2a3723dabc)
- Initial Redirect: This page will take in a
shopquery parameter and redirect to Shopify’s OAuth flow. - Redirect Callback: This page will receive the OAuth authorization code after the Shopify user grants consent and call
paragon.completeInstallto save the user’s account connection.
Initial Redirect
The Initial Redirect should be implemented as follows:- Accept and read the query parameter
shop. If the query parameter is present, redirect to the following URL to start the Shopify OAuth flow:
- The
SHOPIFY_CLIENT_IDshould match the Client ID that you use in your Shopify integration settings. - The
REDIRECT_CALLBACK_URLshould be the URL of the Redirect Callback page in your app. - The
SHOPIFY_SCOPESshould match the scopes that you use in your Shopify integration settings.
Redirect Callback
The Redirect Callback should be implemented as follows:-
Import the Paragon SDK and authenticate a user.
- Note: If a user is not yet logged into your app, you can redirect to a login form, while preserving the intended URL to redirect to upon successful login. In other words, after logging in, your user should see your Redirect Page.
-
Accept and read query parameters, which will be:
-
codeandshopin case of a successful installation -
errorin case of an unsuccessful installation or denied consent
-
-
If the
codequery parameter is present,-
Read the
shopquery parameter and capture the shop name in the pattern{shop}.myshopify.com. See the regular expression used below. -
Call
paragon.completeInstallto complete the OAuth exchange and save a new connected Shopify account.
-
Read the
-
If the
errorquery parameter is present,- Show this error in your app and allow your user to retry the process.
Updating your app’s redirect and app URLs
- Log in to your Shopify Partner Dashboard and select your app.
- Navigate to App setup > URLs > Allowed redirection URL(s)
- Set your App URL to your app’s Initial Redirect URL.
- Add your app’s Redirect Callback URL to Allowed redirection URL(s).
Subscribing to mandatory privacy webhooks
Shopify requires you to subscribe to 3 privacy webhooks to request or erase personal data that your integration may store in your application. Paragon’s Shopify integration allows you to subscribe and take action on these webhooks via workflows.Setting the Shopify Webhook URL
To get started, visit the Paragon dashboard and navigate to your Shopify integration.- Click on the Settings tab and copy the Webhook URL value.

- Select the app that you are using in the environment or project you have opened in Paragon.
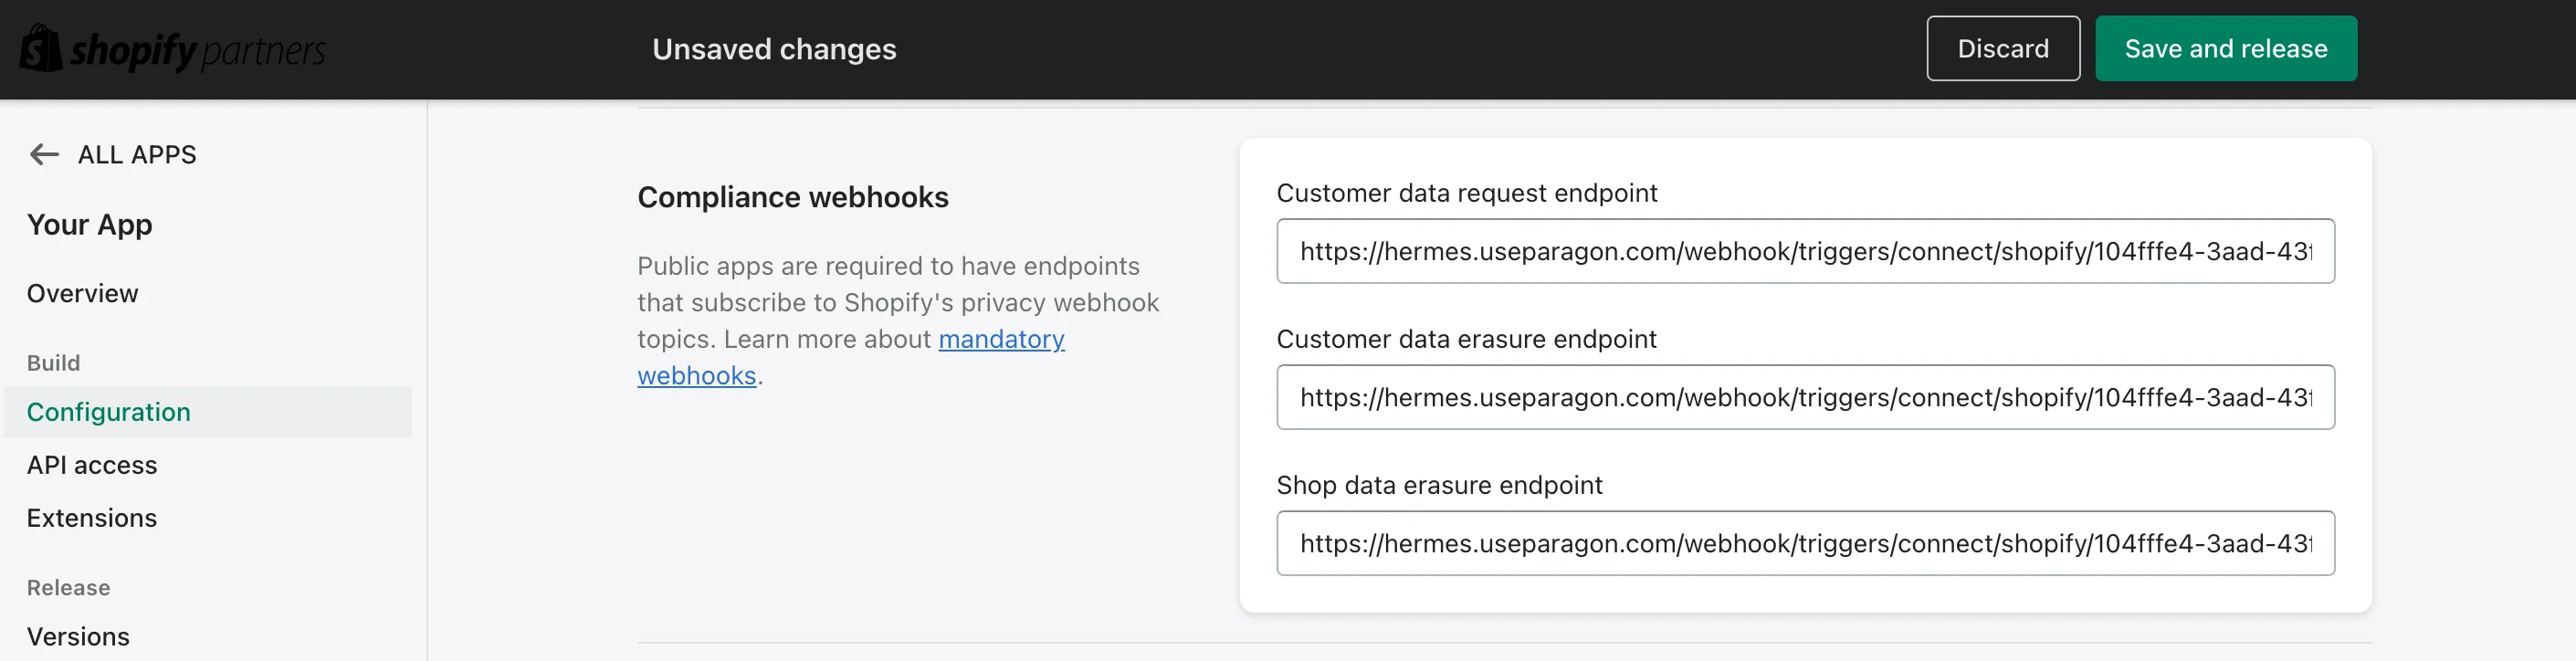
- Navigate to Configuration (under the Build section) and scroll to Compliance Webhooks.
- For each of the endpoints (Customer data request endpoint, Customer data erasure endpoint, Shop data erasure endpoint), paste in the Webhook URL value you copied from the Paragon dashboard.
- Click Save and release at the top to save your changes.
Creating workflows to respond to privacy webhooks
Next, create 3 workflows that listen for these triggers and take action on events received:- Customer data request
- Customer data erasure
- Shop data erasure
-
Customer data request: If your app has been granted access to customer or order data, then it will receive a data request webhook. The webhook contains the resource IDs of the customer data that you need to provide to the store owner. It’s your responsibility to provide this data to the store owner directly.
- Note: This request does not require the data to be provided in a response to the webhook. This process happens outside of Shopify and should be provided to the user who connected this Shopify account directly, e.g. through email, within 30 days of receiving the request.
- Customer data erasure: Shopify store owners can request that data is deleted on behalf of a customer. When this happens, Shopify sends a Customer Data Erasure event to the apps installed on that store so that you can erase any data for a certain customer of a store from your database.
-
Shop data erasure: 48 hours after a store owner uninstalls your app, Shopify sends a Shop Data Erasure event. This webhook provides the store’s
shop_idandshop_domainso that you can erase data for that store from your database.
Example Implementation
Example Implementation
Example implementationAdd a Request step under the Trigger to send the privacy event information to your API. We recommend including the following values in the request body for your reference:
{{1.result}}: This is the full event payload received from Shopify. You will see an example of the event in your workflow Test Data. See Shopify’s documentation on event payloads for more details.{{userSettings.userId}}: This is the User ID of the Connected User that received the event. You can use this ID to relate the event to a user in your application.
- Click the context menu in the Workflow Editor toolbar and click Edit Connect Portal Workflow Settings.
- Switch on Default to enabled and Hide workflow from Portal for all users.
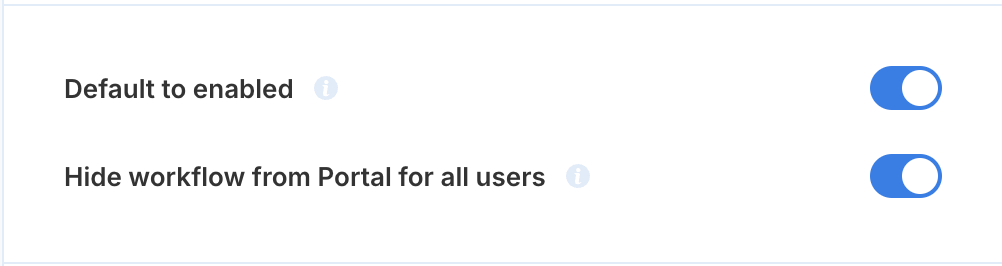
- Repeat for each workflow that has a Shopify privacy event trigger.
Testing and validating privacy webhooks
To test your privacy webhook implementation end-to-end:- Verify that each of your workflows are deployed.
- In your application, connect a Shopify store to the Connect Portal. Remember the store and account that you have connected.
- In the Shopify Admin page for the same store, request or erase a customer’s data (see Shopify documentation). These actions will trigger the “Customer data request” and “Customer data erasure” events, respectively.
- In the Paragon dashboard, visit the Monitoring > Workflows page and verify that your workflow has executed.