Example Implementation
Below is an end-to-end example implemented with React and shadcn/ui components (no pre-built Paragon components are used):
An example implementation of the Headless Connect Portal, using shadcn/ui components and the Paragon SDK
useparagon/connect-headless-example
An end-to-end implementation example of the Headless Connect Portal using
React
Usage
To implement the Headless Connect Portal, use the SDK to implement the following product surfaces in your app:- Integrations Catalog: Listing all available integrations in a catalog to allow your users to discover integrations and connect their accounts.
- Integration Install / Uninstall Flow: Guiding your user through the install stages of any integration, including the OAuth 2.0 flow (if required for the integration)
- User Settings and Workflow Configuration: Providing inputs for users to configure User Settings for their integration.
Have you implemented SDK authentication?The Usage guide below assumes that you have already implemented the basics of SDK authentication described in Getting Started. All of the functions below should be called after SDK authentication is completed.
Enabling Headless Mode
To turn on Headless mode for the SDK, call theparagon.setHeadless function:
Integrations Catalog
In your app’s Integrations Catalog or Settings view, list available integrations from your Paragon project to allow your users to discover integrations and connect their accounts: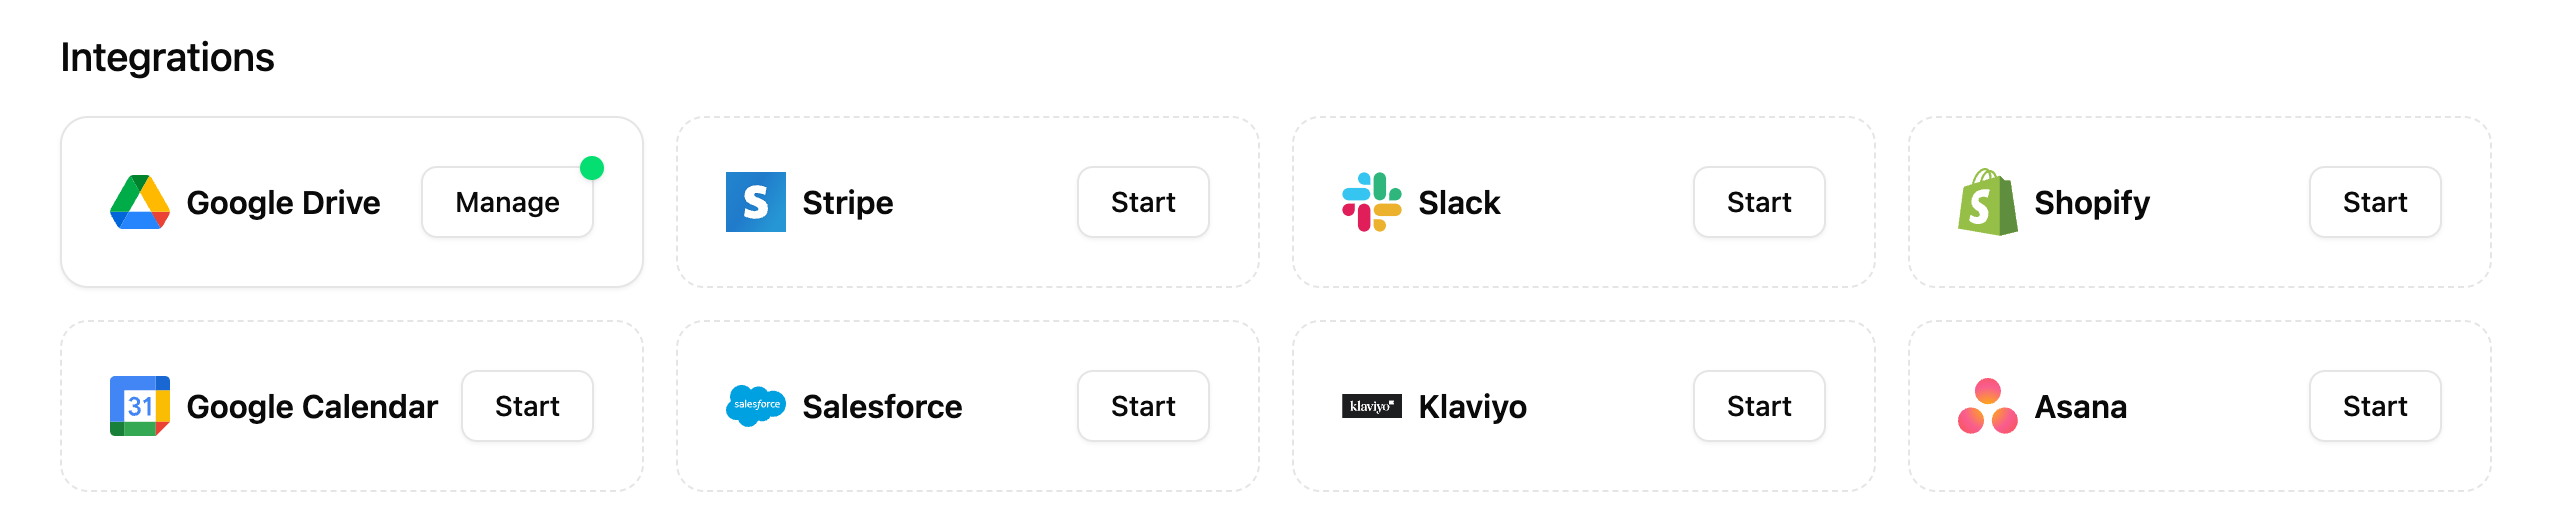
paragon.getIntegrationMetadata:
Integrations Catalog Example
See our reference implementation of the Integrations Catalog in the example
repo.
SDK Reference
Learn more about
paragon.getIntegrationMetadata in the SDK Reference.Integration Detail View
As a part of your catalog, you may want to show users additional information when they click on an integration (or inline with the catalog):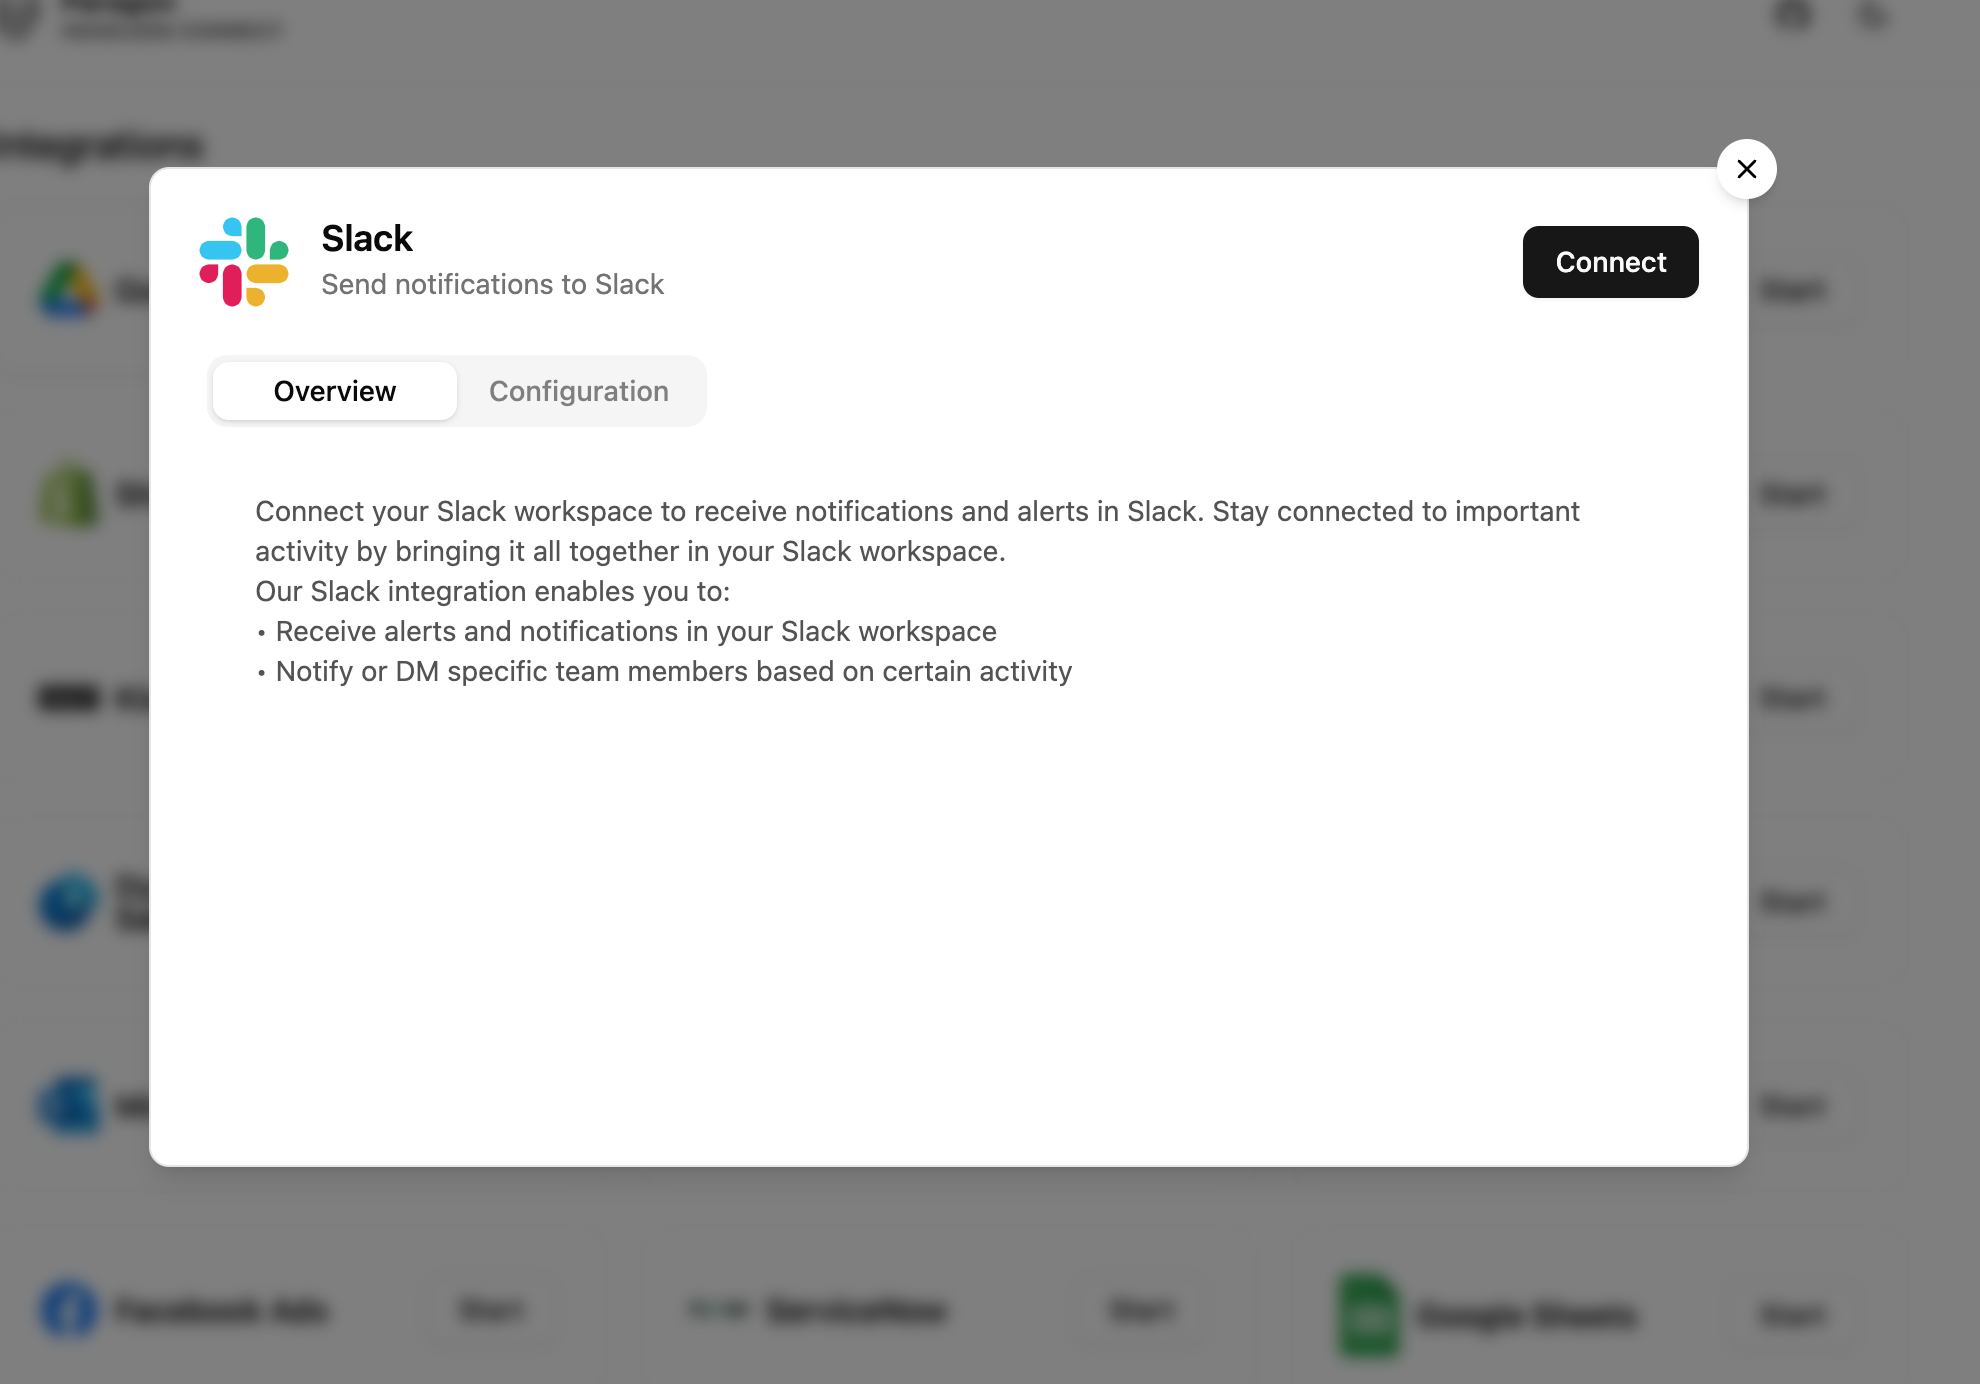
A detail view of the Slack integration, after clicking on the Slack entry in the Integrations Catalog
paragon.getIntegrationConfig:
Response
Integration Detail View Example
See our reference implementation of the Integration Detail View in the
example repo.
SDK Reference
Learn more about
paragon.getIntegrationConfig in the SDK Reference.Displaying Account State
To display your user’s account connection status in the Integrations Catalog (for example, showing a “Manage” button instead of a “Connect” button for integrations they have already installed), callparagon.getUser to get the user’s account state and paragon.subscribe to react to state changes.
Getting account state with getUser
user.integrations[integrationType].enabled.
You can also react to changes in your UI by setting up paragon.subscribe handlers:
Example component using subscribe() to react to user state changes
SDK Reference
Learn more about
paragon.getUser in the SDK Reference.Integration Install / Uninstall Flow
Once a user expresses intent to connect their account, guide them through an Install Flow using the Paragon SDK:
Install Flow example for Shopify
- Account Type selection (e.g. Salesforce Production vs. Salesforce Sandbox) —
AccountTypeStage - Pre-OAuth / API Key inputs (e.g. Stripe API Key input, Shopify Store URL) —
PreOptionsStage - Post-OAuth inputs (e.g. Atlassian site, SharePoint site selection) —
PostOptionsStage - Instructional content (e.g. Salesforce package installation) —
InstructionStage
See a full reference of install flow stages and their properties in the SDK Reference.
onError callback and prompt users of any issues.
Begin an Install Flow by calling paragon.installFlow.start:
.start, you may receive required install stages in the onNext callback (depending on the specific install flow required by the integration).
To handle each of the install stages in your app, you will need to:
- Receive the stage details in the
onNextcallback. - Render the appropriate UI for your user to provide the necessary details in that stage.
For the
PostOptionsStage, refer to the User Settings docs below for help rendering integration-specific dropdown inputs. - Update SDK state with the user’s inputs by calling one of:
Example Install Flow
Here’s a step-by-step example for how these stages would be implemented for Salesforce account types:-
Receive the
AccountTypeStageinonNexthandler: -
Render account type options for your user to select the available types:
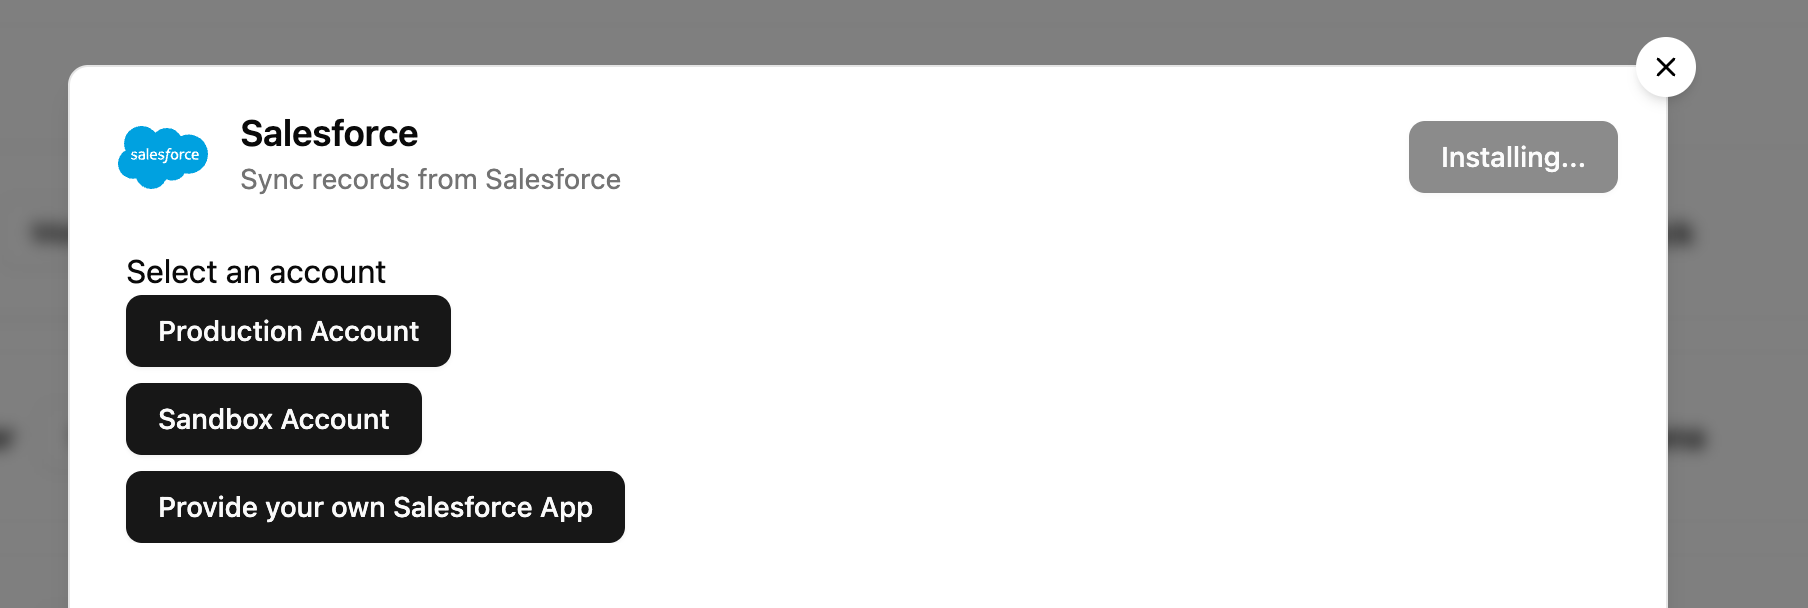
Example UI rendered by above code
-
Update SDK state with the user’s inputs:
Bind the
onClickhandler for the account type selection buttons to confirm the user’s selection and start the OAuth flow.
Integration Install Flow Example
See our reference implementation of the Integration Install Flow in the
example repo.
SDK Reference
Learn more about
paragon.installFlow and all related methods in the SDK Reference.Uninstalling Integrations
When a user requests to disconnect their account, callparagon.uninstallIntegration to remove their account:
SDK Reference
Learn more about
paragon.uninstallIntegration in the SDK Reference.User Settings and Workflow Configuration
After your user has connected an integration, show a Configuration screen with your configured User Settings to customize their integration, like a Salesforce Field Mapping or a Google Drive Folder to sync files from. If you are using Workflows and want your users to have controls to opt-in or out of specific Workflows, you can render toggles to enable or disable Workflows.
A configuration screen to customize the Google Drive integration with User Settings
paragon.getIntegrationConfig method to get all the User Settings that you have configured for this integration’s Connect Portal:
availableUserSettings key of the response.
Response
Exposing User Settings
User Settings are inputs that appear during the install or configure stage of the Connect Portal, like the Folder input in the example above. Your implementation should render inputs when:- Your user is prompted with pre-OAuth options (
PreOptionsStage) - Your user is prompted with post-OAuth options (
PostOptionsStage)- For both
PreOptionsStageandPostOptionsStage, User Settings objects can be found instage.options.
- For both
- Your user is configuring integration-level or workflow-level User Settings
- User Settings objects can be found in
paragon.getIntegrationConfig, underavailableUserSettingsandavailableWorkflows[n].inputs.
- User Settings objects can be found in
SidebarInputType.DynamicEnum or SidebarInputType.FieldMapping) will require you to render a dynamic list of options from the integration (a “data source”). You can use the following functions to help load this list:
paragon.getSourcesForInput- Get the data sources needed to render a dynamic input. Returns the appropriate data source objects which can be passed directly toparagon.getFieldOptions.paragon.getFieldOptions- Load a page of options from a data source to show in a dropdown input.
DynamicEnum input
paragon.getSourcesForInput returns all the necessary data sources at once:
Field Mapping input
Defining Custom Data Sources
If your Connect Portal inputs use Custom Dropdowns or Field Mapping with your own integration or application fields, you can useparagon.setDataSources to register these data sources with the SDK.
Call paragon.setDataSources once after enabling headless mode, before rendering any inputs:
paragon.setDataSources are automatically resolved by paragon.getSourcesForInput and paragon.getFieldOptions. Integration-specific sources take priority over global sources when the same key is used.
SDK Reference
Learn more about
paragon.setDataSources and its configuration options in the SDK Reference.setPreOptions- Save pre-OAuth options and start the OAuth flow.setPostOptions- Save post-OAuth options and complete account connection.paragon.updateIntegrationUserSettings- Save integration-level User Settings.paragon.updateWorkflowUserSettings- Save workflow-level User Settings.
User Settings Example
See our reference implementation of User Settings in the
example repo.
Input Types Reference
Learn more about the different Input Types to implement in our reference.
Exposing Workflow Configuration
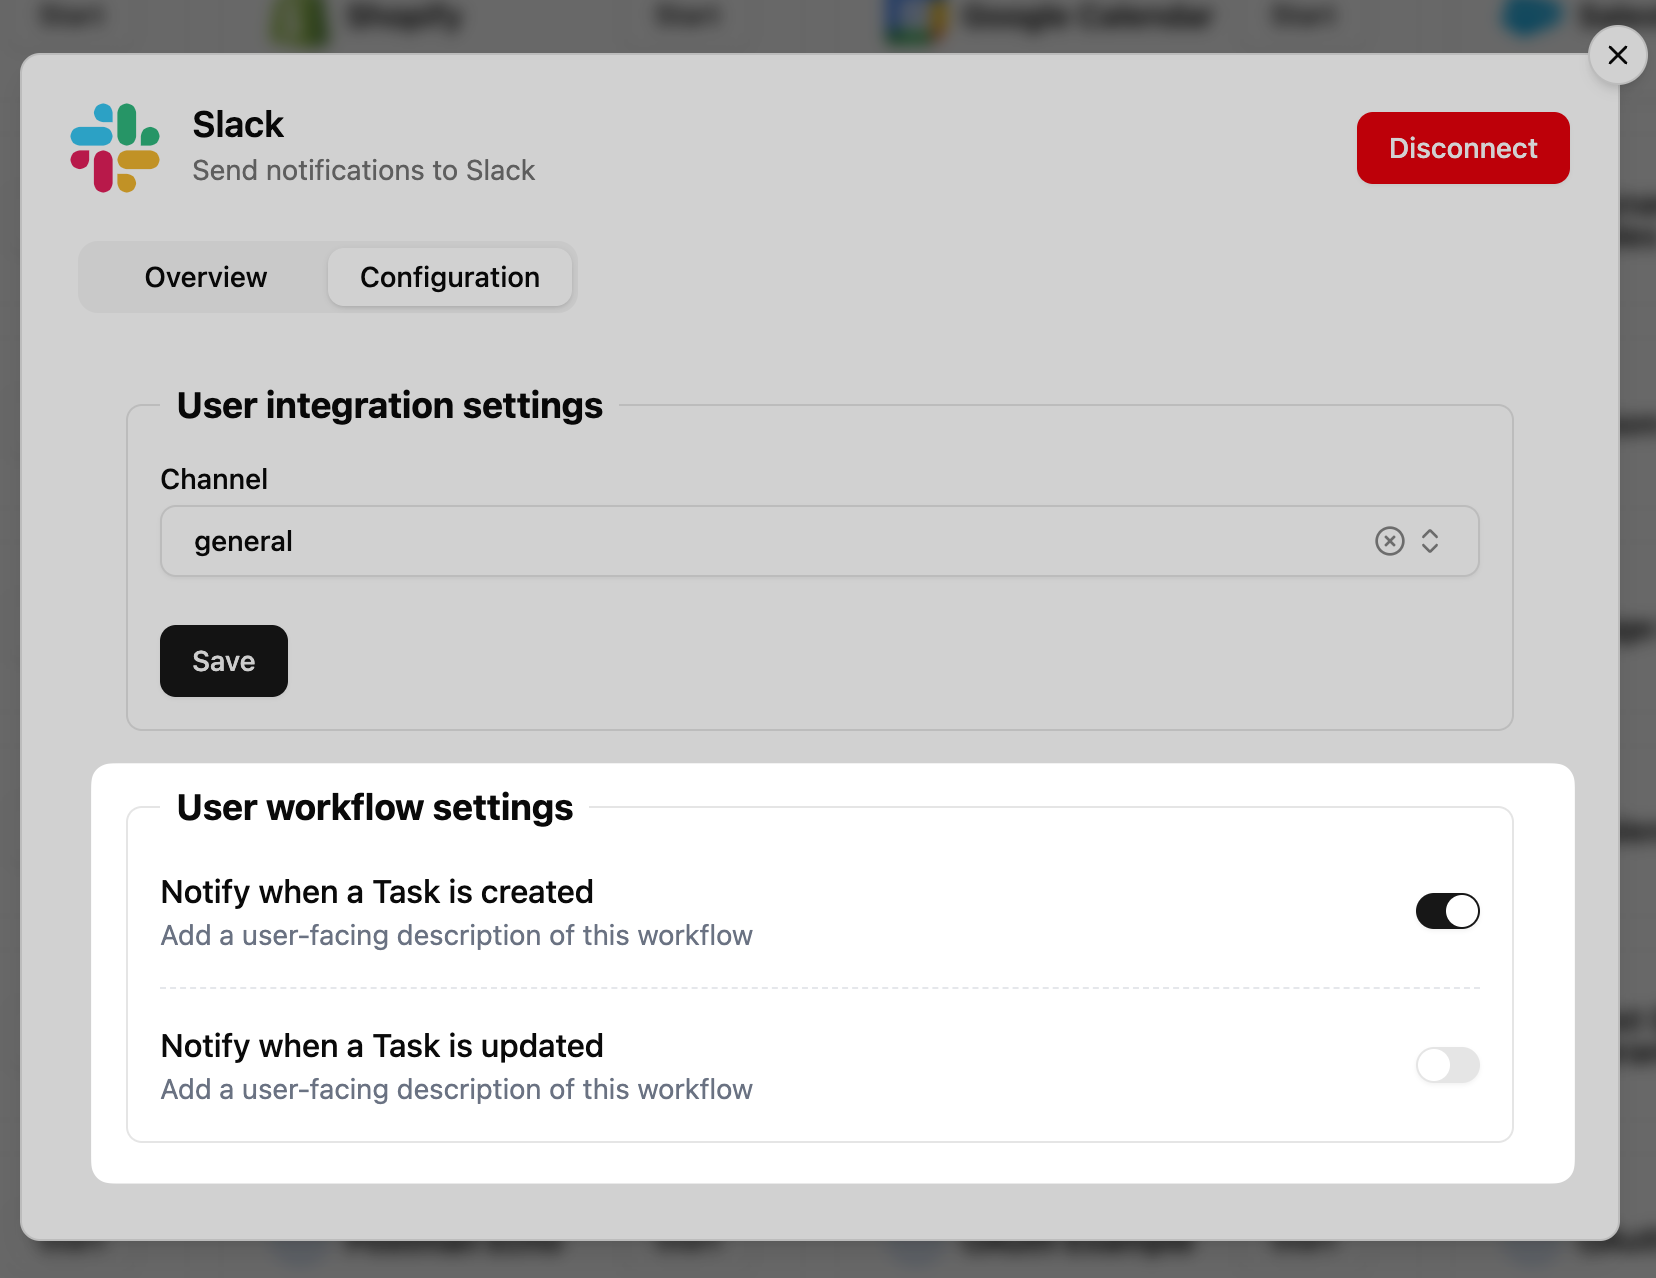
Optionally, show a list of Workflows for users to enable / disable in the Connect Portal
- To render the list of available Workflows, you can use
paragon.getIntegrationConfigand read theavailableWorkflowskey. - To see what Workflows the user has enabled, you can use
paragon.getUserand readuser.integrations[].configuredWorkflows[].enabled.Getting Workflow state - To toggle a Workflow on or off for a user, you can use
paragon.updateWorkflowStateto pass a partial update object of the Workflows that should be enabled or disabled for a user.Updating Workflow state
Workflow Configuration Example
See our reference implementation of User Settings in the
example repo.
SDK Reference
Learn more about the
paragon.updateWorkflowState method in the SDK Reference.Multiple Account Authorization
When implementing the Headless Connect Portal for Multiple Account Authorization, you’ll need to update your UI to handle listing multiple connections for a given integration. You can useselectedCredentialId in the following SDK functions to ensure that the right account is used in multi-account setups:
-
paragon.updateIntegrationUserSettings -
paragon.updateWorkflowUserSettings -
paragon.updateWorkflowState -
paragon.uninstallIntegration -
paragon.getFieldOptions
paragon.getUser, in user.integrations[].allCredentials[n].id.
SDK Reference
The SDK includes the key functions below that should be used when implementing the Headless Connect Portal. Find more details about each function (including parameter types and return values) in the linked reference page.paragon.getIntegrationMetadata: Returns display and branding information for integrations in your project, including a display name and icon.paragon.installFlow.start: Prompts the user for third-party authorization details to connect their account. This function should be used when a user expresses intent to install your integration, for example: from a “Connect” button in your integrations catalog.paragon.installFlow.setAccountType: Sets the account type for an integration being actively installed.paragon.installFlow.setPreOptions: Sets the pre-OAuth options for an integration being actively installed.paragon.installFlow.setPostOptions: Sets the post-OAuth options for an integration being actively installed.
paragon.uninstallIntegration: Disconnects the user’s account.paragon.getIntegrationConfig: Returns the configuration for an integration, including its available User Settings and Workflows.paragon.getUser: Returns the current state of the user, with their integrations and account statuses.paragon.updateIntegrationUserSettings: Updates integration-level User Settings values.paragon.updateWorkflowUserSettings: Updates workflow-level User Settings values.paragon.updateWorkflowState: Enables or disables Workflows for a user.paragon.setDataSources: Registers custom data sources for dropdown and field mapping inputs, globally or per-integration. (SDK 2.3.0+)paragon.getSourcesForInput: Returns the data sources needed to render a specific input, which can be passed directly toparagon.getFieldOptions. (SDK 2.3.0+)paragon.getFieldOptions: Returns integration-specific options for dynamic User Settings, such as Dynamic Enum or Field Mapping inputs.paragon.getDataSourceOptions: For compound inputs, returns the configuration for each data source needed to render the input.