Overview
Custom Webhooks allow you to build your own webhook trigger with any integration provider on Paragon.Building a Custom Webhook
The prerequisites for building a Custom Webhook with any integration provider on Paragon are:- The integration provider must have a webhook API.
- You have access to the integration provider’s webhook API documentation.
- If the integration provider uses OAuth authentication, create a developer account and developer application from the integration provider.
- You have access to a sandbox within the integration provider’s service.
- A Paragon account with a Pro plan or above.
Step 1. Basic Info
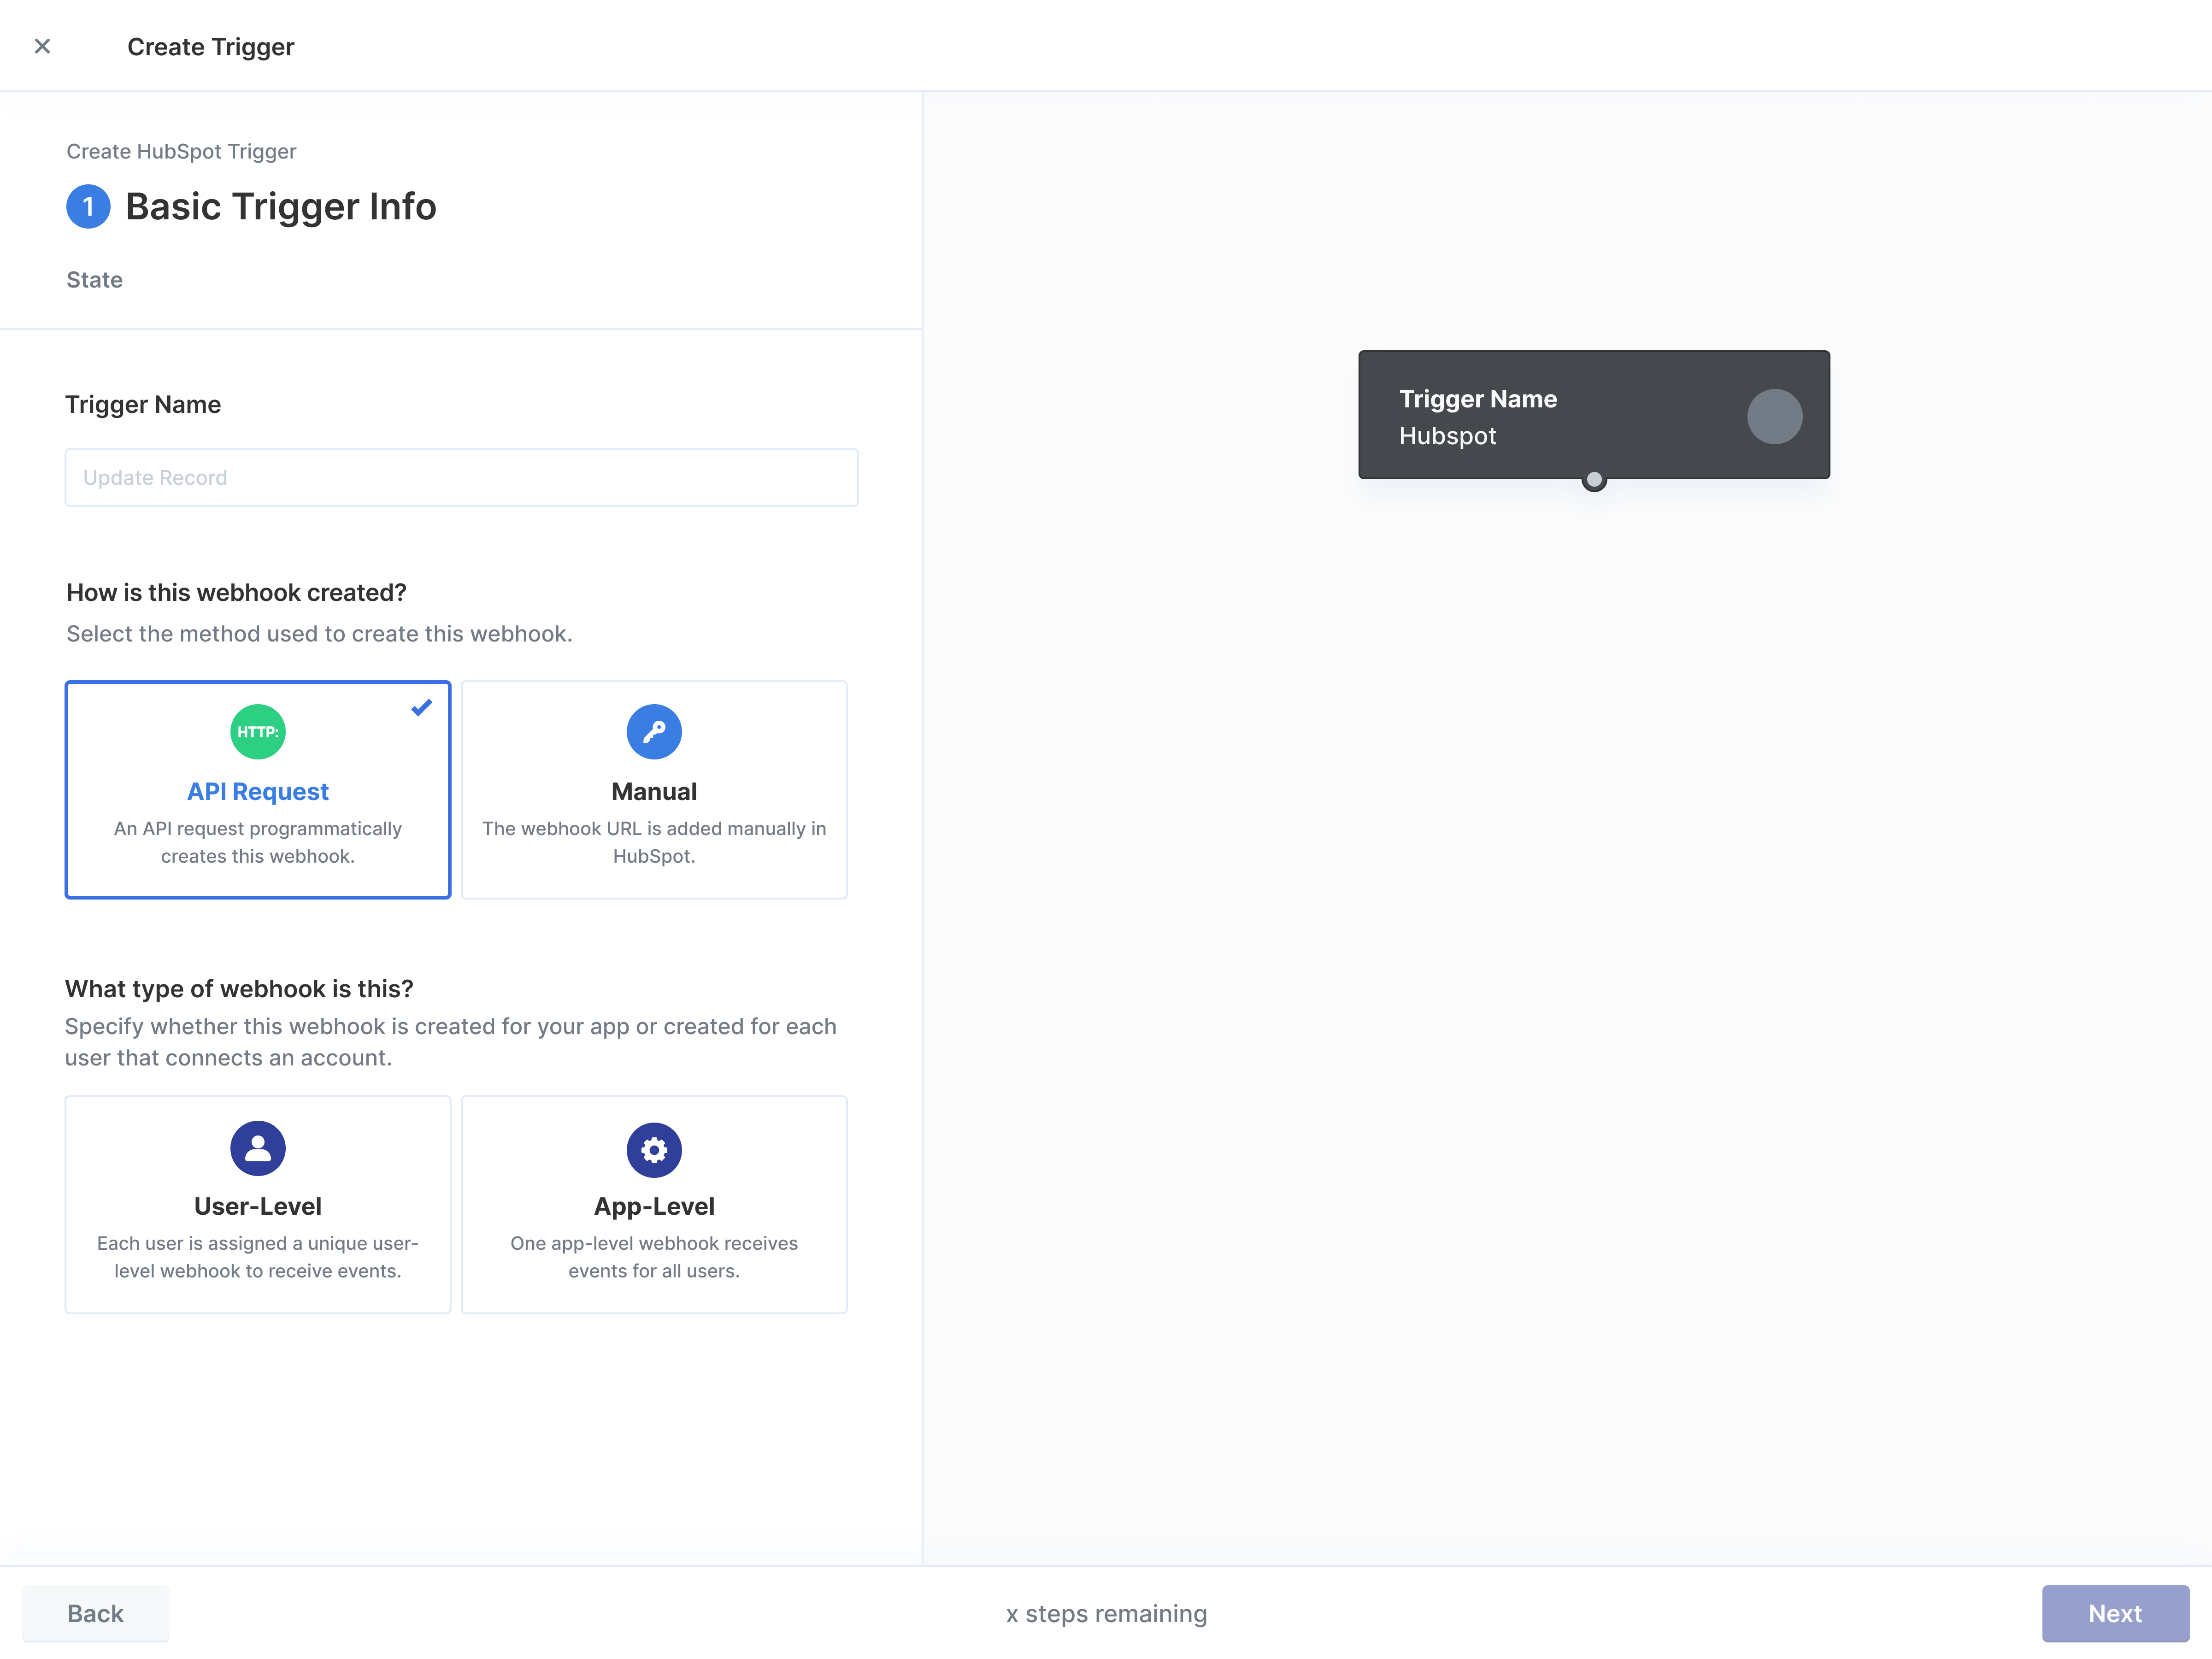
You’ll first need to provide some basic information about the webhook that will appear in the Workflow Editor and dictate the trigger’s configuration. Trigger Name - A descriptive short name for the webhook, like Record Created. How is this webhook created? You can usually find this in your integration provider’s webhook API documentation.- Select API Request if the webhook can be created programmatically using the provider’s webhook API.
- Select Manual otherwise.
- Select User-level if webhooks are created for each user.
- Select App-level if webhooks are created once at the client or application level.
Step 2. Webhook Setup
Option 1: API Request Setup
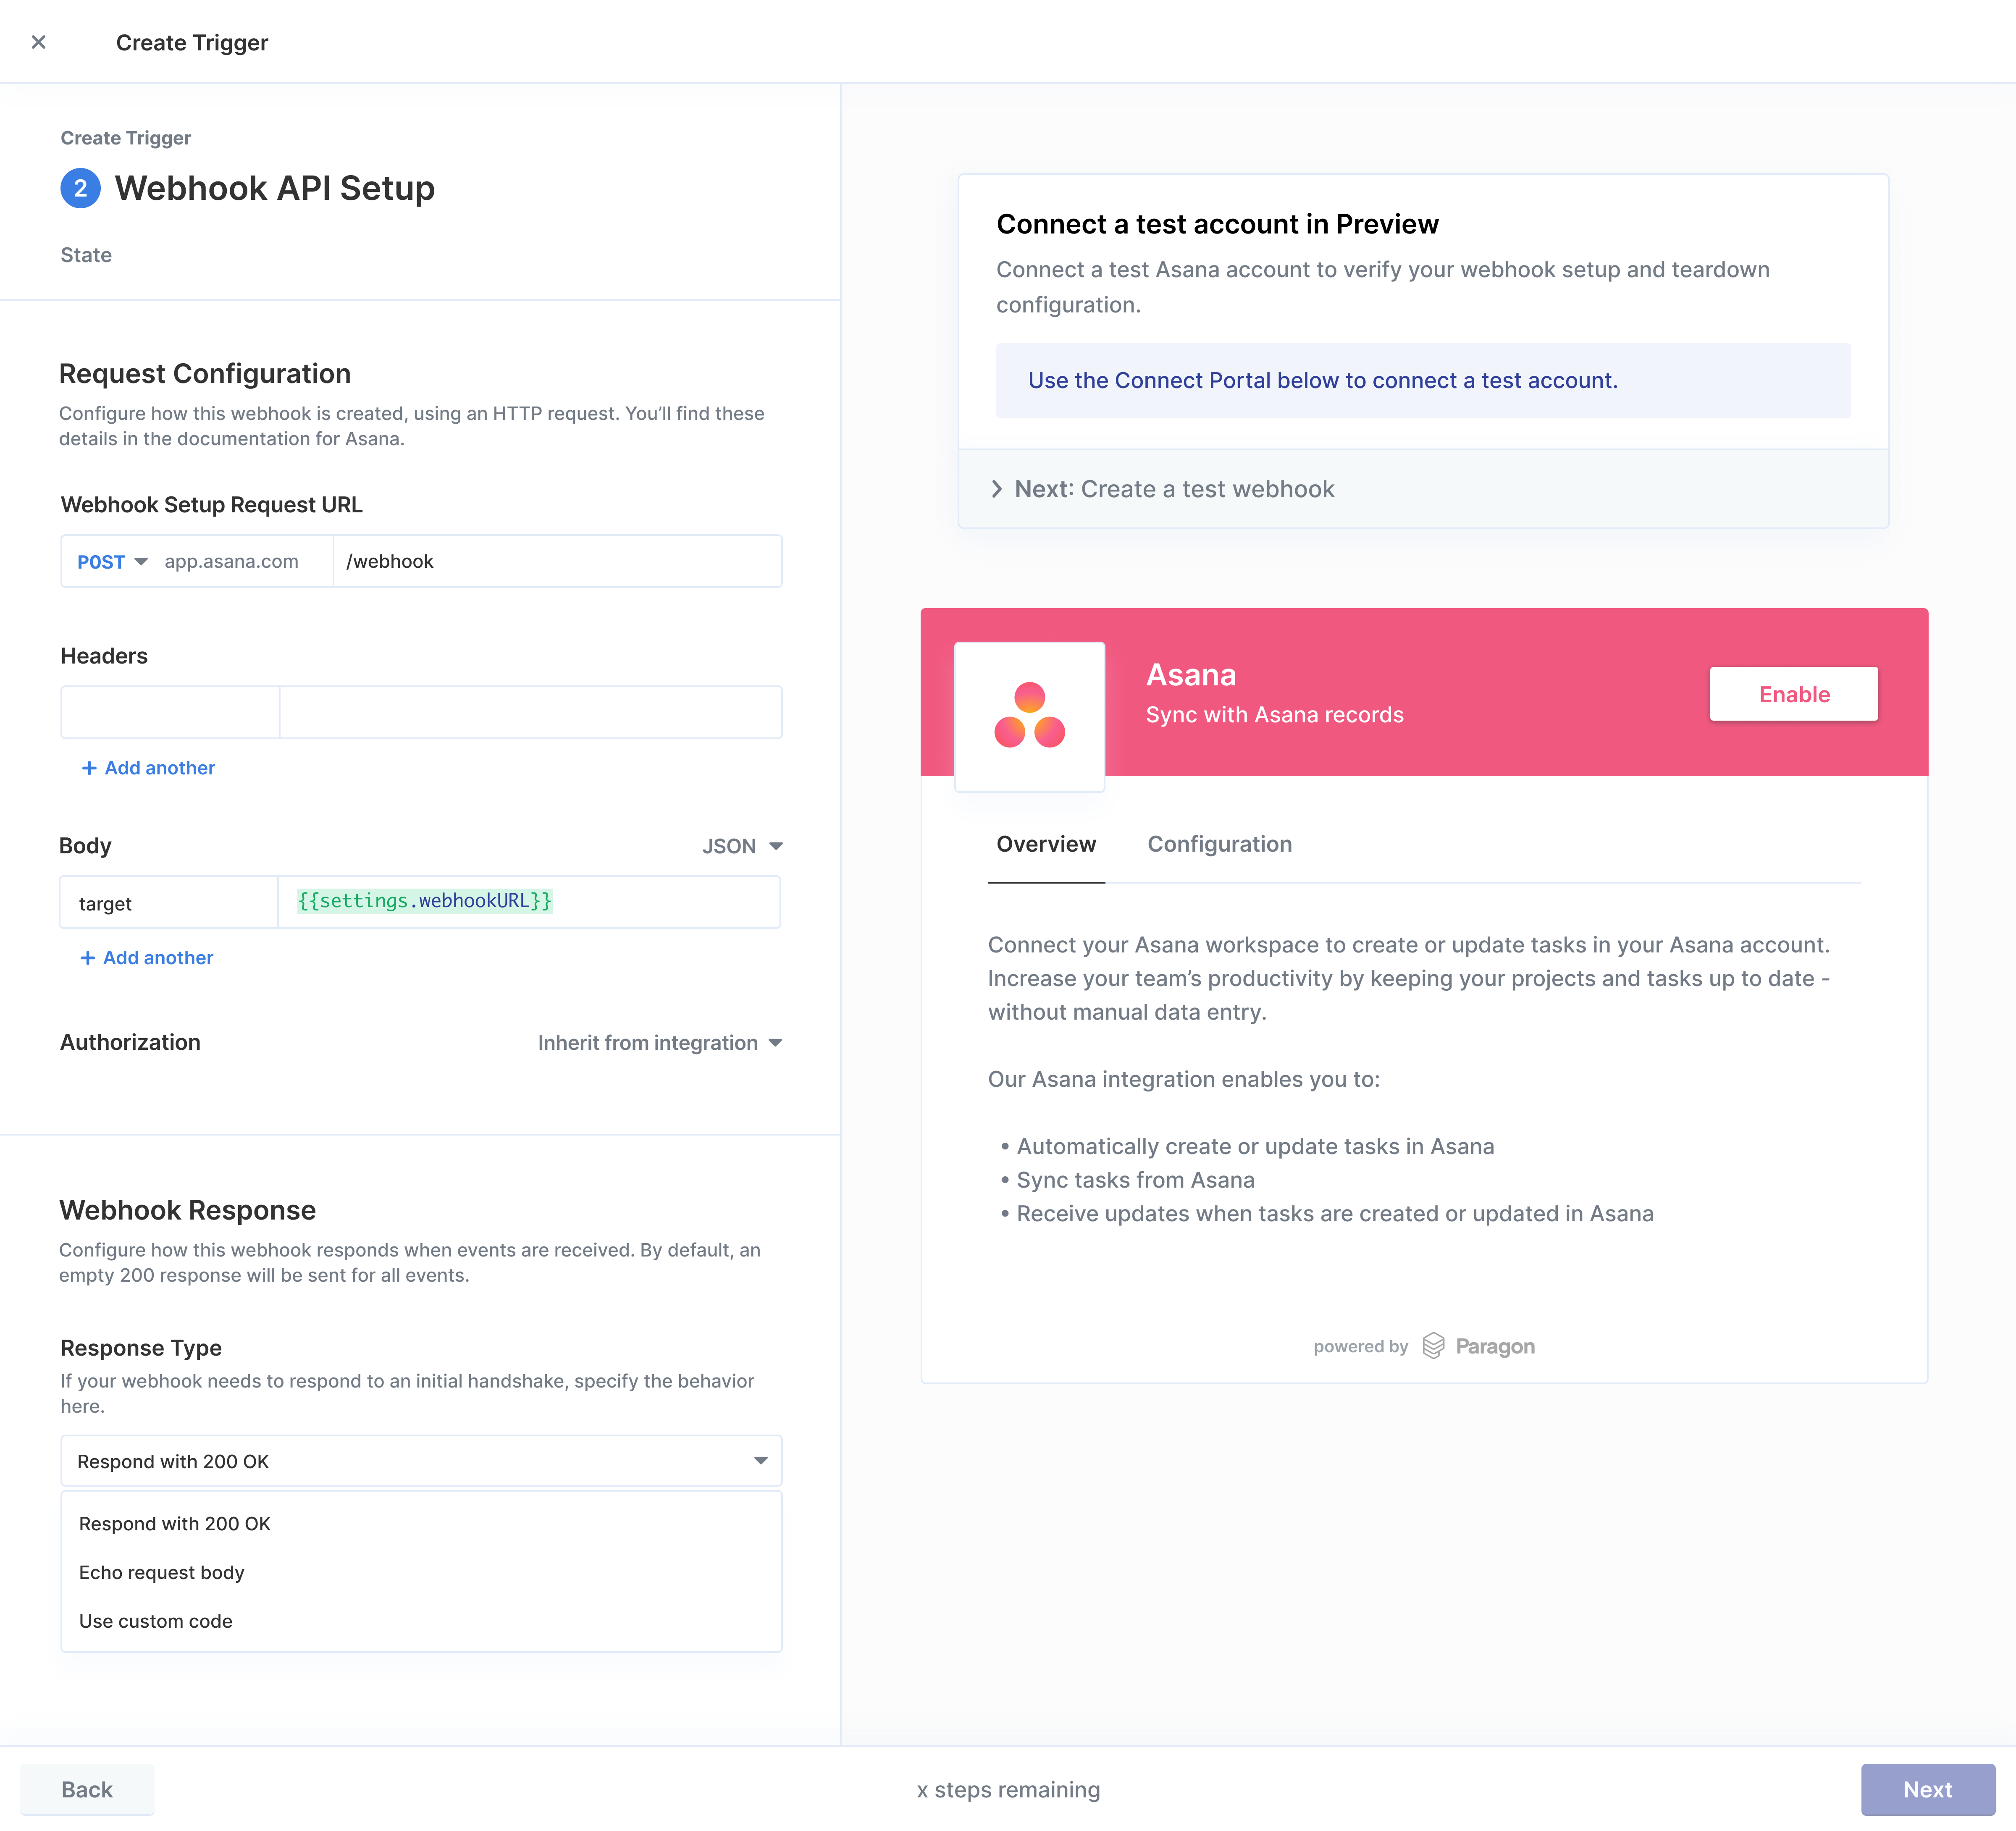
With API Request Setup, a request is sent to programmatically create the webhook when a user enables a Workflow that relies on this trigger. To set up and test API Request Setup: Configure the following API request parameters that should be used to create the webhook. This information should be found in the provider’s webhook API documentation.- Webhook Setup Request URL: The API endpoint that should be used to create the webhook.
- Webhook Target URL: Instruct the webhook provider where to send webhook events by referencing
{{settings.webhookURL}}variable. This variable will resolve to a Paragon-provided webhook URL that will capture events on behalf of your user. - Authorization: Defaults to the authentication scheme used for the Paragon integration. If the provider’s webhook API authenticates differently, this can be overridden and developer tokens can be referenced from the variable menu.
Option 2: Manual Setup
With Manual Setup, either you (the integration developer) or your customer (the connecting user) will manually register a Paragon-provided webhook URL with the integration.-
For App-Level Triggers: You must register the Webhook Target URL in the client application settings of the integration you are building in.
- For example, Custom Webhooks for Zoom can be created by adding the Webhook Target URL to the Zoom Developer Portal under your app’s registration. When a user connects Zoom via OAuth to your app, Zoom will start sending events for that user to the Webhook Target URL registered in your app.
-
For User-Level Triggers: Your customers must register the user-specific Webhook Target URL in their account settings for the integration you are building in.
- For example, Custom Webhooks for Gong can be created by prompting your customer to register their user-specific Webhook Target URL in their Gong account settings.
-
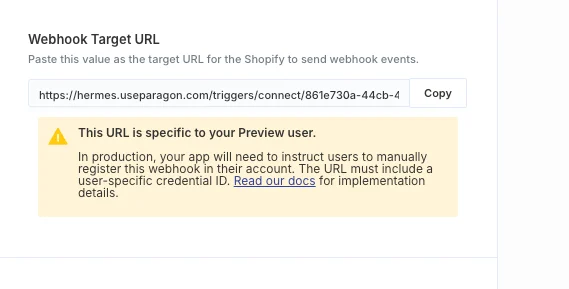
Copy the Webhook Target URL that appears in this step.
For integrations that already have pre-built triggers, the Webhook Target URL is the same as the one you have already configured to listen for events.
- Paste this URL into your client application settings (for App-Level Triggers) or test account settings (for User-Level Triggers) to register the webhook.
- Click Next in the bottom navigation bar and test receiving events.
-
After verifying that events are received successfully, remove the
/testpath from the Webhook Target URL as configured in client application settings or test account settings.
The/testpath only routes events to the Workflow Editor / Custom Webhook Builder as test data and cannot trigger deployed workflows. - For User-Level Triggers: add a prompt in your app to provide users with their Webhook Target URL to register in their account settings for the integration. See below for more details on building this URL.
User-Specific Webhook Target URLs:
In a frontend app, you can use theparagon.getCustomWebhookUserManualUrl SDK function to build the user-specific Webhook Target URL:
JavaScript SDK
- Pass the ID of any Workflow that uses this Custom Webhook to this function to get the URL.
- If you are using Multi-Account Authorization, pass the specific
credentialIdof the integration account that should be used to receive events for this Custom Webhook as the second argument to the function.
/test segment of the URL after verifying that you can receive test events).
The Credential ID is the ID of the integration account that the user connected as provided by the paragon.getUser SDK function/API endpoint in the credentialId property.
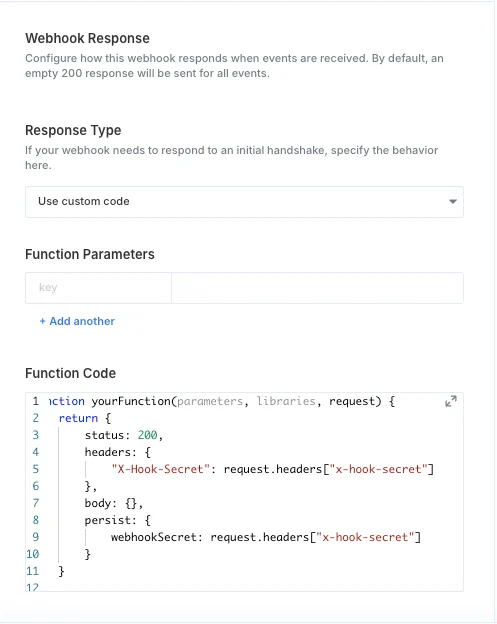
Customizing the Webhook Response
Some integration providers enforce verification – when the webhook is created – requiring the events recipient server to respond in a certain way to prove their authenticity. Use the Response Type input to define this behavior. A Use custom code option is made available for fully configuring the response behavior and saving any webhook secrets returned by the provider. This function should return an object describing the response with the following properties:status, headers, and body. A persist property is available to save incoming request values for reference later in the webhook wizard.
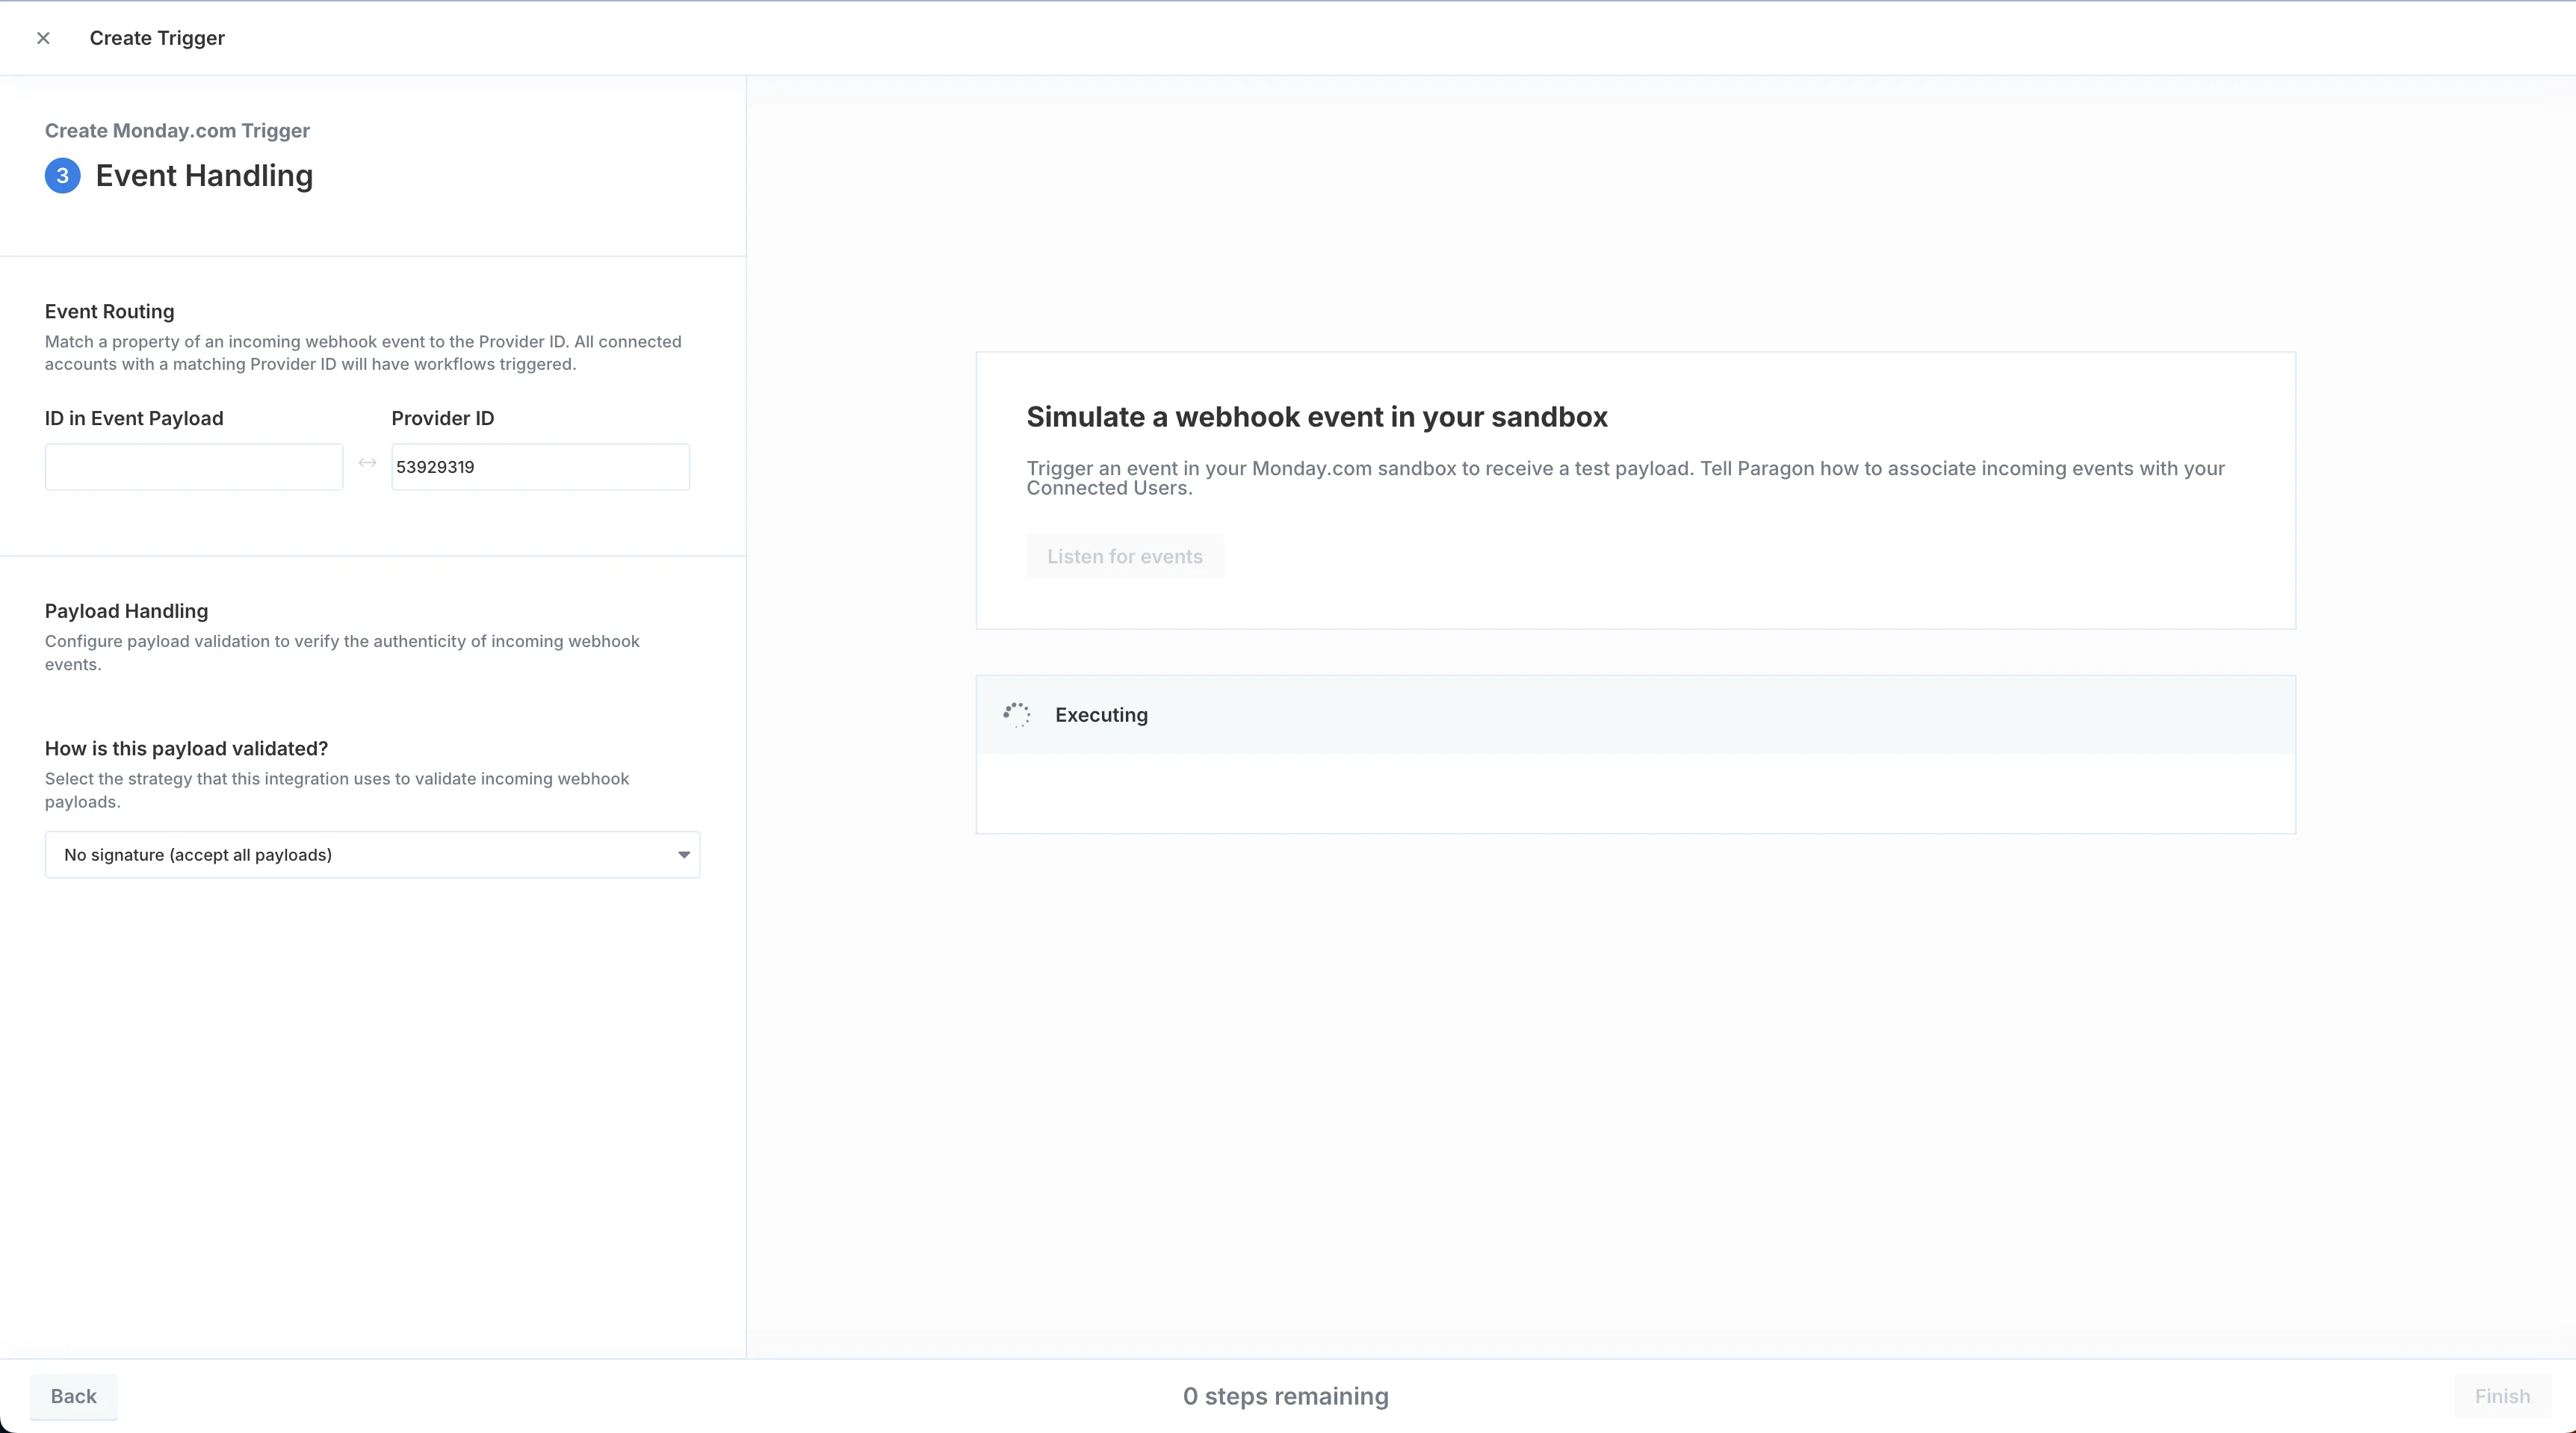
Step 3. Event Handling
Event Routing
App-level webhooks require you to match the user-identifying property of the incoming event payload with the existing user ID saved by Paragon. This ensures that incoming events are associated to the correct user. Use the variable menu to reference properties and headers of the incoming event to match against the Provider ID Paragon uses internally to identify tenants of an integration.Payload Verification
Specify how Paragon should process incoming webhook events and validate their authenticity. You can usually find these details in the webhook security or validation sections of their webhook API Documentation. The most common methods of payload verification are supported as pre-configured options, and a custom code option is provided to allow you to define your own HMAC digest if necessary. Once you’ve configured your payload validation method, press theListen for events button to validate the verification. Receiving an event once configuring your payload validation method confirms that your validation is properly configured. You must successfully receive a payload before moving to the next step.
Finish button to save your custom trigger.
Using your Custom Webhooks
Once you’ve fully configured your custom trigger, you can now access it through the Workflow Builder in the same way as existing integration triggers.