- Development: Make updates to your integrations and workflows in a development project that can be modified by any Developer team member.
- Staging: Preview and test integrations in a read-only environment before deploying to Production.
- Production: Deploy integrations and updates to live users.
Have an existing account without Release Environments?
Have an existing account without Release Environments?
If your account does not already have Release Environments enabled, follow the steps below to enable the feature.
- Note: You can only set up one set of Release Environments (Development, Staging, Production) for your account. Your selection is final and cannot be reversed.
-
Start by navigating to your Paragon dashboard. At the end of your Integrations list, you will see a prompt to enable Release Environments. Click Get started.

-
You will be prompted to select the project that represents your Production Environment.
Once you make this selection:
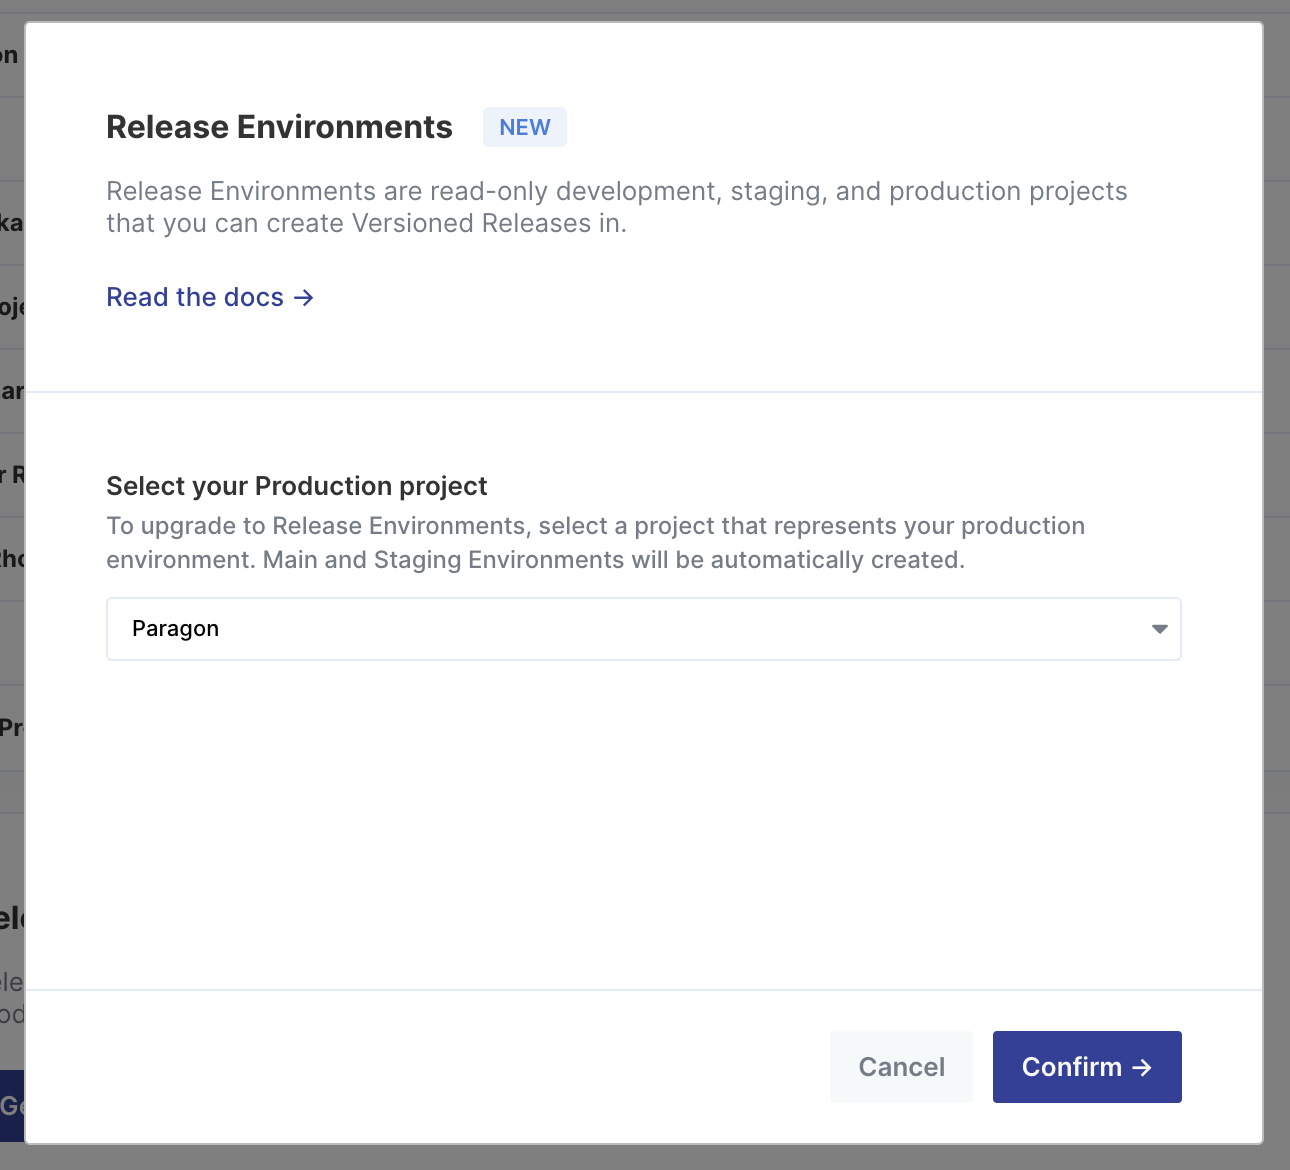
- The selected project will become read-only (meaning that Integrations, Workflows, and App Events cannot be modified directly). To update a Production Environment, you will need to create a Versioned Release.
- Development and Staging environments will be automatically created. If you have existing projects used for Staging or Development, these projects will still be available and unchanged, but they will not participate in the release pipeline.
Usage
With Release Environments, your team’s integration development will start in the Development environment. Workflows and integrations in the Development environment can be added and modified directly. Once your team is ready to start testing the changes made in Development, you can create a Release from Development -> Staging to validate your changes. Staging can be used for code review and QA, prior to releasing changes to users in your Production environment. Finally, once your changes have been finalized in the Staging environment, you can create a Release from Staging -> Production to deploy your changes to live users.Working with a large team?Multiple team members can work together in the Development environment, or they can opt to create an isolated Development Project to start working on new changes.Development Projects cannot be involved in the Releases pipeline, but you can use our Copying Workflows feature to replicate changes from Development Projects into Development.
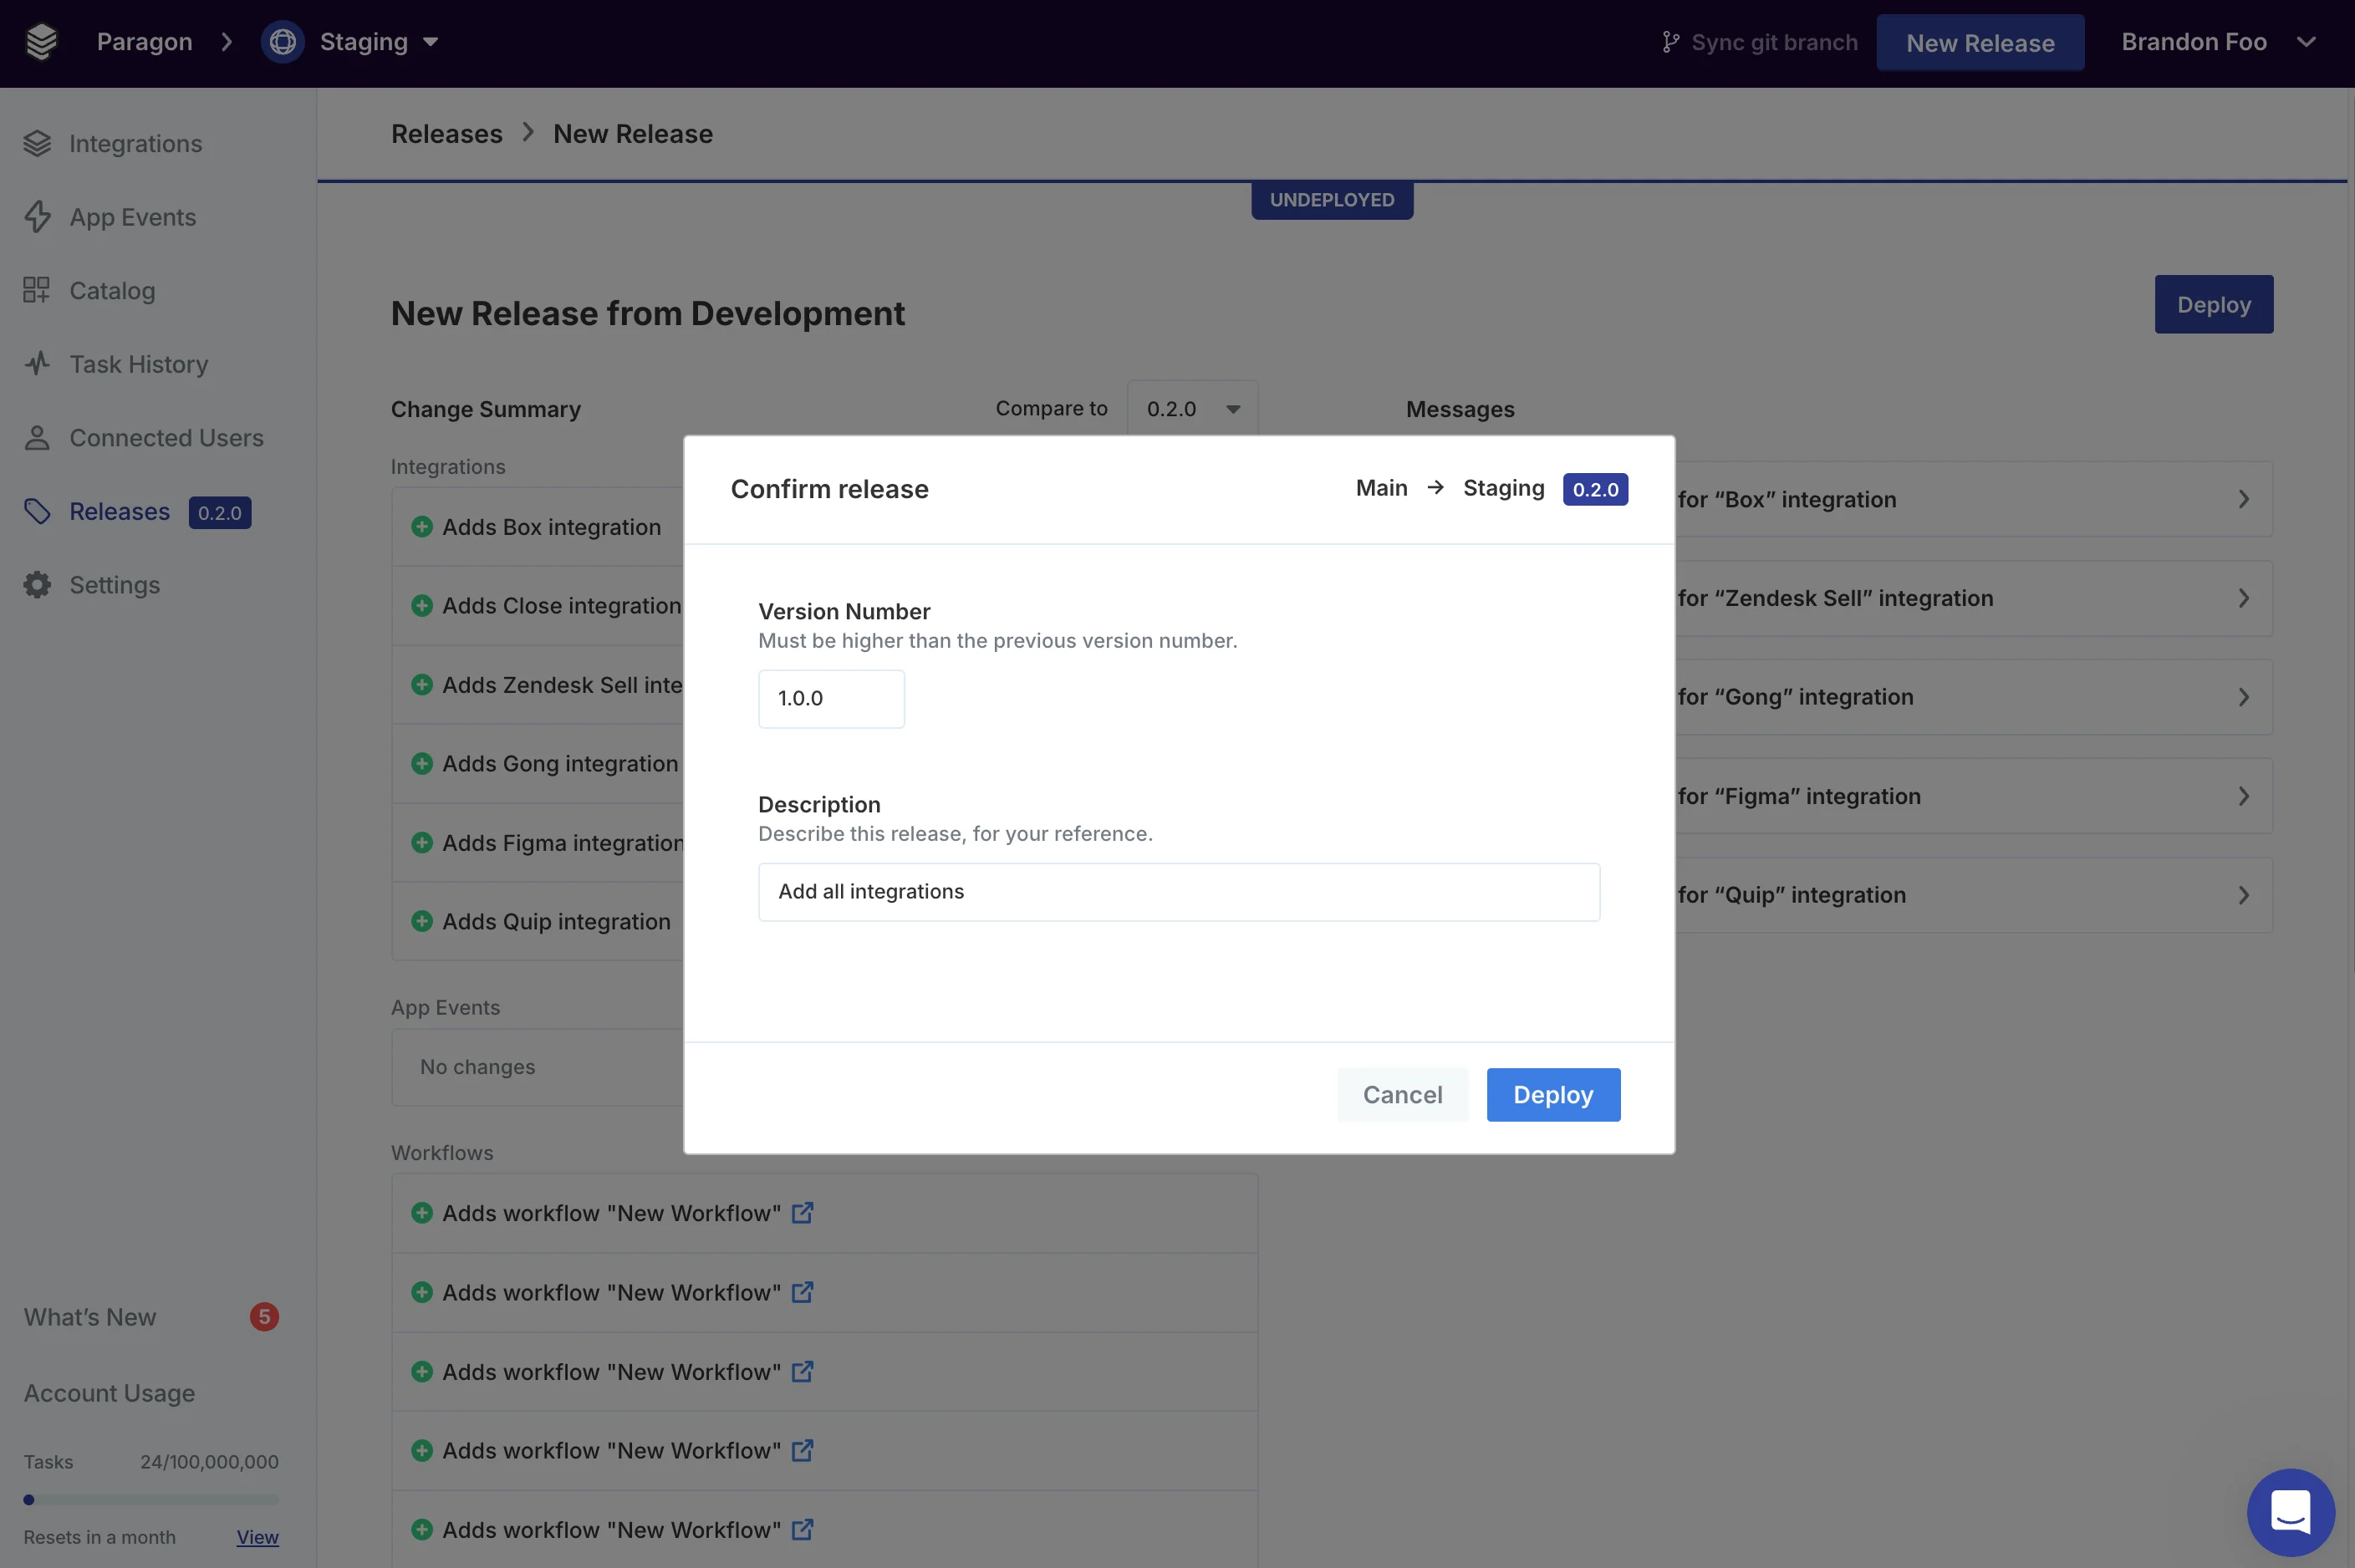
Creating a Release
To start a new Release, you can click the Environment Selection menu in the top navigation bar and click Deploy on the environment you want to promote.When hovering over the Deploy button, a path will appear between the Release Environments that you are deploying to and from.

- Change Summary: A summary of changes made to Integrations, Workflows, and App Events since the last deploy that occurred. Each change will have a type: Add, Modify, or Remove.
-
Messages: Warning and informational messages about potential issues with or effects of the Release.
- For example, if there are new Environment Secrets being used in the downstream environment (Development) that are not present in the upstream environment (Staging), a prompt will appear to provide a value for the new Environment Secret.
- Learn more about Messages in Reviewing Messages.
Reviewing Messages
Messages appear when Paragon detects potential issues or side effects of deploying the set of changes associated with a Release. Documentation for each type of Message can be found below:-
indicates an Error Message. Error Messages appear after a Release has been deployed, if any unexpected failures occurred during the deployment.
.png?fit=max&auto=format&n=jCM_Y_j0HttScr1R&q=85&s=f8463f6ddb73c0a9bbea267264dfb7eb)
-
indicates a Warning Message, which requires action to resolve prior to deploying a Release. If Warning Messages are not addressed, integrations may not work as expected.

-
indicates an Informational Message, which informs you of any changes that have occurred that will affect existing users of your integration.

New Integration Requires Additional App Configuration
New Integration Requires Additional App Configuration
This warning appears when you have added a new integration that uses OAuth to authenticate users.You can resolve this warning by providing the App Configuration that is required to deploy this integration to users, such as a Client ID and Client Secret (required configuration will vary by integration).
Environment Secret Missing
Environment Secret Missing
This warning appears when the Release Environment you are deploying to is missing an Environment Secret that is used in the downstream environment.You can resolve this warning by providing a value for the Environment Secret as it should be saved in the upstream environment.
App Event Schema Changed
App Event Schema Changed
This message appears when you have modified the schema of your App Event.When modifying the schema of an App Event, you will need to update references to this event in your application source code to use the new event schema.
App Event Removed
App Event Removed
This message appears when you have removed an App Event.You will need to remove references to this event in your application source code. If an invalid App Event name is sent to the API, an error response will be sent back.
OAuth App Scopes Changed
OAuth App Scopes Changed
Note: This Release Message is currently in beta.This message appears when the Release includes changes to the scopes requested by the OAuth App for a particular integration.If any workflows use logic that requires the new scopes, you will need to prompt current integration users to re-authorize their account (disconnect the integration from the Connect Portal and reconnect an account).This message allows you to view and export Affected Users for this change.
Integration Removed
Integration Removed
This message appears when you have removed an Integration.When an Integration is removed, all connected accounts and workflows associated with this integration will be deleted.
Integration Disabled
Integration Disabled
This message appears when you have disabled an Integration in a downstream environment.When an Integration is disabled, all connected accounts and workflows associated with this integration will be paused until the integration is re-enabled.
Required User Setting Added
Required User Setting Added
This message appears when you have added a User Setting that is marked as required in the Connect Portal options for an integration.If any workflows rely on this User Setting, you will need to prompt current integration users to revisit the Connect Portal to set a value for the new required User Setting.This message allows you to view and export Affected Users for this change.
Workflow Enabled by Default
Workflow Enabled by Default
This message appears when you have added or modified a Workflow to be enabled by default.When this Release is deployed, Paragon will attempt to enable the default-enabled workflow for all Connected Users of the associated integration.This message allows you to view and export Affected Users for this change.
Workflow Changed Trigger Type
Workflow Changed Trigger Type
This message appears when you have changed the Trigger type for a Workflow.When this Release is deployed, Paragon will attempt to create the trigger on behalf of all Connected Users that have enabled this Workflow. For example, if the Trigger has changed from a Request Trigger to a Record Created Trigger, Paragon will need to create a new webhook for your Connected Users to enable the workflow.This message allows you to view and export Affected Users for this change.
Deploying a Release
When you are ready to deploy a Release, click Deploy in the Release Preview screen. A prompt will appear to specify:- Version Number: Using semantic versioning, provide a version number to represent this Release. The new version number must be higher than the currently deployed version number.
- Description: Describe the Release with a message summarizing changes, for internal reference.

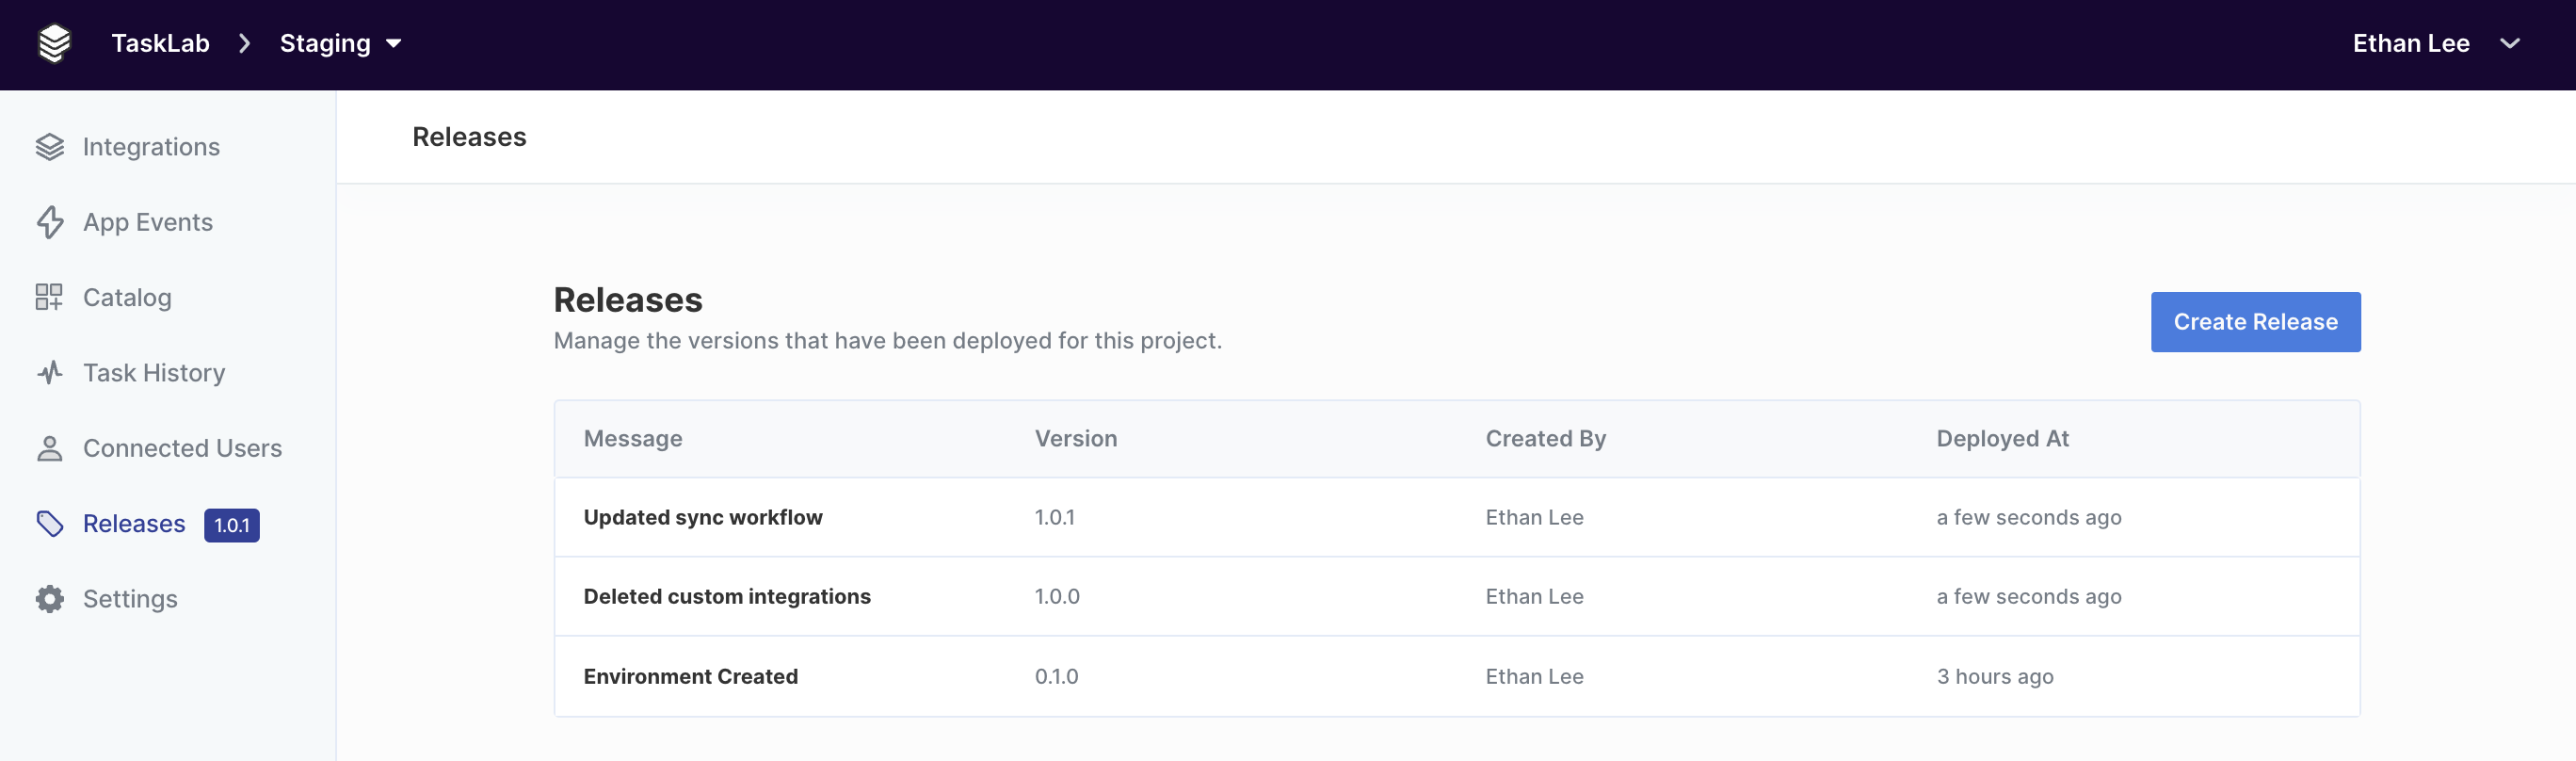
Viewing Release History
You can review past Releases in the Staging and Production environments, by clicking the Releases tab in the left sidebar.