Installing from npm
You can install the Paragon SDK with npm or package manager of choice:paragon.configureGlobal function to point the SDK to use the base hostname of your Paragon instance.
Migrating from the <script> tag?
Migrating from the <script> tag?
If you are migrating from using the <script> tag to the npm package, please note that
paragon is no longer exposed as a global or on the window object by default.Any references to paragon or window.paragon must be updated to point to the package import:Setup
Before using the Paragon SDK, you’ll need to set up your application to verify the identity of your users to the SDK. Paragon verifies the identity of your users using the authentication system you’re already using, including managed services like Firebase or Auth0. Some backend code may be required if your application implements its own sign-in and registration.Generating tokens with your backend
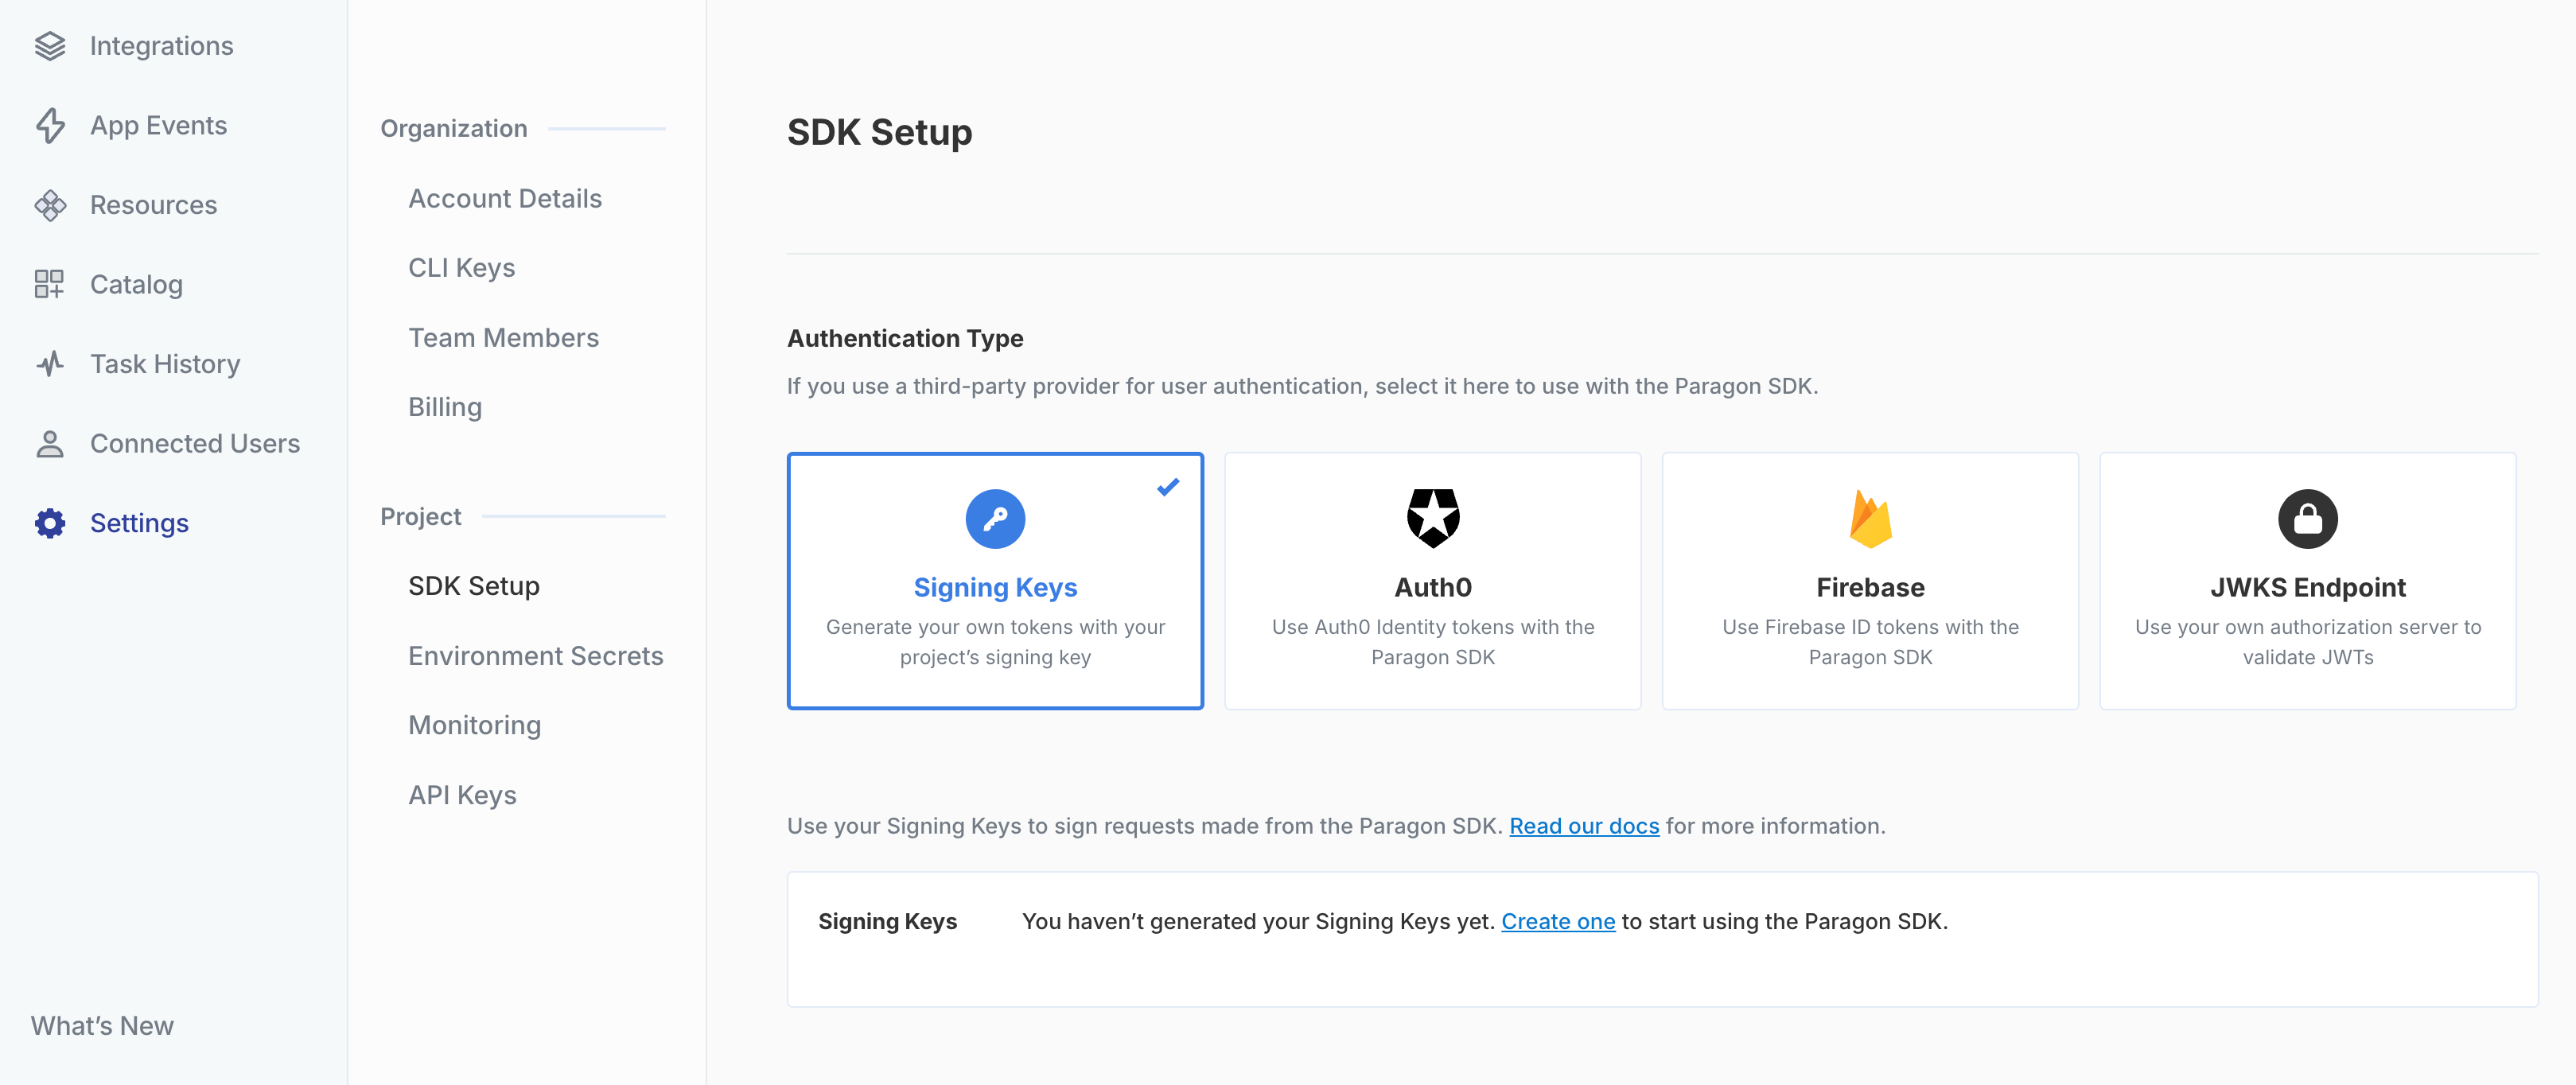
If your backend server will generate JWTs for Paragon, you’ll first need to complete the following steps:1. Generate a Paragon Signing Key
To generate a Signing Key, go to Settings > SDK Setup in your Paragon dashboard. You should store this key in an environment secrets file. For security reasons, we don’t store your Private Key and cannot show it to you again, so we recommend you download the key and store it someplace secure. A unique Signing Key is generated for each environment. To learn more about the environments supported by Paragon, visit our Releases documentation.Note: Signing keys never expire. However, generating a new signing key for the same environment will automatically invalidate the previous one.
2. Generate a Paragon User Token
Next, you’ll need to generate a Paragon User Token for each of your authenticated users. To do this, you’ll need a library in your target language to sign JWTs with RS256. You can find one in your language at https://jwt.io/. If your application is a fully client-rendered single-page app, you may have to create and use an additional API endpoint to retrieve a signed JWT (or reuse an existing endpoint that handles authentication or user info). The signed JWT/Paragon User Token minimally must include thesub, iat, and exp claims:
JavaScript
Just for testing: Generating one-off JWTsUse the Paragon JWT Generator to generate test JWTs for your development purposes. In production, static tokens should never be used.
3. Call paragon.authenticate()
You’ll callparagon.authenticate in your view with a JWT signed by your backend using the library chosen in Step 2. This JWT is the Paragon User Token.
How do I find my Project ID?
How do I find my Project ID?
You can copy your Project ID by clicking Copy Project ID under the Environment switcher:
paragon.authenticate function is Promiseable and resolves when the SDK has successfully authenticated your user. Note that other functions, like paragon.connect, may not work as expected until this Promise has resolved.
Example Implementation: A Node.js and Express app using Handlebars view templating
-
Adding middleware to sign the JWT and include it in the response context
-
Use the
paragonJwtset in context within the view template, with a call toparagon.authenticate:
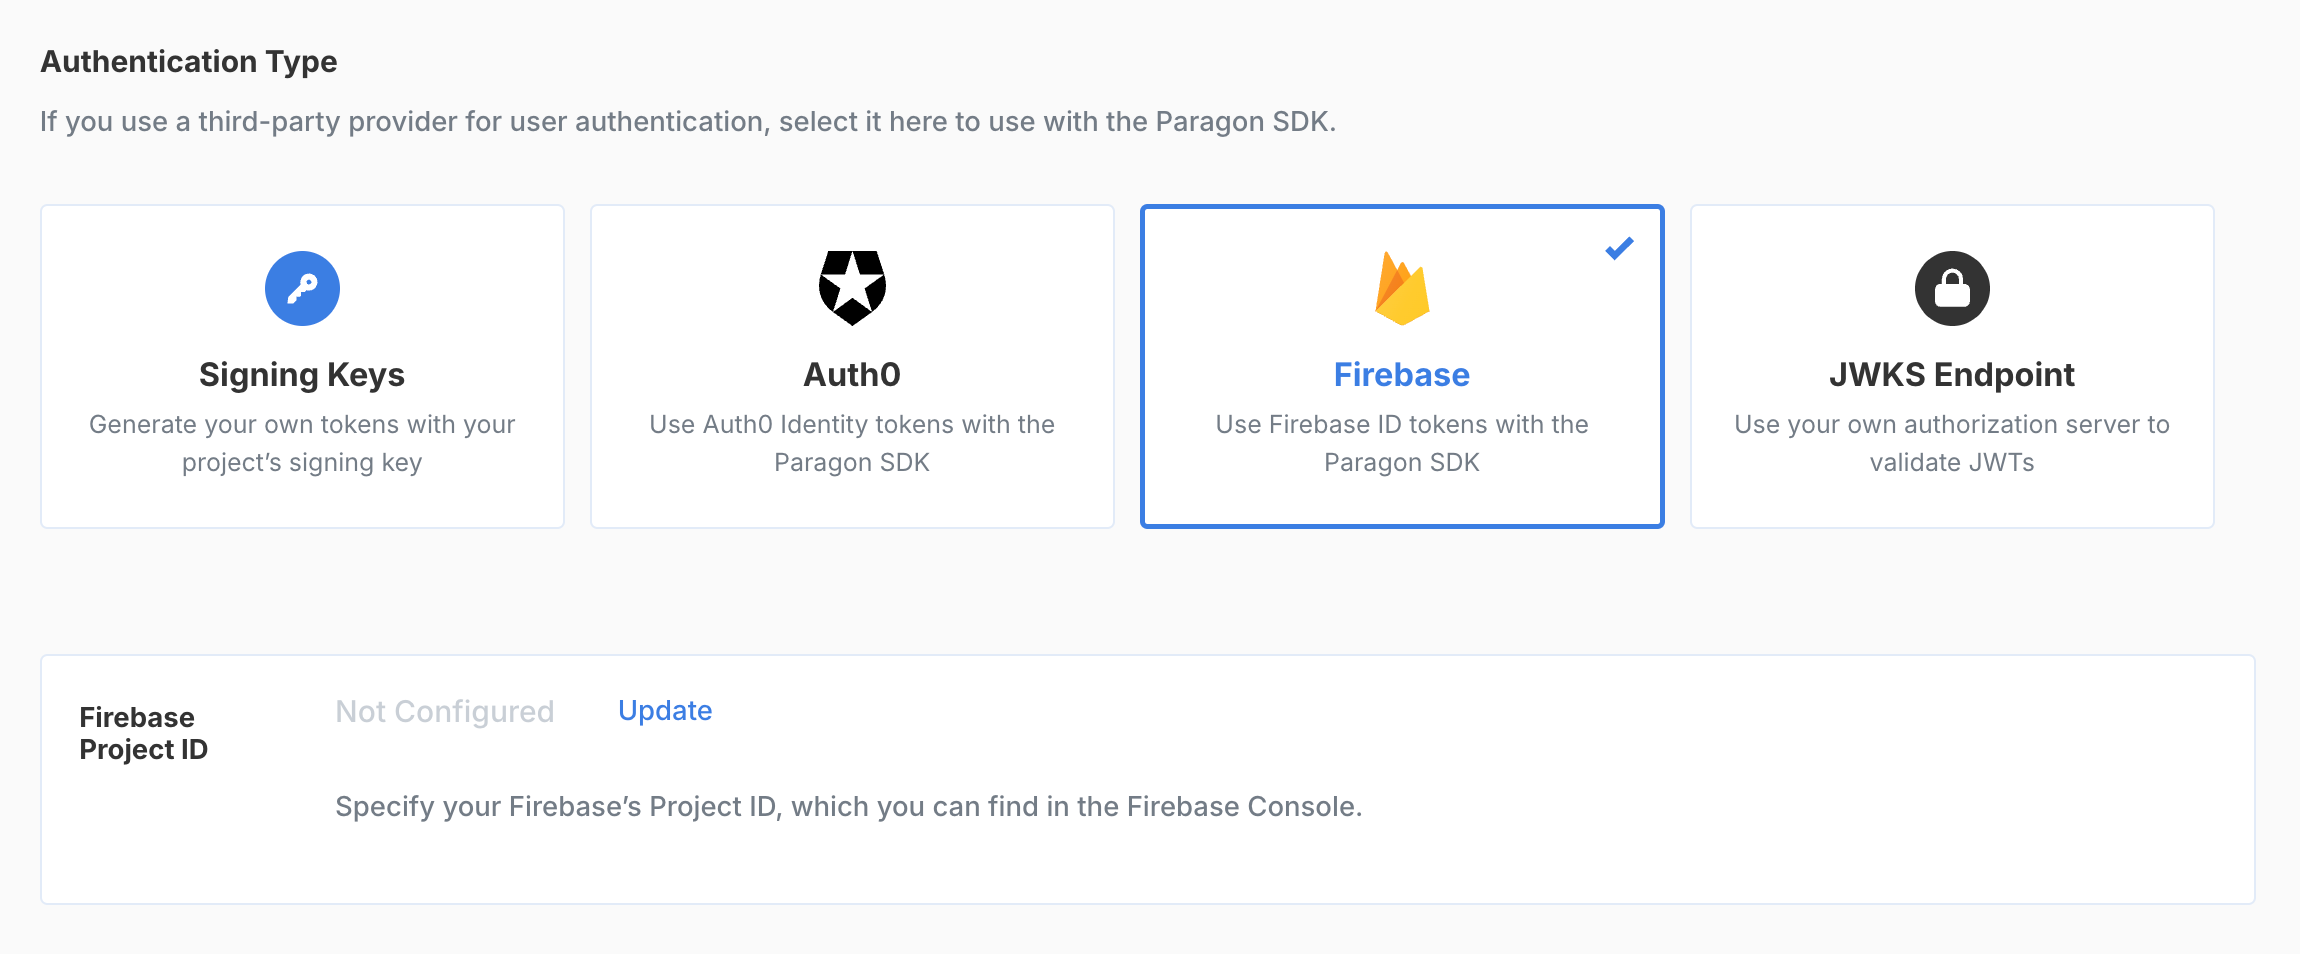
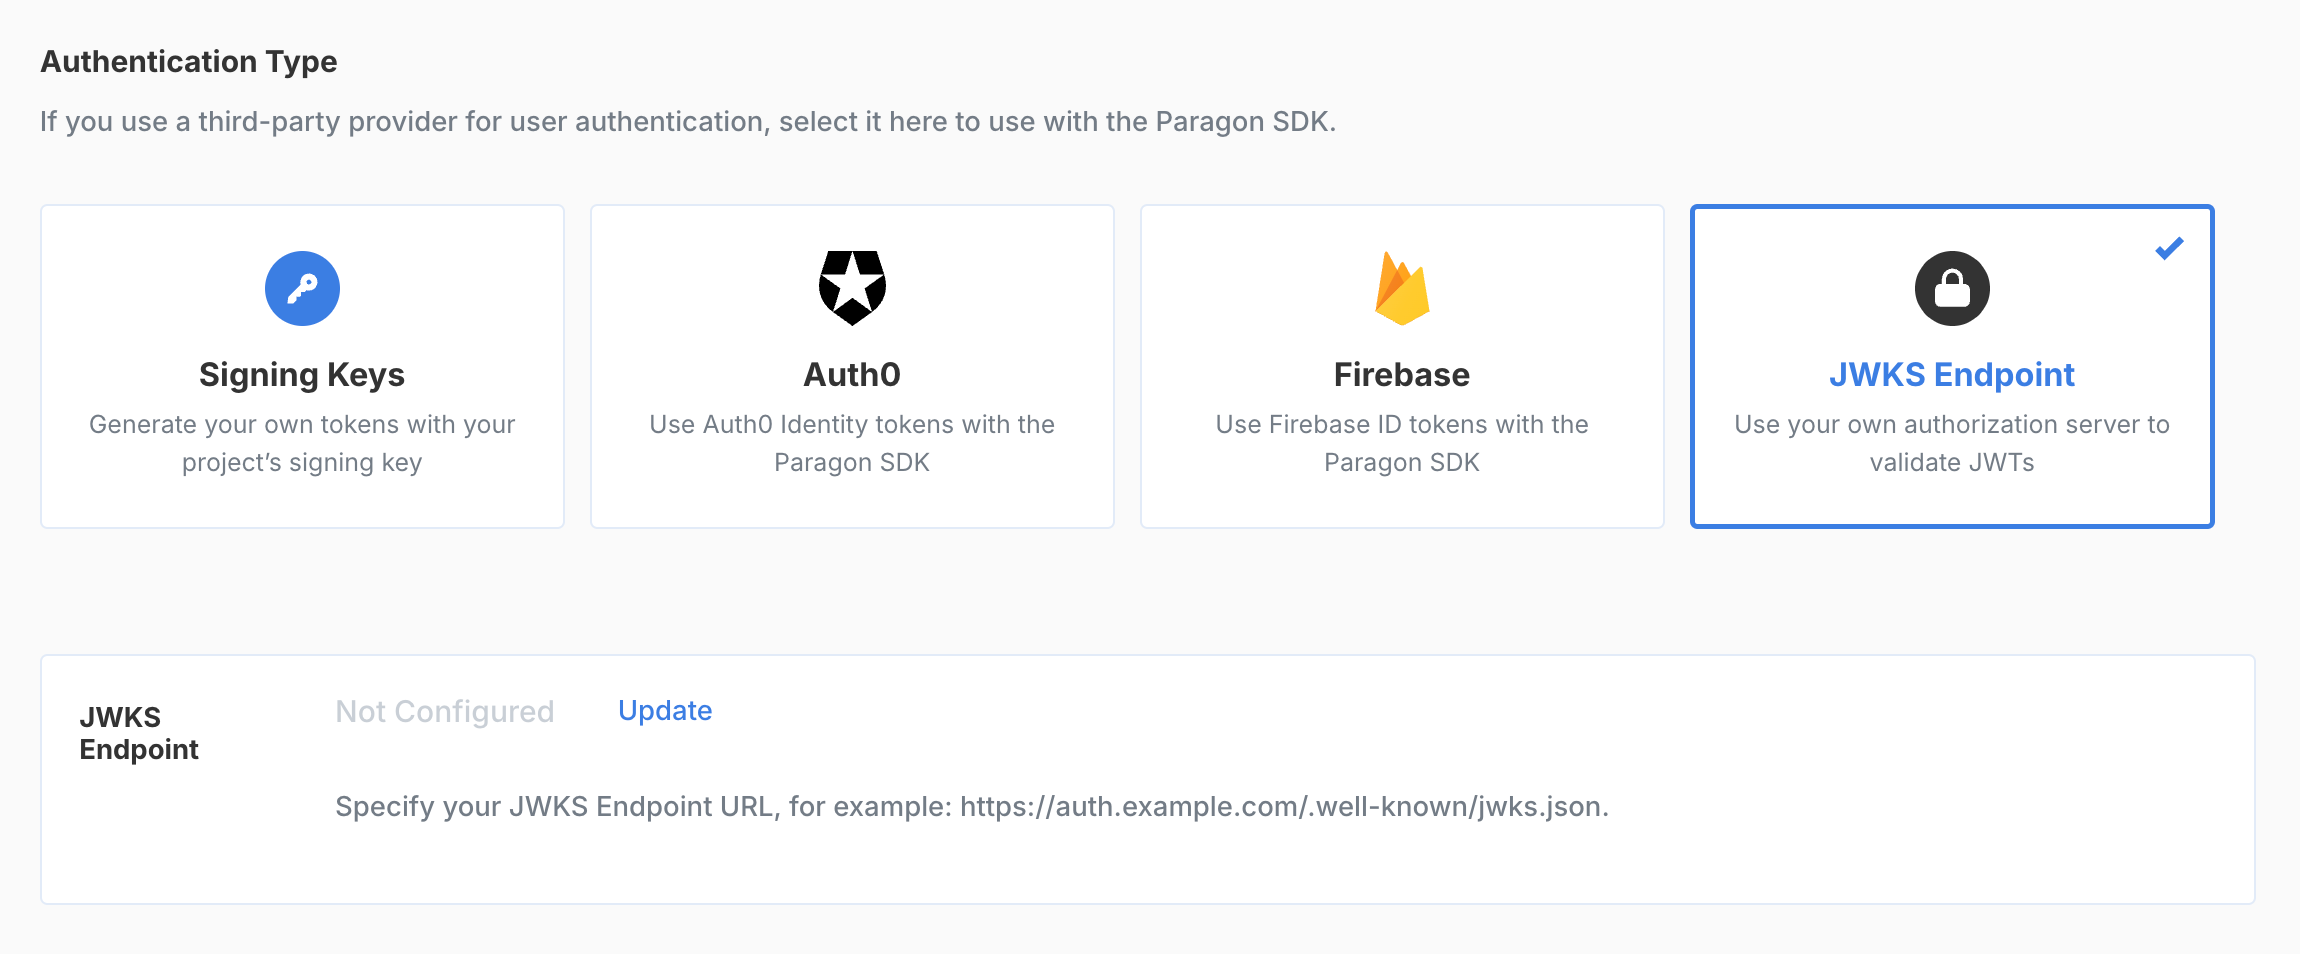
Using a managed authentication service
If you already use an authentication service like Auth0, Firebase, or a JWKS-compatible authentication server, you can set up your Paragon project to use tokens generated by that service by navigating to Settings > SDK Setup and selecting a provider.- Auth0
- Firebase
- JWKS Endpoint
You’ll need to provide Paragon with your Auth0 Tenant Domain, which ends with 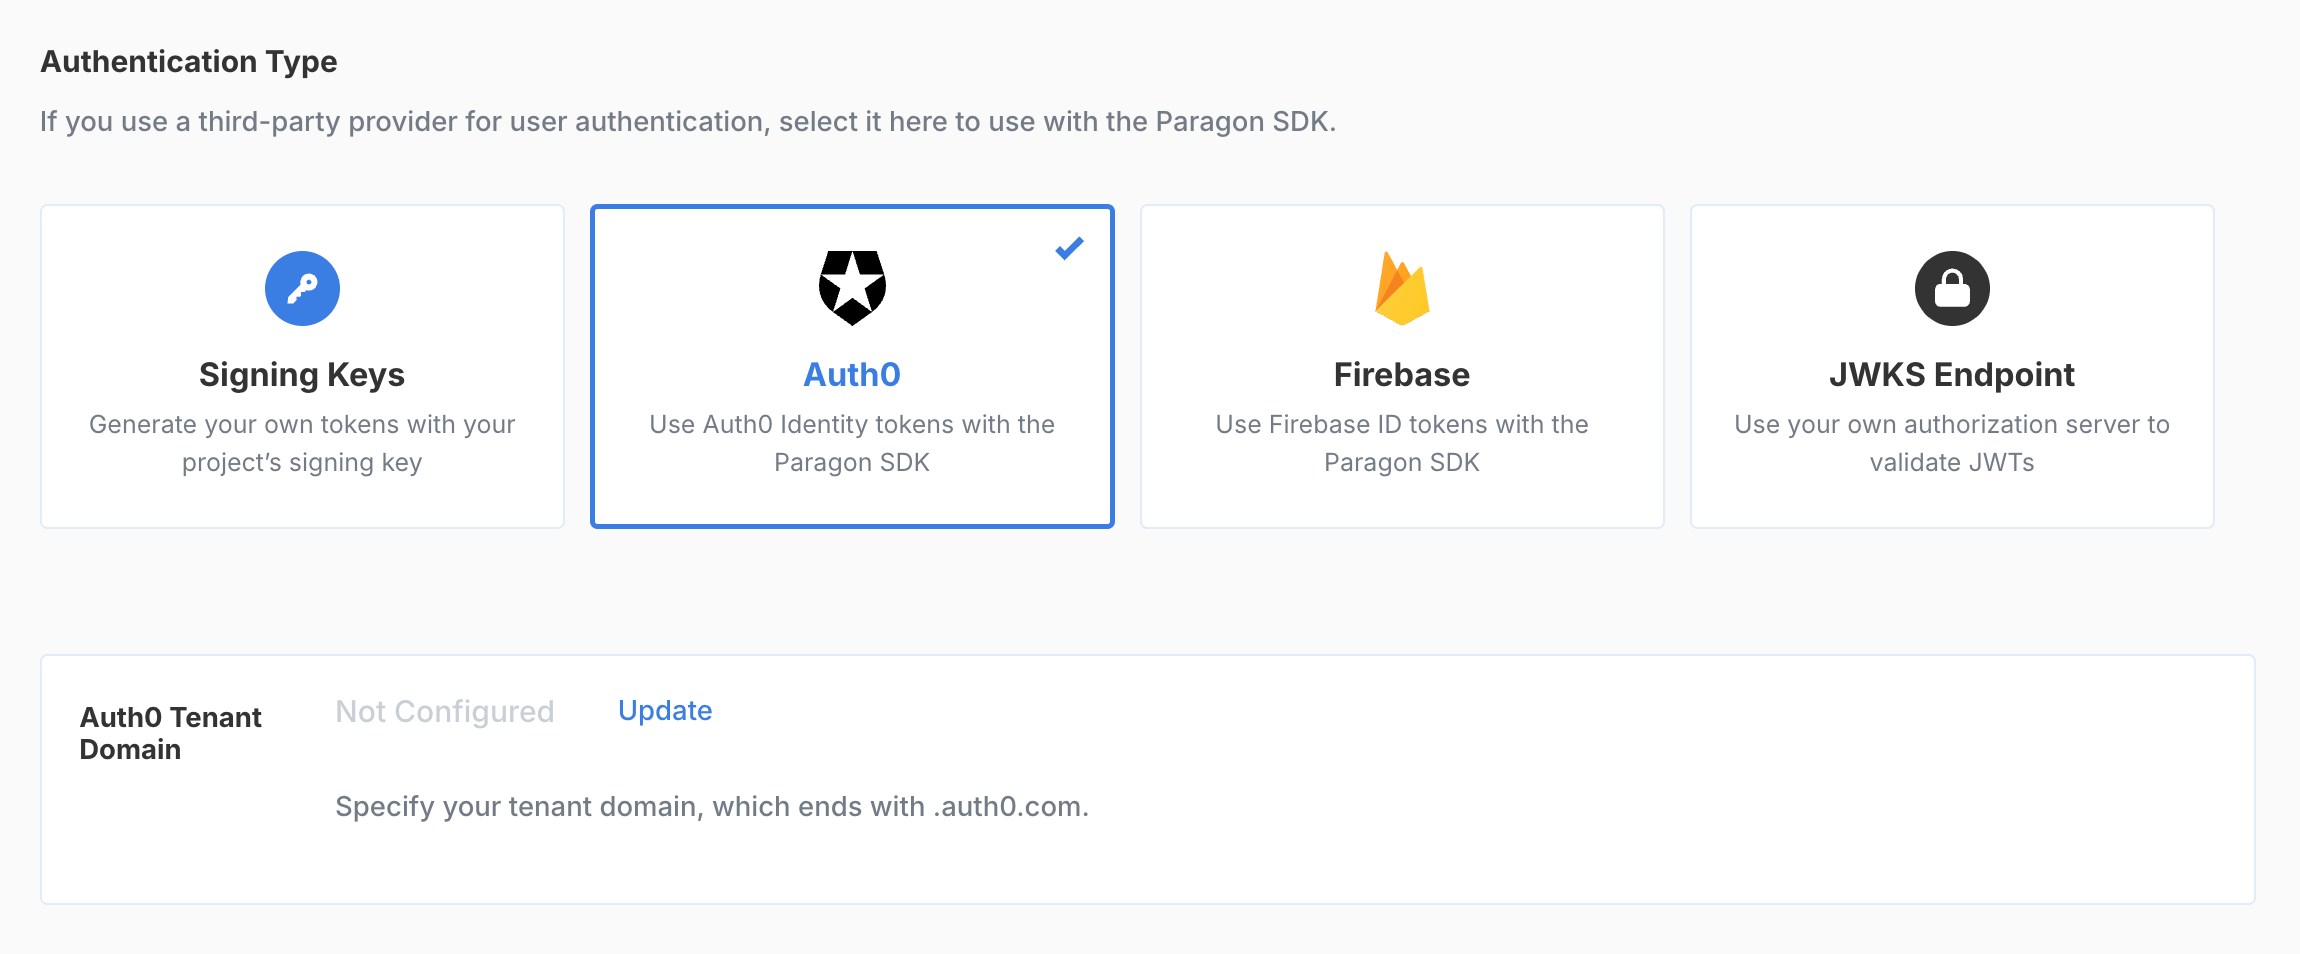
.auth0.com. Example: https://<YOUR_TENANT>.auth0.com.If you have a domain alias for your tenant domain, use the domain alias instead.