Setup Guide
Paragon supports two authentication methods for the ServiceNow integration:- OAuth 2.0 (recommended): Your users authenticate by using an inbound OAuth application that they create in ServiceNow.
- Username and Password: Your users provide their ServiceNow username and password.
accountType when calling paragon.connect.
If omitted, both OAuth and Basic auth methods will be displayed.
Creating a ServiceNow Test Account
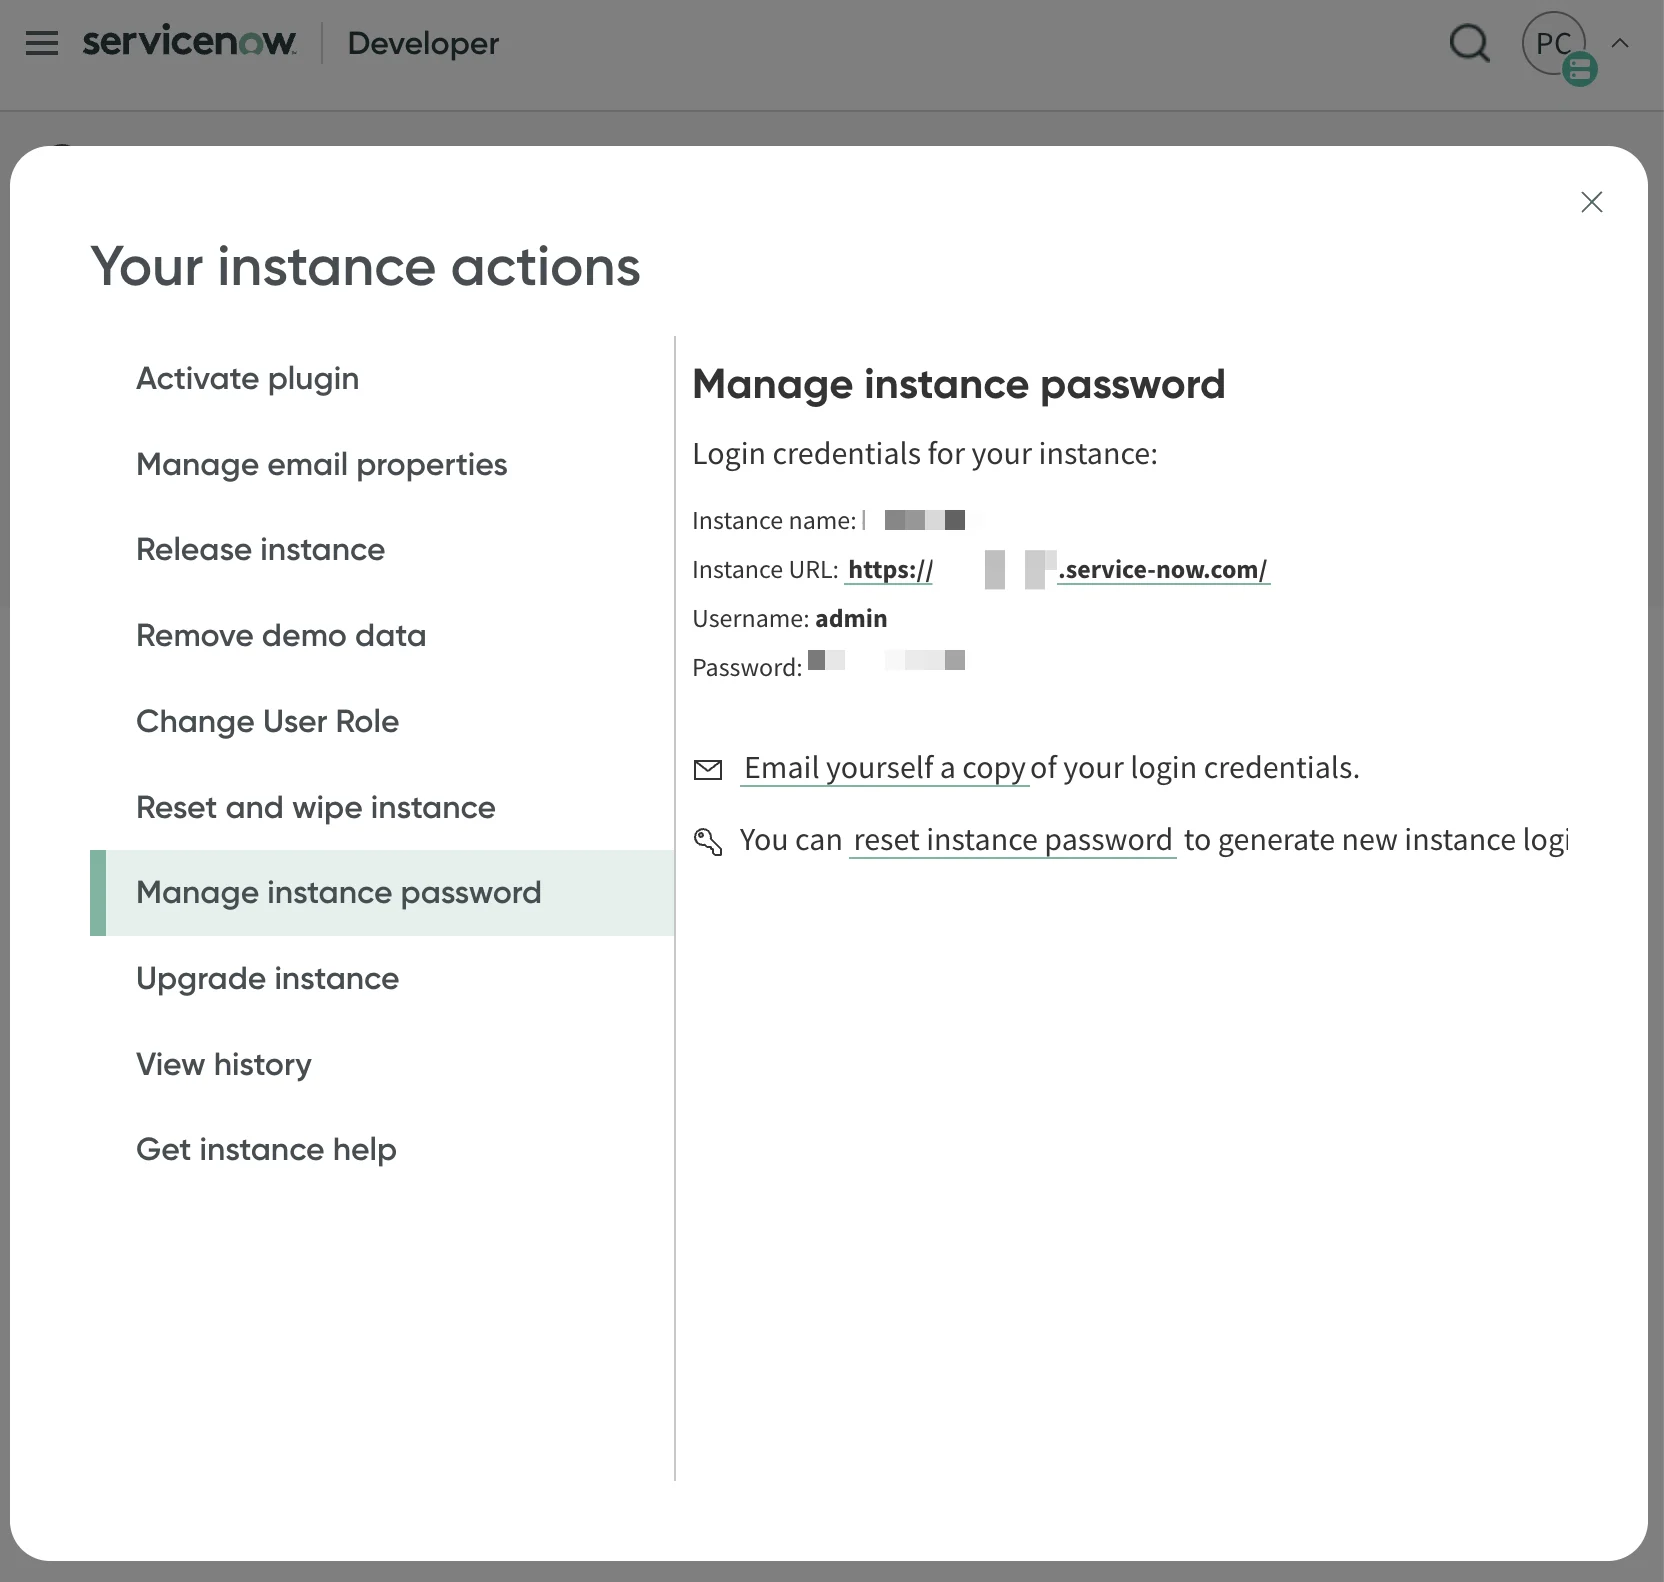
You can create a ServiceNow test account from the ServiceNow Developer Portal. In the ServiceNow Developer Portal, you can create a free developer instance by clicking the Request Instance button in the page header. Whether testing the OAuth 2.0 connection or the Username and Password connection, you will need to leverage the test account to validate connection and your integration logic.Connecting with OAuth 2.0
To connect to ServiceNow with OAuth, your users will need to create an inbound OAuth application in their ServiceNow instance. The steps to create an inbound OAuth application are as follows: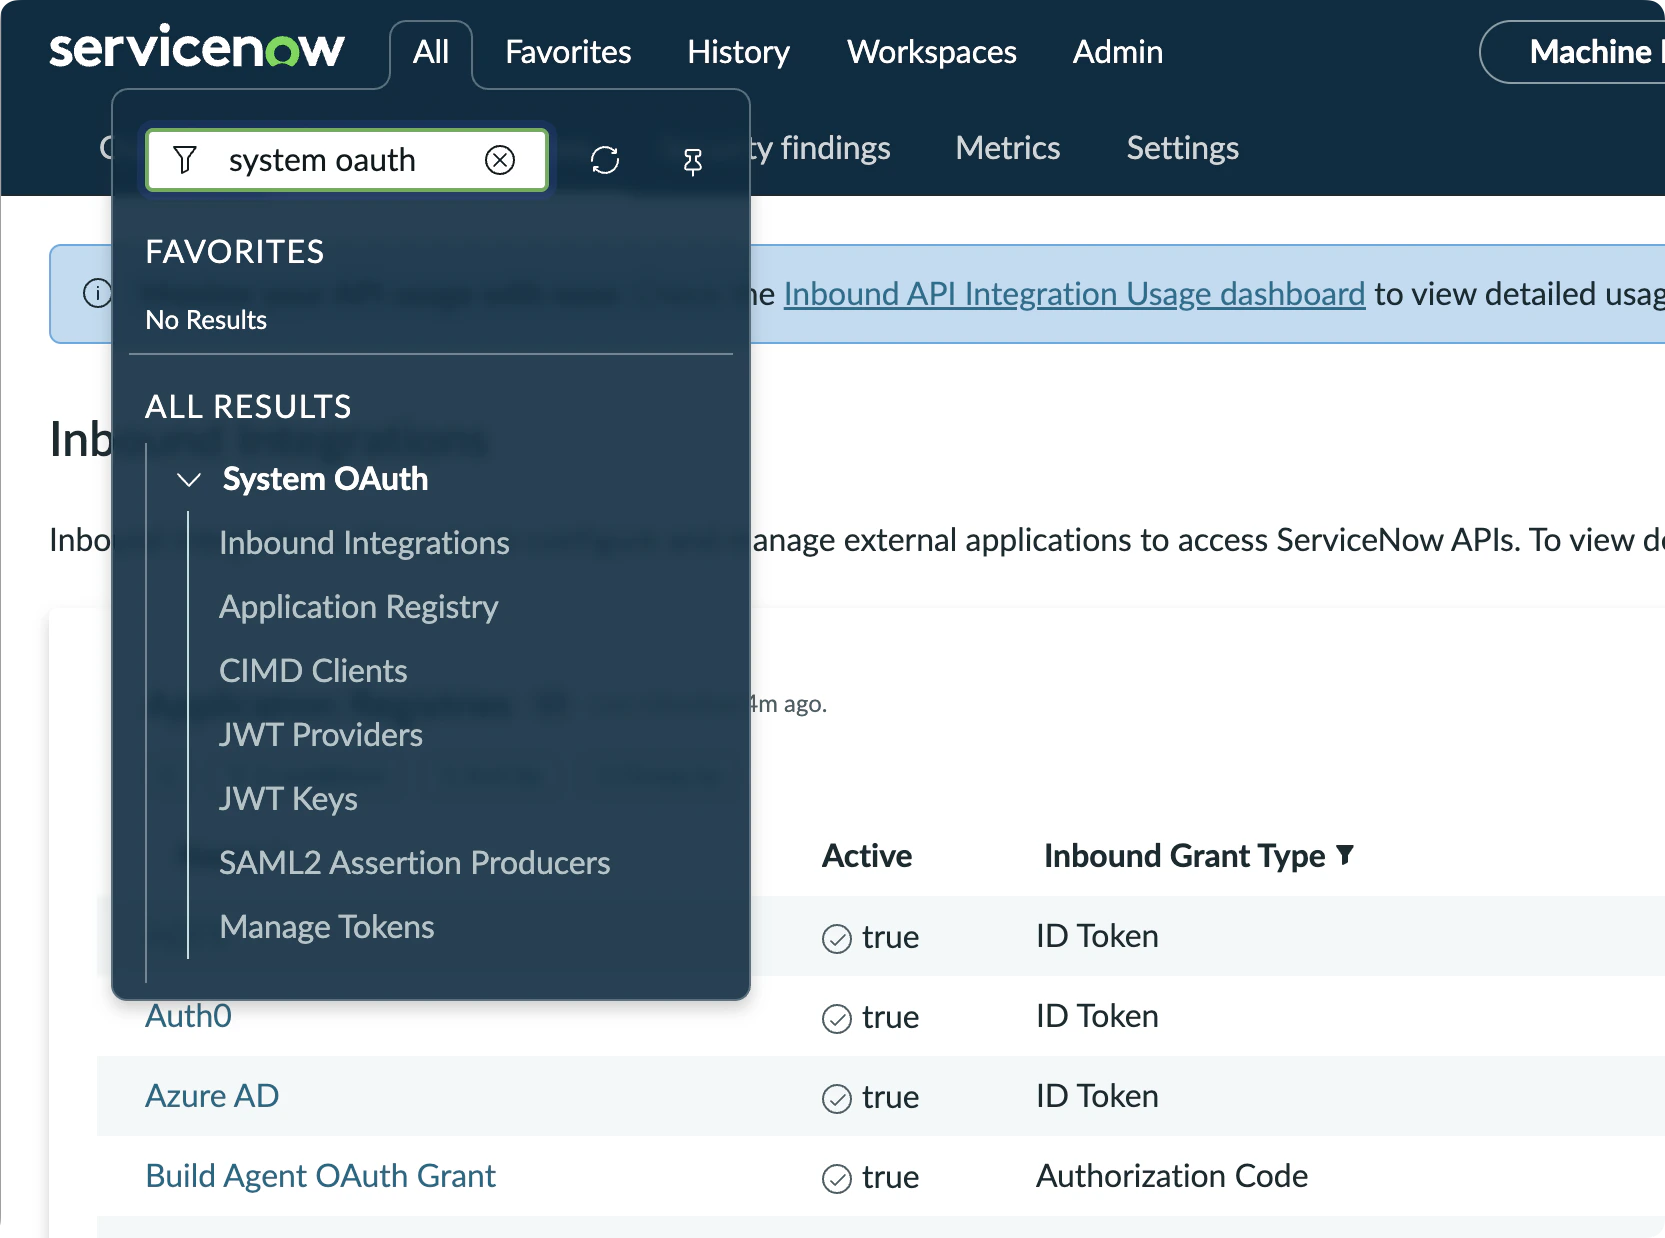
1
From within your ServiceNow instance, navigate to All > System OAuth > Application Registry and click New.
2
Select New Inbound Integration Experience
3
Select OAuth - Authorization Code Grant
4
Fill out the application details and add the Paragon redirect URL to the Redirect URL field.
5
Add the
useraccount scope to the application. ServiceNow uses the useraccount scope by default to access REST APIs on behalf of the connecting user.6
Click Save to create your application. ServiceNow provides you with the Client ID and Client Secret needed in the next step.
Connecting with Username and Password
To connect to ServiceNow with basic authentication, your users will need to provide:- Subdomain
- Username
- Password
Connecting to ServiceNow
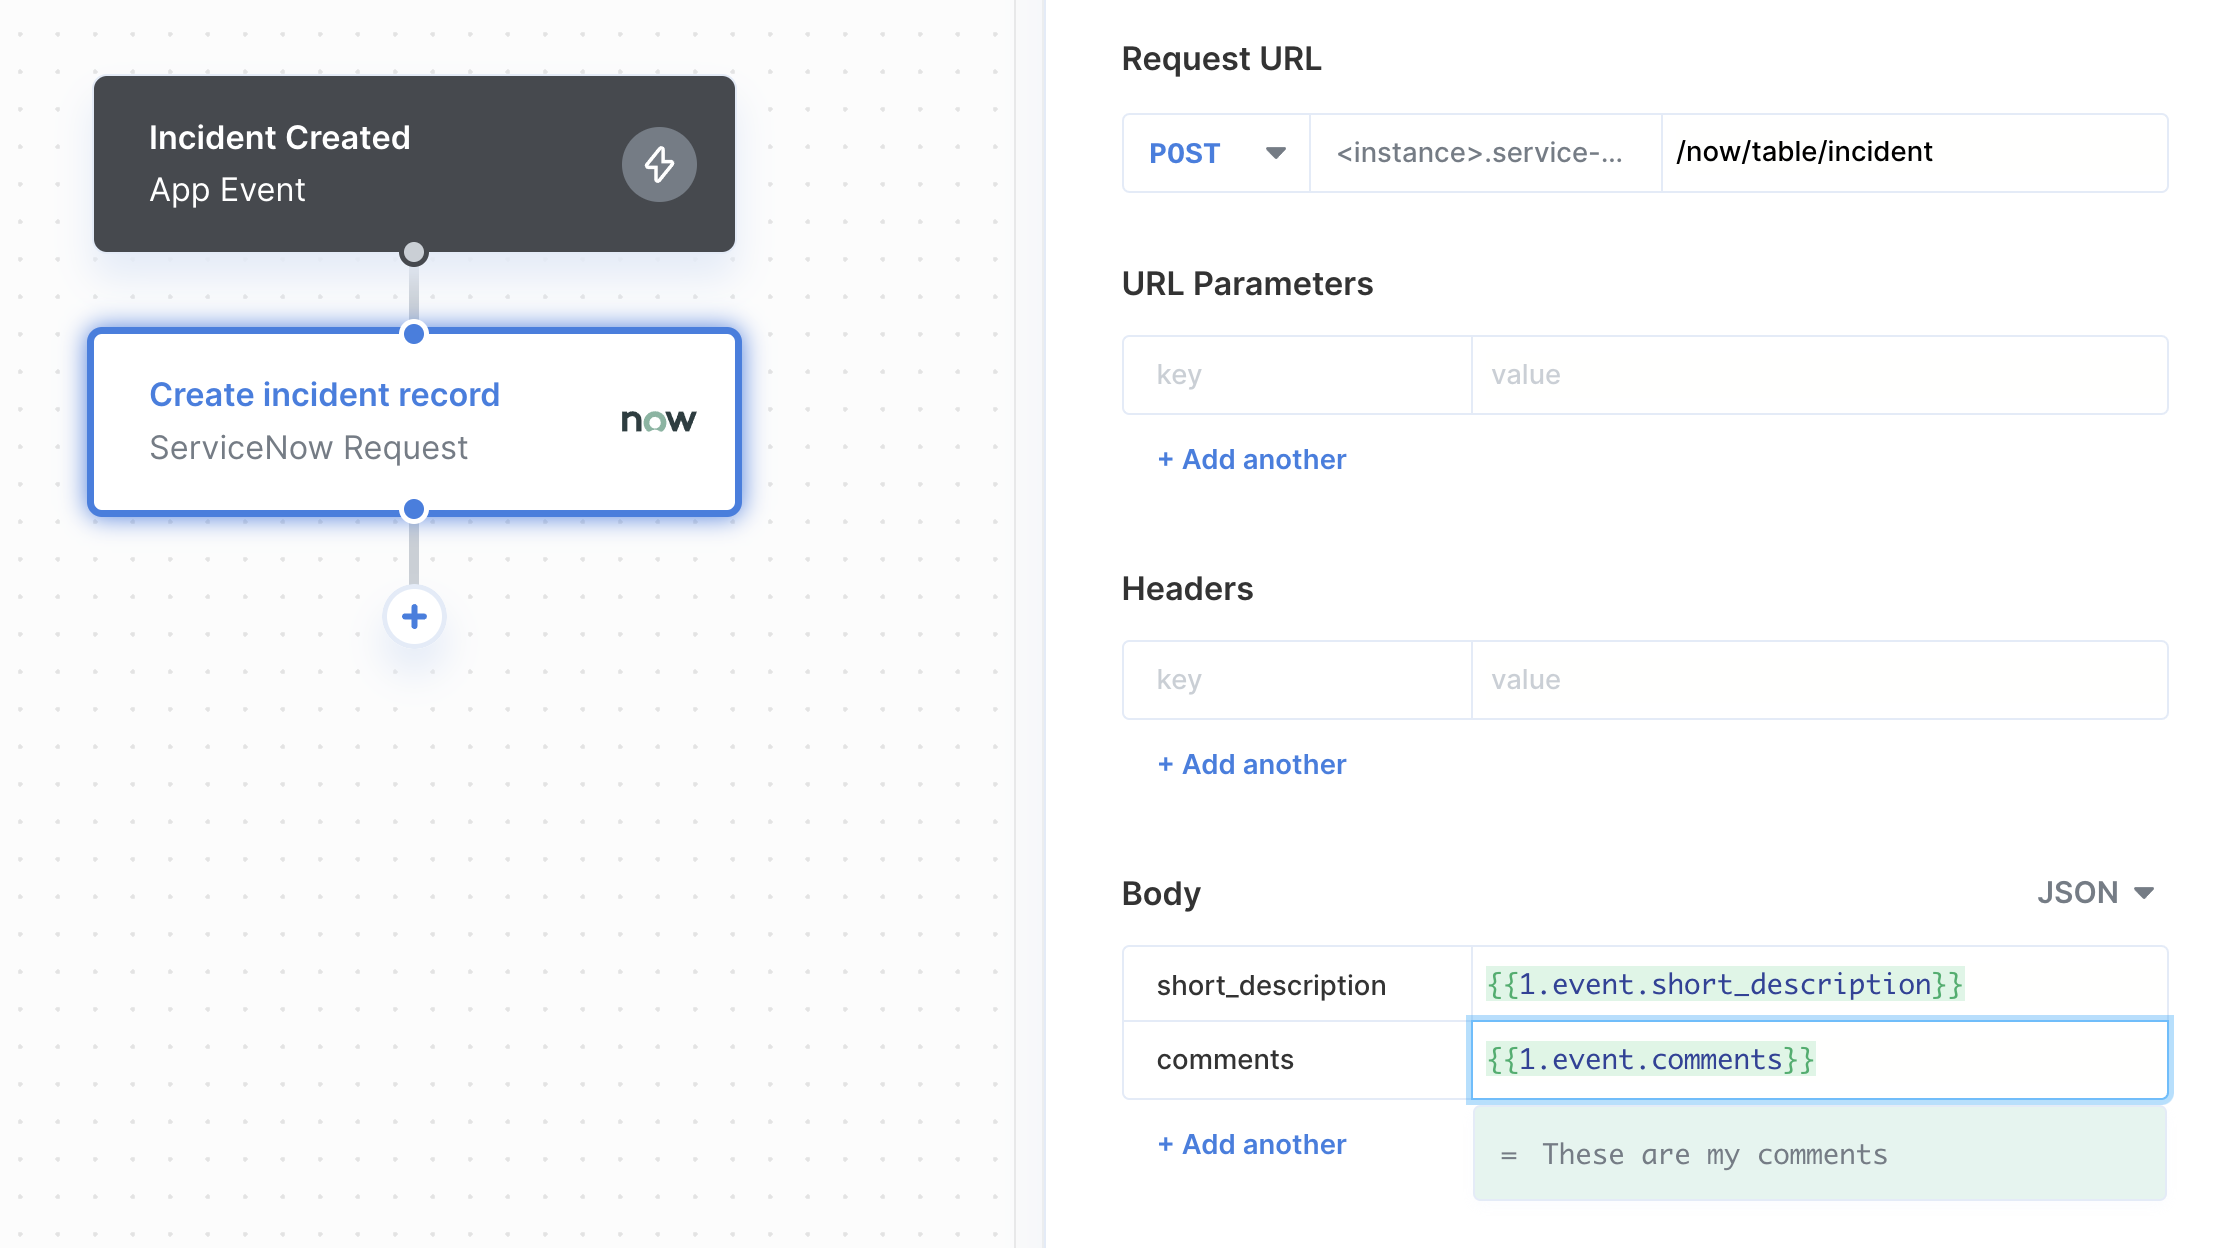
Once your users have connected their ServiceNow account, you can use the Paragon SDK to access the ServiceNow API on behalf of connected users. See the ServiceNow REST API documentation for their full API reference. Any ServiceNow API endpoints can be accessed with the Paragon SDK as shown in this example.Building ServiceNow workflows
Once your ServiceNow account is connected, you can add steps to perform the following actions:- Create Ticket
- Update Ticket
- Get Tickets
- Get Ticket by ID
{{ to invoke the variable menu.