Setup Guide
This guide walks you through creating a HubSpot App for testing and development purposes. Once you have finished your integration and are ready to publish in the HubSpot Marketplace for public distribution, jump to Publishing your HubSpot App.Prerequisites
- Register a HubSpot developer account to associate your app with and to create test accounts.
-
Install and authenticate the HubSpot CLI.
If you don’t already have the HubSpot CLI, install it with the following command (requires Node.js):
After installation, authenticate your developer account:Install the HubSpot CLIConnect the CLI to your HubSpot account
Creating a HubSpot Project
A HubSpot project is a local package of configuration files defining features of your app like requested OAuth scopes, allowed redirect URLs, and webhooks. You will need to create and upload a project to generate an OAuth Client ID and Secret that we can reference in Paragon.Create a project
Start by creating a project with the CLI using the following command:You will be prompted to choose a name and destination for the project.
Configure scopes and redirect URL
Open You can adjust the
src/app/app-hsmeta.json to update your redirect URLs and scopes:Add Paragon URL
Paragon default scopes
requiredScopes or optionalScopes to your use case; the only scope required for Paragon is the oauth scope.Learn more about available HubSpot scopes in their documentation.Configure webhooks
Paragon provides a webhook Target URL to subscribe your HubSpot app to events in your users’ HubSpot instances. Copy this URL from the Settings tab of your HubSpot integration in Paragon: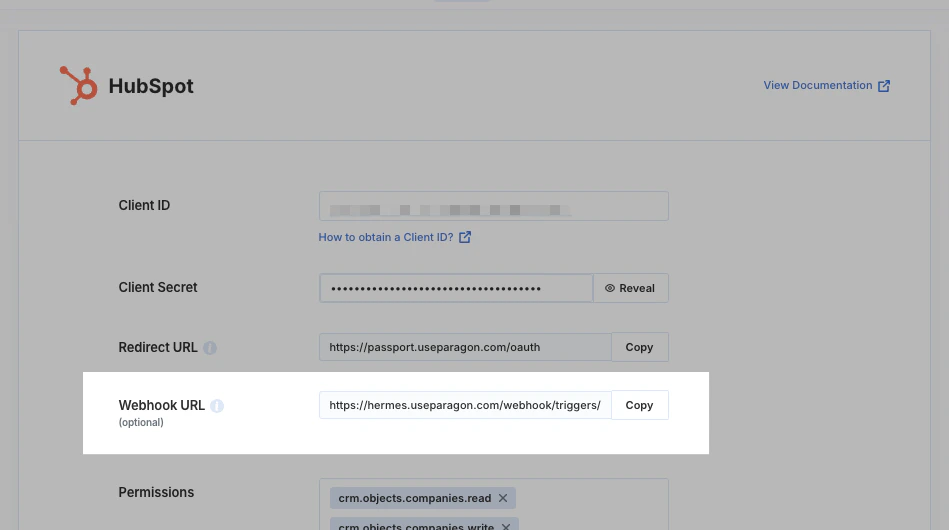
src/app/webhooks/webhooks-hsmeta.json and add the URL:Update targetUrl in webhooks-hsmeta.json
subscriptions with any specific events that you will subscribe to via Workflows or Triggers. See HubSpot’s webhooks documentation for available subscription types.Upload your project
Upload your HubSpot project to your developer account by saving all changes to project files and running the following command from within the project directory:After it has succeeded, open the project in the developer account:
Save your OAuth Client ID and Secret
In the HubSpot developer account from the project view, click your app’s name under Project Components and navigate to Auth.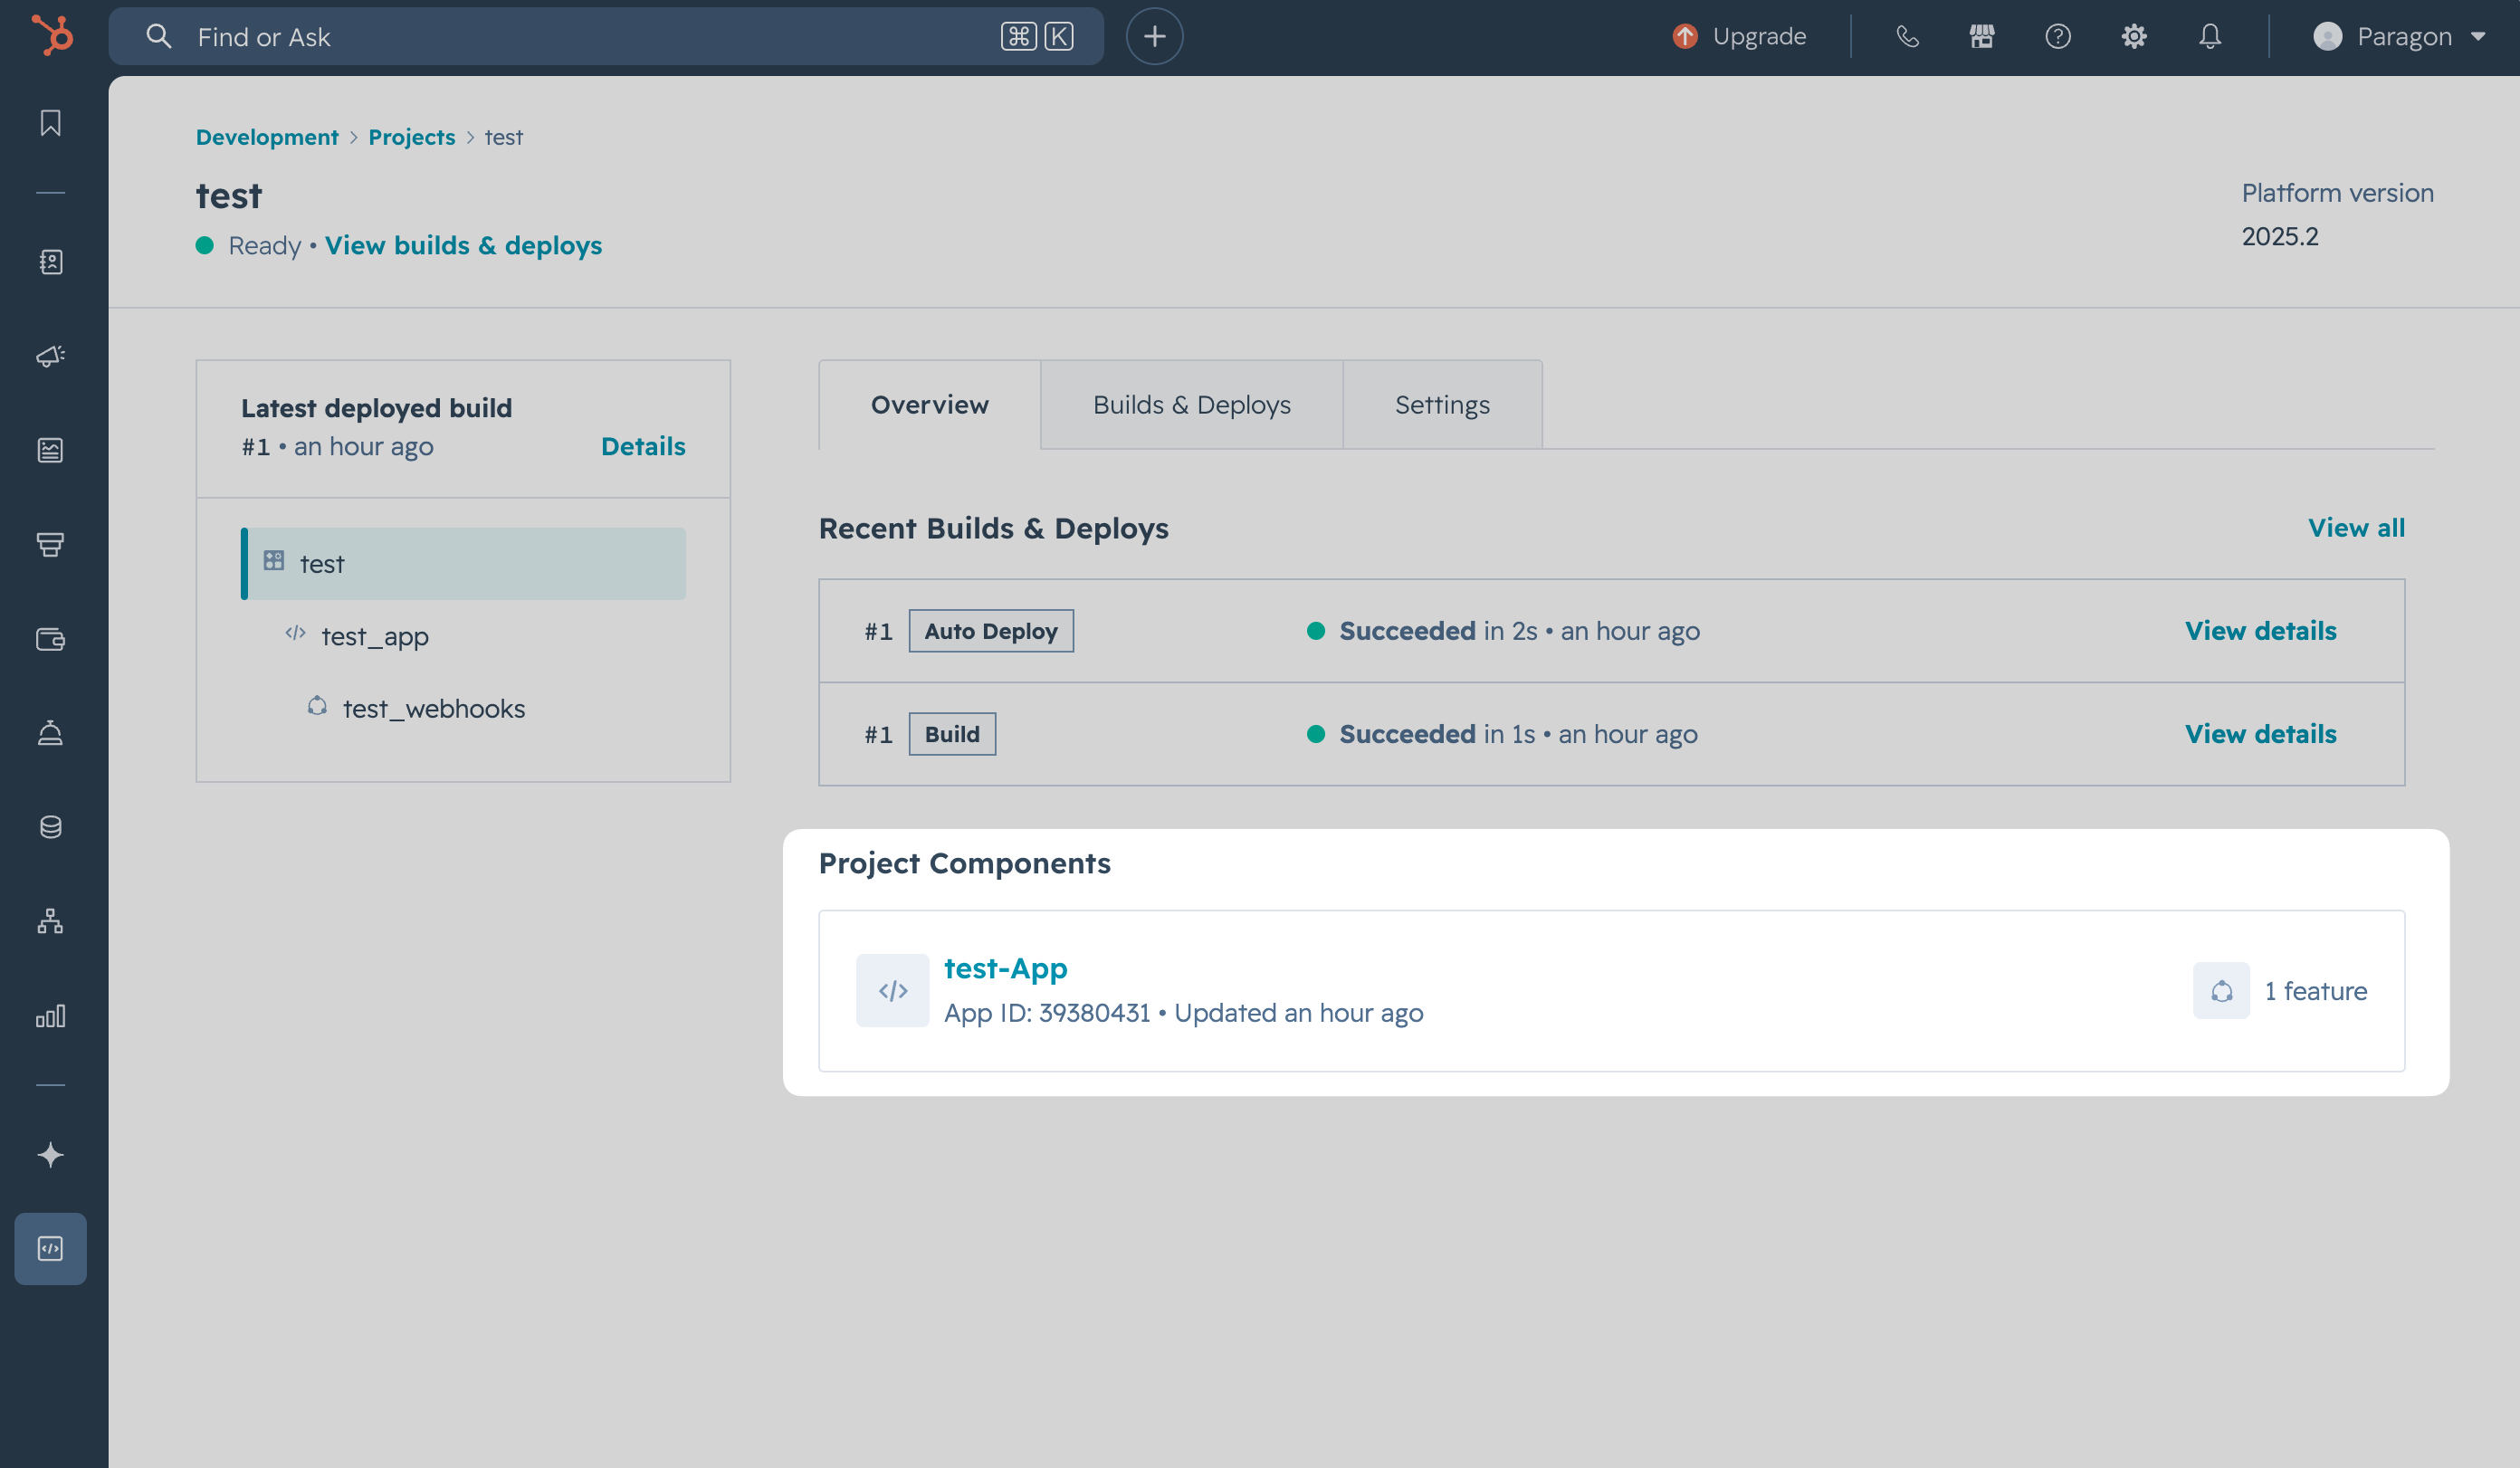
Setup for Legacy Apps
If you are not yet using HubSpot’s project-based framework, follow the below directions to configure your Legacy App in Paragon.Configuring HubSpot Legacy Apps
Configuring HubSpot Legacy Apps
Add the Redirect URL to your HubSpot app
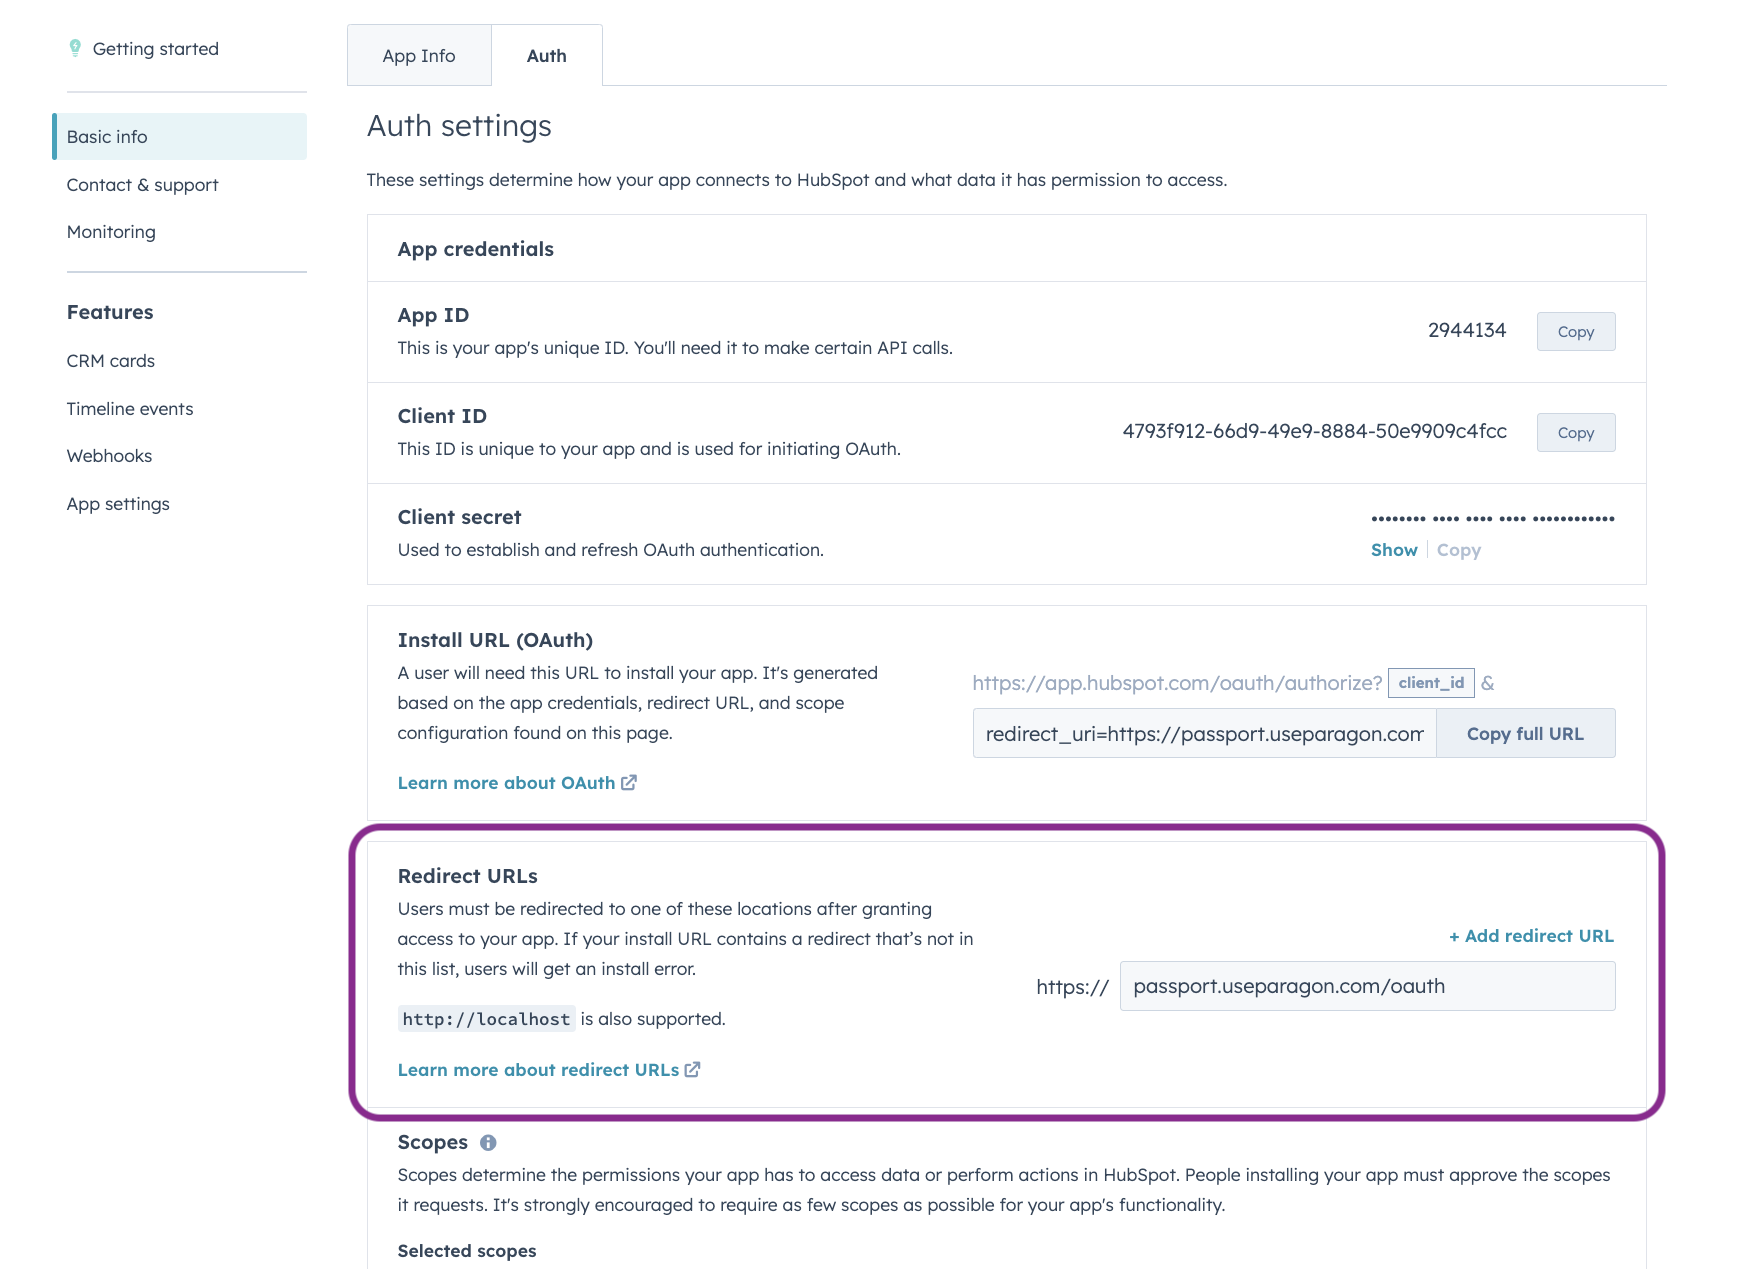
Paragon provides a redirect URL to send information to your app. To add the redirect URL to your HubSpot app:- Copy the link under “Redirect URL” in your integration settings in Paragon. The Redirect URL is:
- Log in to your HubSpot developer dashboard.
- In Legacy Apps, select the app you’d like to use in Paragon.
- Under Auth > Auth settings > Redirect URL, paste in Paragon Connect’s redirect URL found in Step 1.
- Select any scopes you’d like to use in your application. Note whether the scopes you permit are required or optional in HubSpot.
Note:
crm.schemas.custom.read is a required scope to enable Field Mapping in the Connect Portal.- Press the Save button at the bottom of the page.
Add your HubSpot app to Paragon
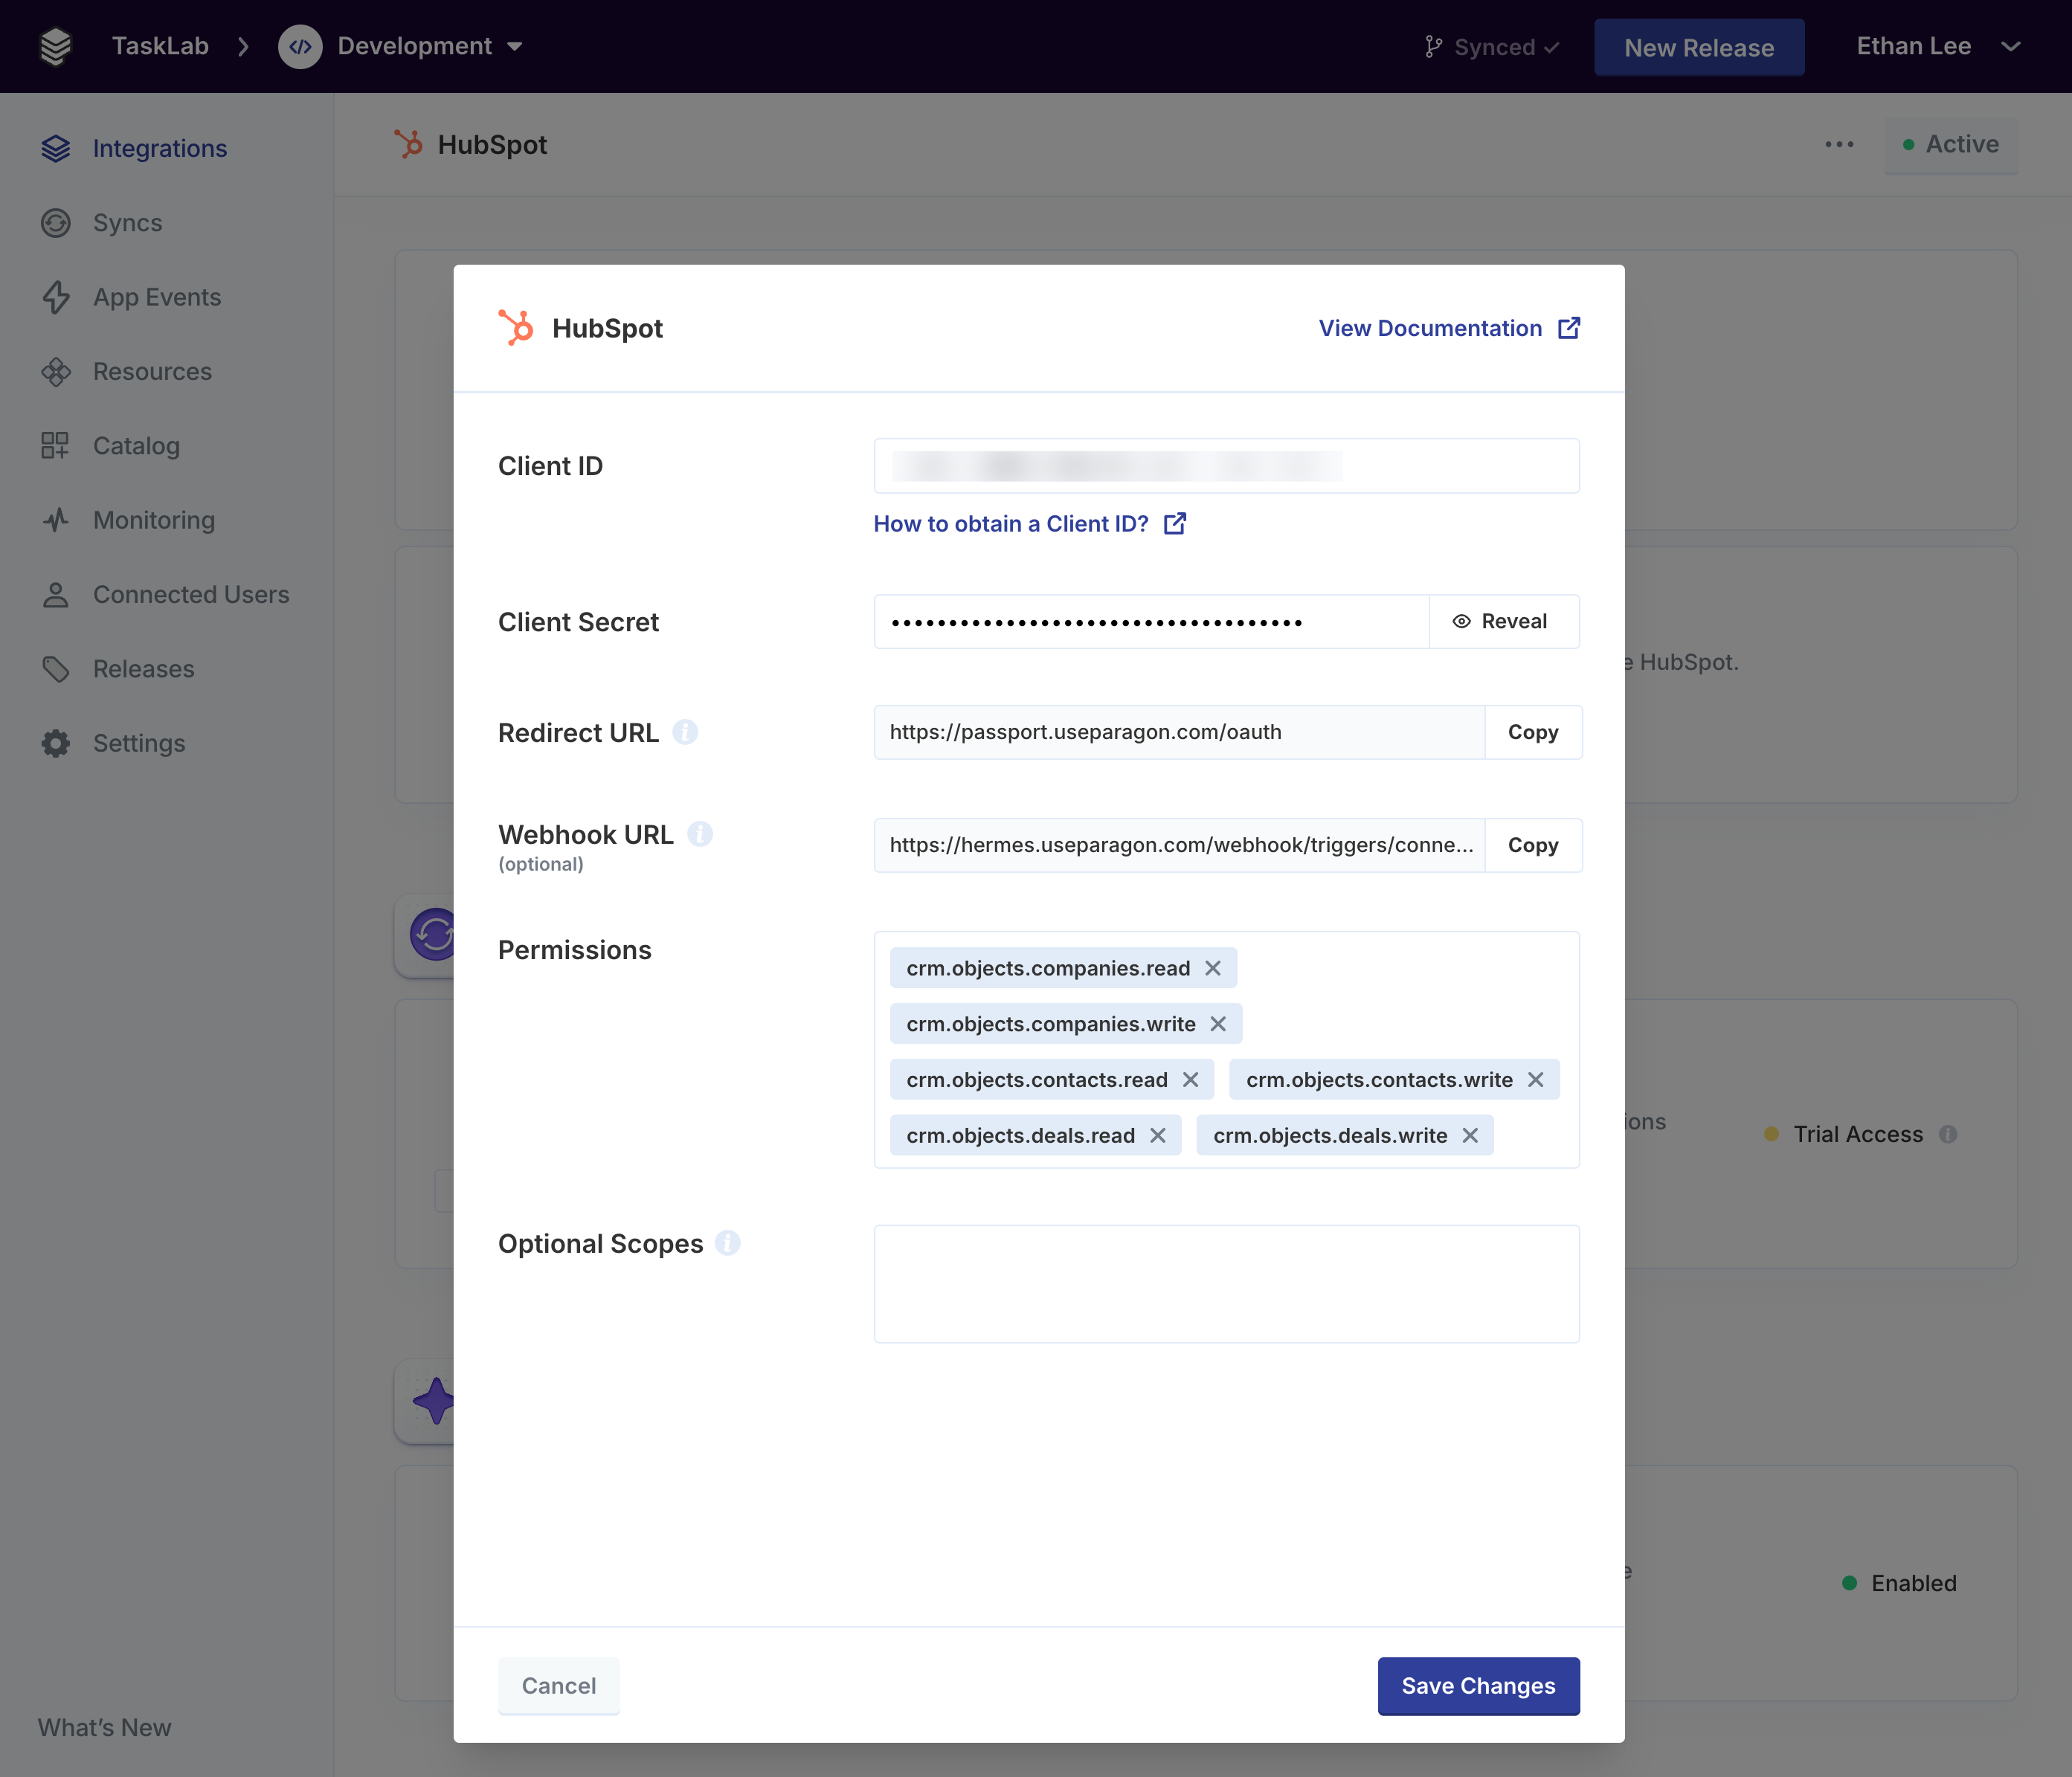
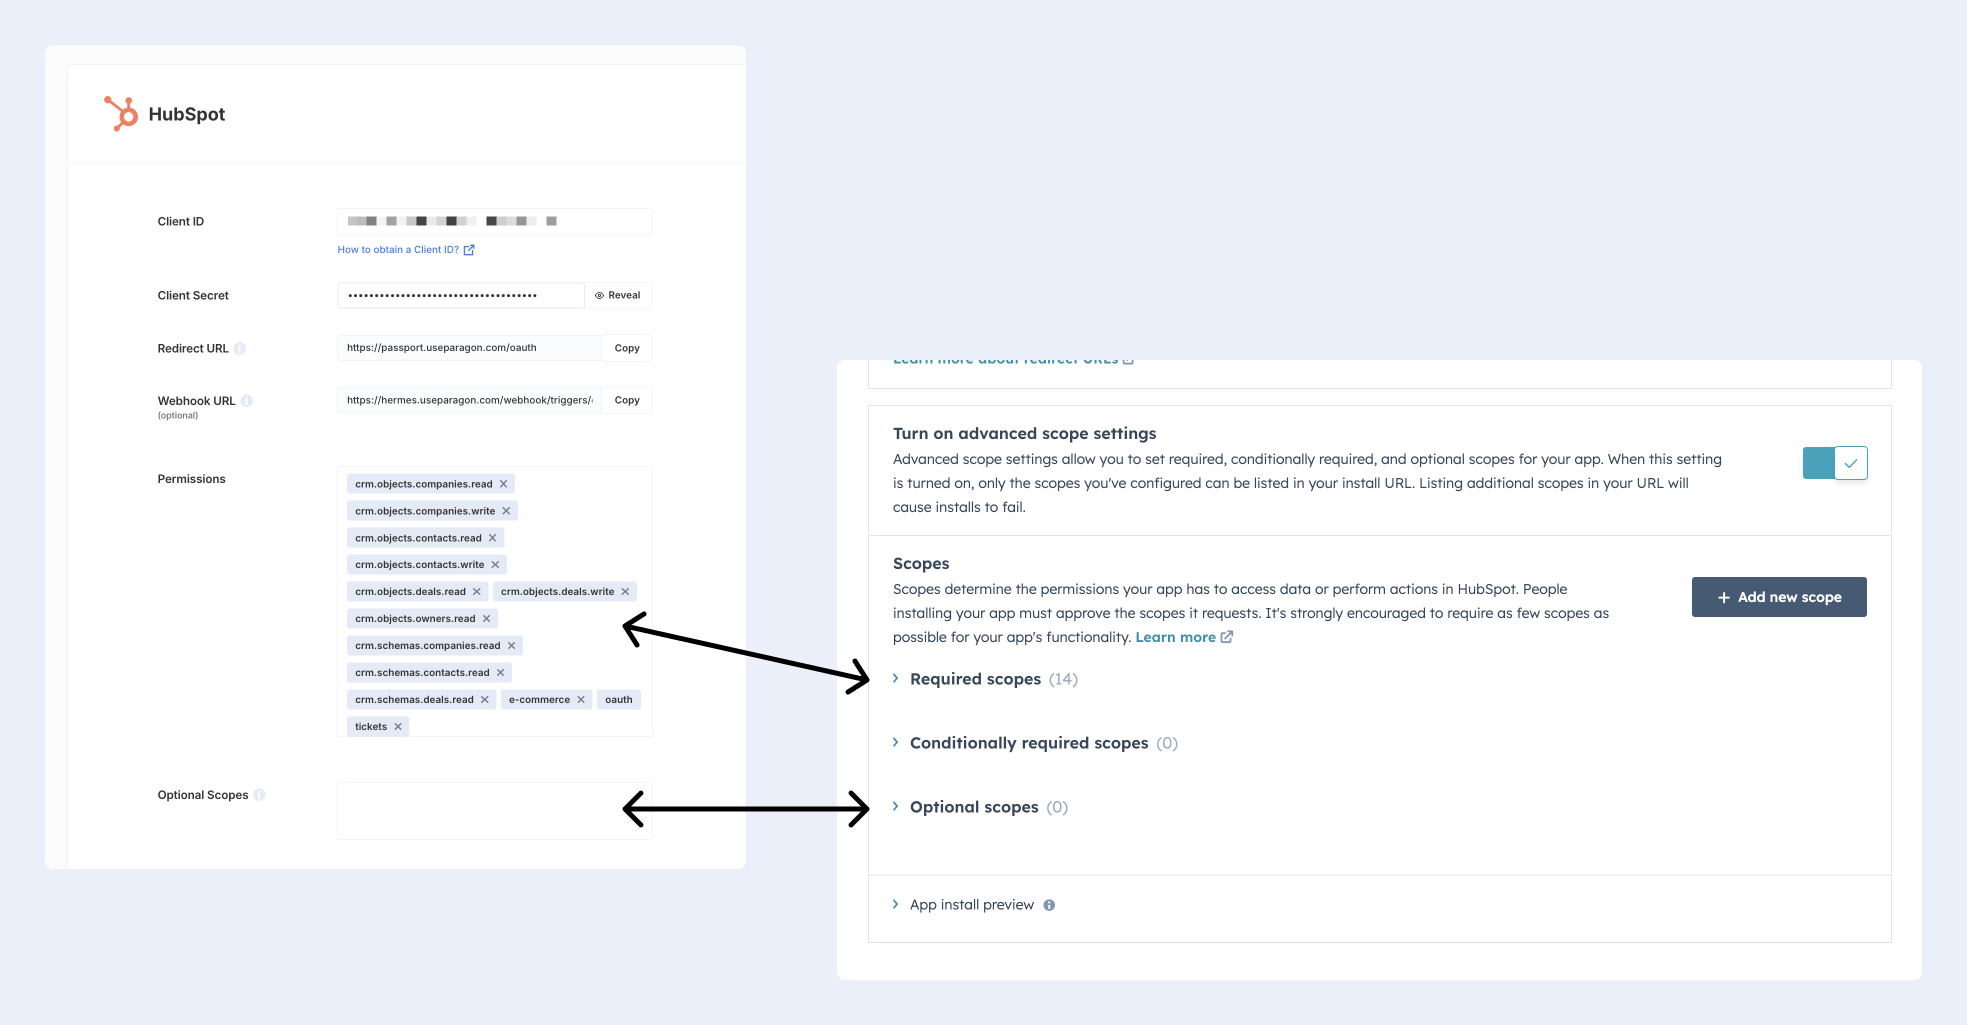
Under Integrations > HubSpot > App Configuration, fill out your credentials from the end of Step 1 in their respective sections:- Client ID: Found under Auth > Auth settings > Client ID on your HubSpot App page.
- Client Secret: Found under Auth > Auth settings > Client secret on your HubSpot App page.
- Permissions: Select the required scopes you’ve indicated as Required scopes for your HubSpot application.
- Optional Scopes: Select any optional scopes indicated as Optional scopes in your HubSpot application.
Note: The scopes you specify in Paragon should exactly match the scopes you permitted in your HubSpot application page.
Connecting to HubSpot
Once your users have connected their HubSpot account, you can use the Paragon SDK to access the HubSpot API on behalf of connected users. See the HubSpot REST API documentation for their full API reference. Any HubSpot API endpoints can be accessed with the Paragon SDK as shown in this example.Building HubSpot workflows
Once your HubSpot account is connected, you can add steps to perform the following actions:- Create Record
- Update Record
- Get Records
- Get Record by ID
- Search Records
- Delete Record by ID
- Get Contacts by List ID
{{ to invoke the variable menu.
.png?fit=max&auto=format&n=EuLlf5VxgsSnEq57&q=85&s=1682010ed531ddd3a955851a3ddd16a6)
Working with HubSpot Custom Objects and Custom Fields
It’s common that different HubSpot instances may be configured with different Custom Objects or Custom Fields. Paragon provides the ability for your users to choose their own Custom Object mapping.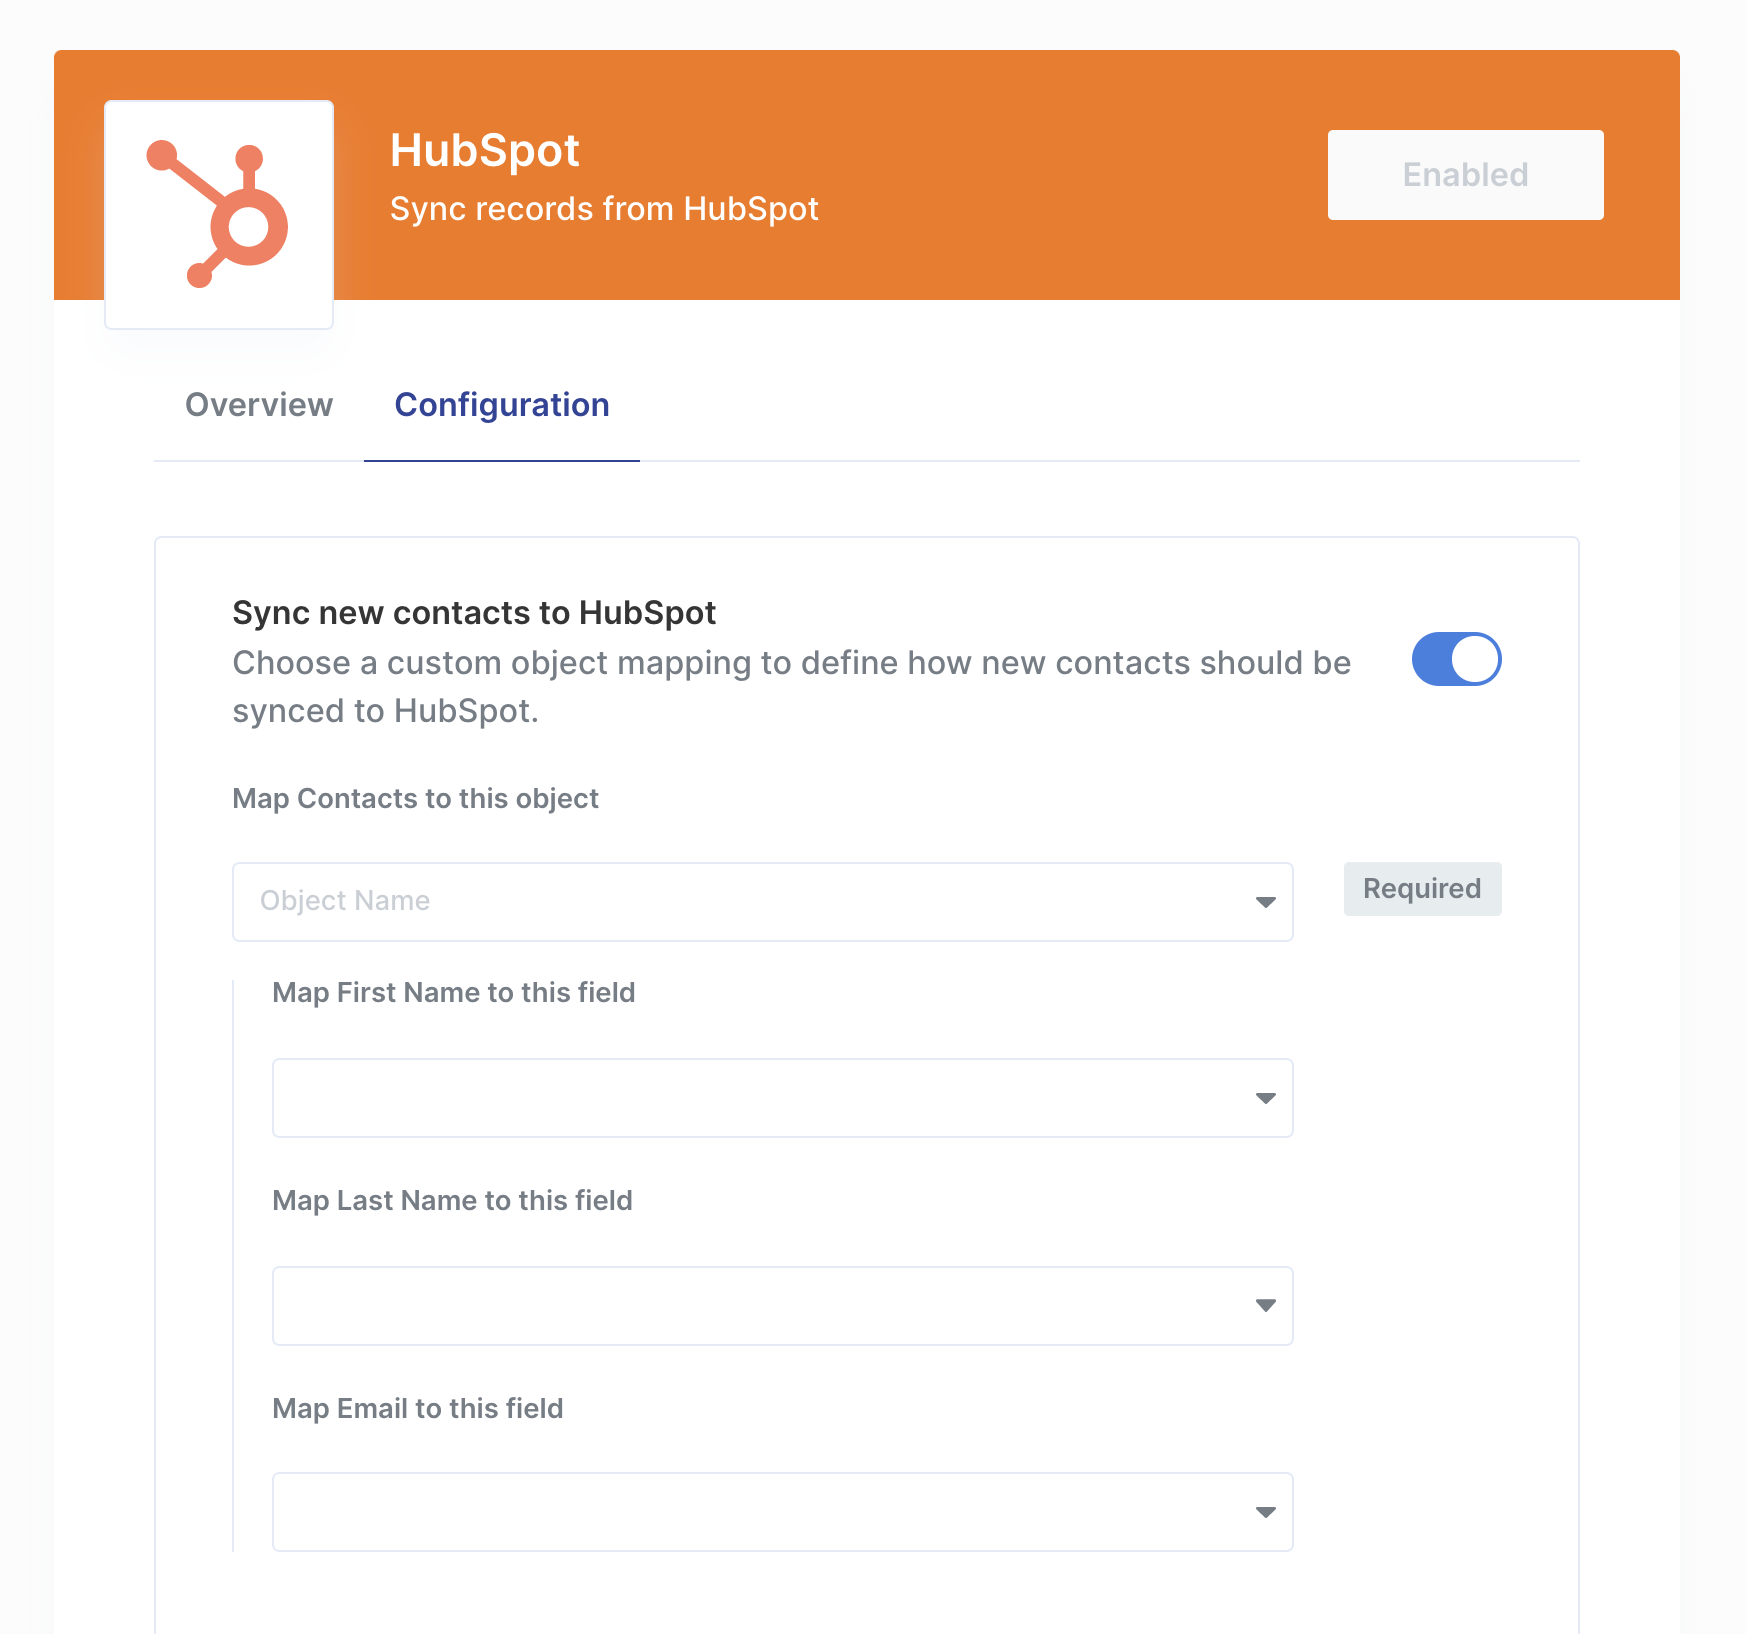
Custom Object Mapping
To allow your users to choose their own Custom Object Mapping, add the Custom Object Mapping user setting in your Connect Portal Editor. You should give this setting a descriptive user-setting name, for example, if you’re mapping contacts from your app to HubSpot, you might call this “Map Contacts to this object”.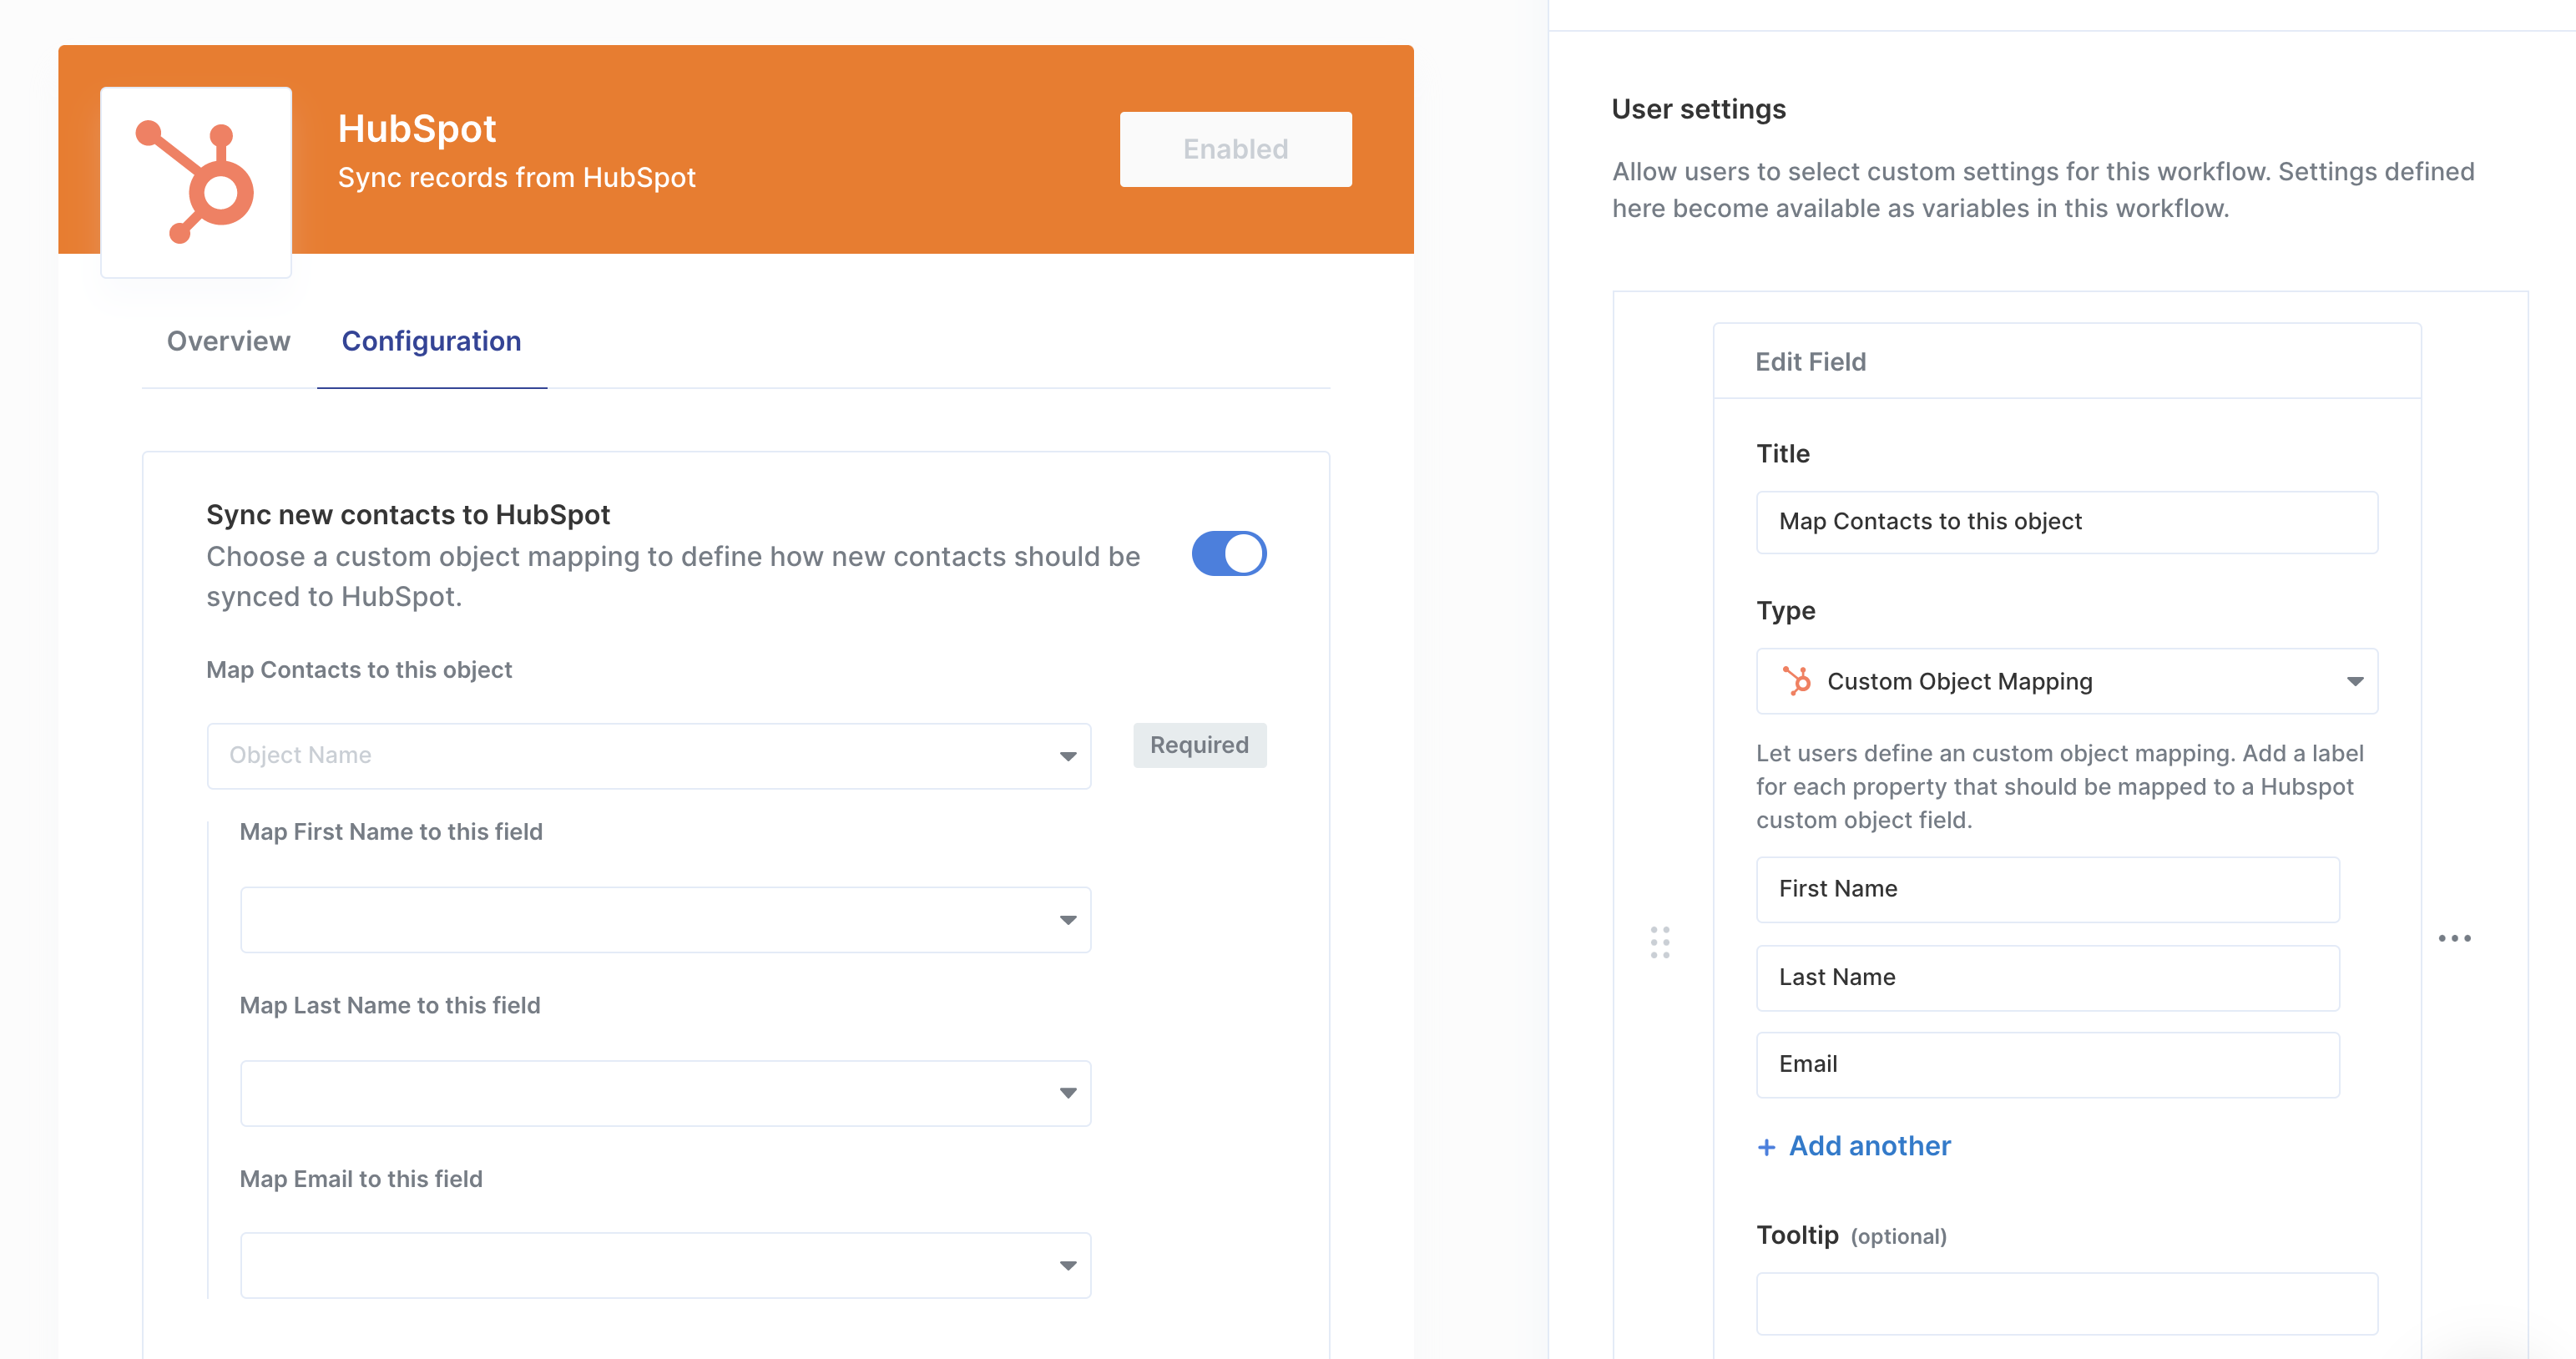
Using Webhook Triggers
Webhook triggers can be used to run workflows based on events in your users’ HubSpot account. For example, you might want to trigger a workflow whenever new contacts are created HubSpot to sync your users’ HubSpot contacts to your application in real-time.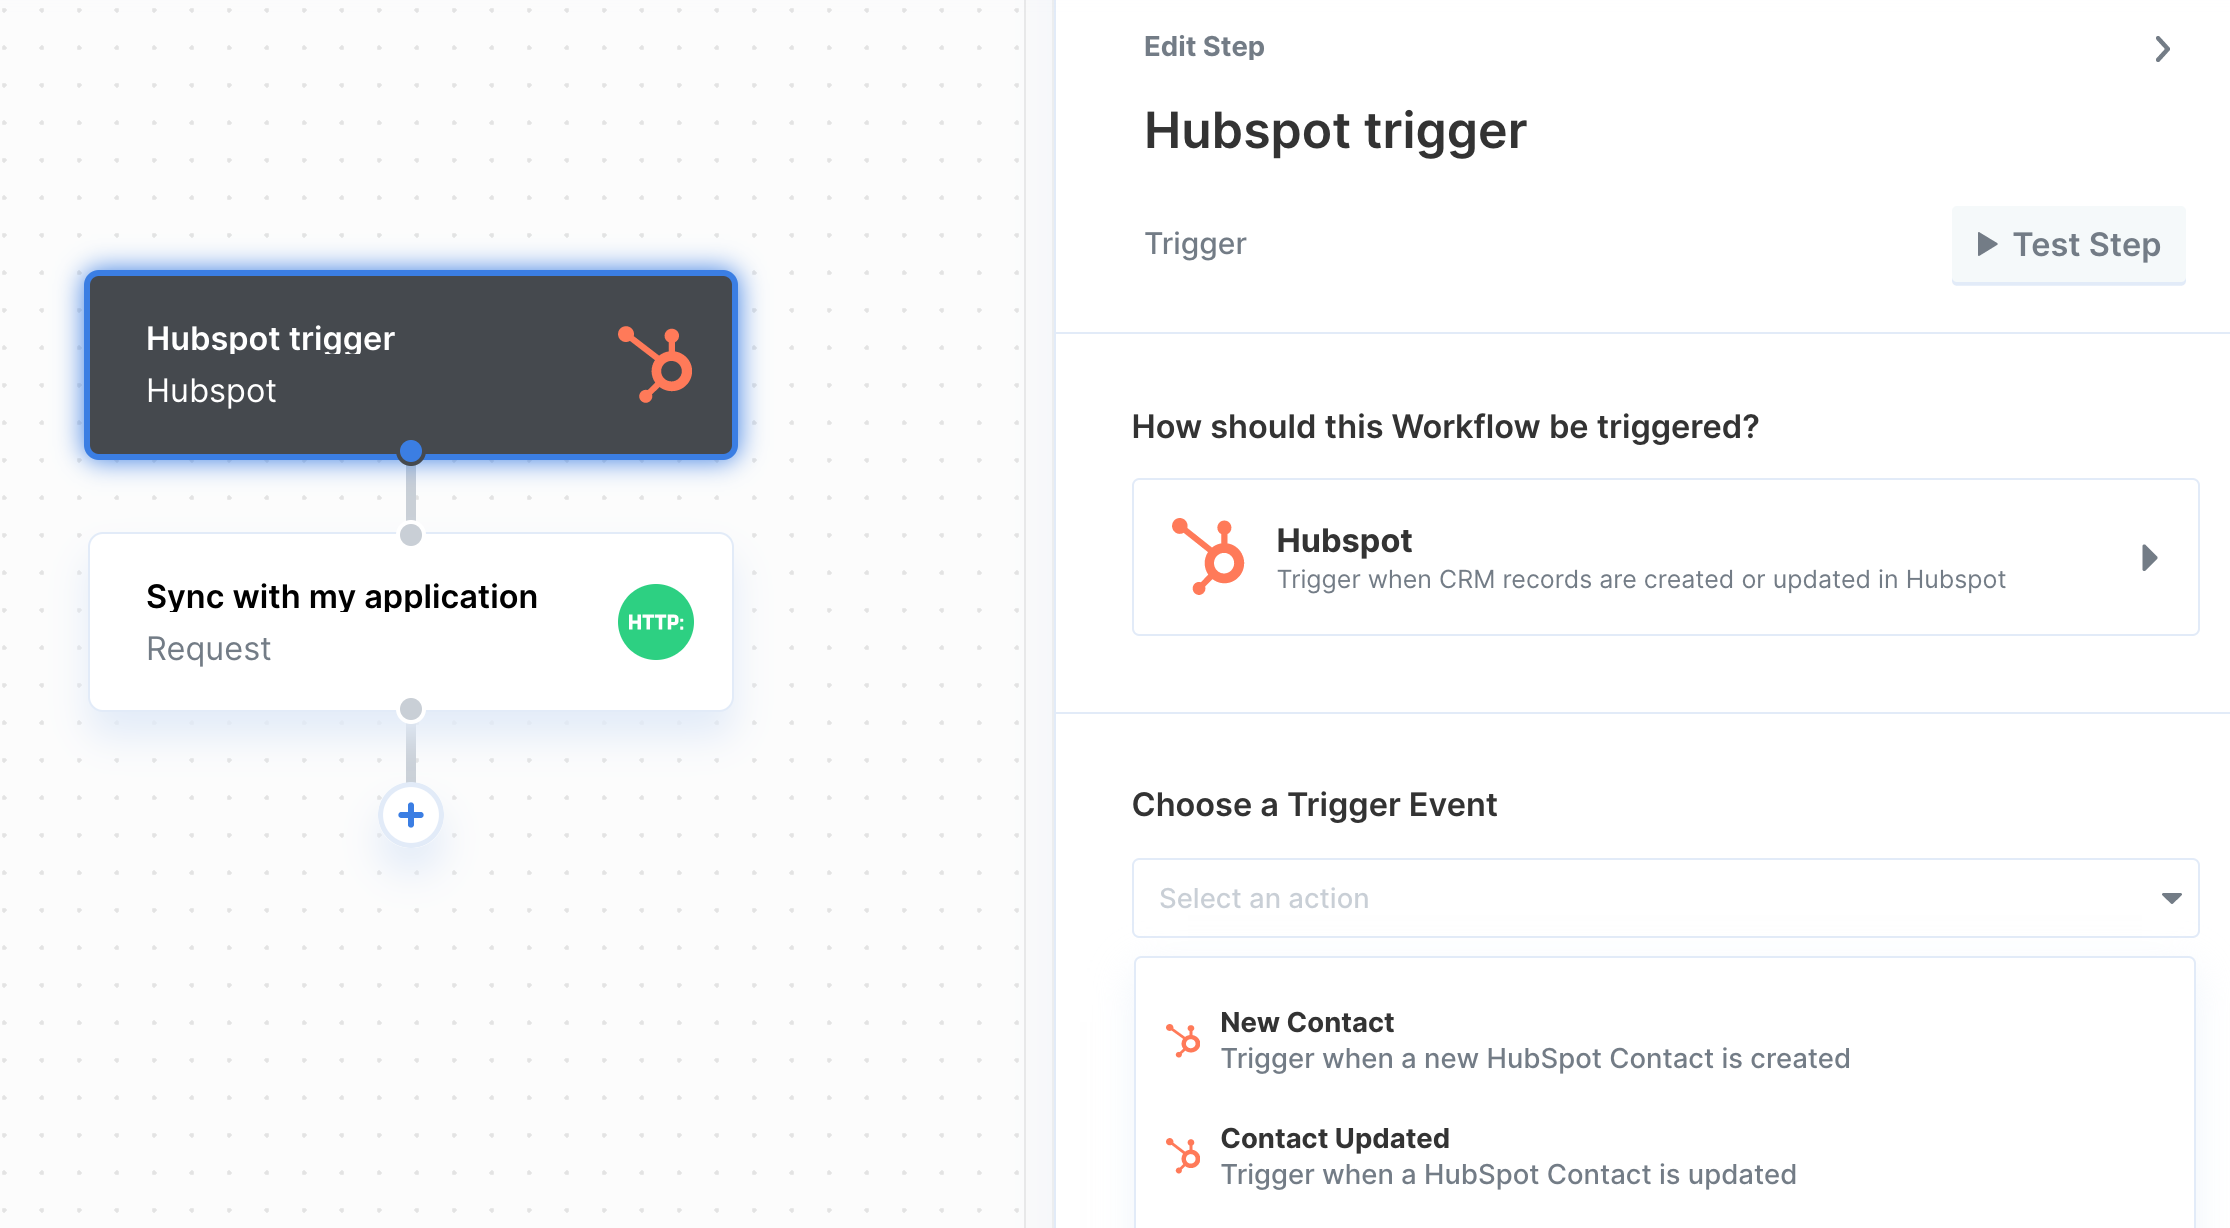
- New Record
- Record Updated
- Record Deleted
- Record Deleted for Privacy (GDPR)
Add Webhooks to your HubSpot App
Using HubSpot triggers requires you to add webhooks as a feature to your HubSpot App. To add webhooks to your HubSpot App, follow Setup > Steps 3 and 4 to register Paragon’s webhook URL with HubSpot and subscribe to the event types you are listening for.Webhooks for Legacy Apps
If you are not yet using HubSpot’s project-based framework, follow the instructions below to register Paragon’s Target URL in your Legacy App.Configuring webhooks for HubSpot Legacy Apps
Configuring webhooks for HubSpot Legacy Apps
Paragon provides a webhook Target URL to subscribe your HubSpot app to events in your users’ HubSpot instances. To add the target URL to your HubSpot app: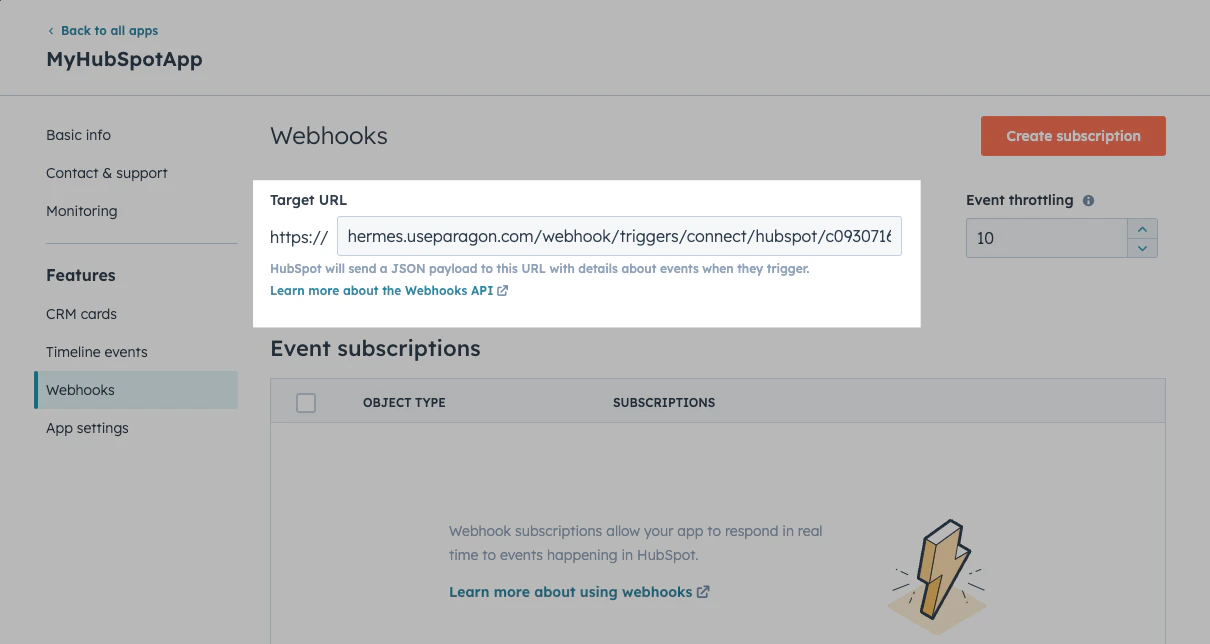
- In the Settings tab of your HubSpot integration in Paragon, copy the link under Webhook URL.
- Log in to your HubSpot developer dashboard, select your HubSpot developer account, and open your app under Legacy Apps.
- In your HubSpot App page sidebar, navigate to Features > Webhooks.
- Provide the Target URL. Paragon will automatically begin listening to events on behalf of your app.
- Click Save at the bottom of the HubSpot App dashboard.
Publishing your HubSpot App
Required for publishing: In order to list your app on the HubSpot Marketplace, you must implement the following additional features in your integration:For more information, see HubSpot’s documentation on publishing requirements.
Setting up Redirect Pages in your app
Your HubSpot App requires a Redirect Page hosted in your application to support an installation flow that begins in the HubSpot Marketplace (i.e., a user searches the HubSpot Marketplace for your app and clicks Install). The Redirect Page should be implemented as follows:-
Allow
X-Frame-Optionsforhubspot.com.- During the installation process, HubSpot will load your Redirect Page URL in a hidden
iframeto complete the OAuth exchange. - If this is not possible, you will need to use the partner sign-in flow option described here. This will first redirect users to your app directly to begin an installation request (Initial Redirect), rather than using an
iframeto complete the installation flow.
- During the installation process, HubSpot will load your Redirect Page URL in a hidden
-
Import the Paragon SDK and authenticate a user.
- If the user is not yet logged into your app, we suggest that you redirect to a login form, while preserving the intended URL to redirect to upon successful login. After logging in, your user should see your Redirect Page.
-
Accept and read query parameters, which will be:
code: The temporary authorization code to pass to Paragon for completing the OAuth exchange.returnUrl: The URL to redirect to after completing the OAuth exchange.
-
Call
paragon.completeInstallto complete the OAuth exchange and save a new connected HubSpot account.Complete the OAuth exchange
Configuring your Redirect Page in your HubSpot App
First, add your production Redirect Page URL to your HubSpot App configuration by modifying your project’sapp-hsmeta.json to include it as an authorized redirect URL:
Add Redirect Page URL
Update HubSpot App
- In Listing Info > Information, select your Redirect Page URL as the Install button URL (you can use a
localhostURL while testing a draft). - For Sign-in configuration, select “No partner login required, HubSpot OAuth only”.
