- Example: when a lead is created in your app, send lead data to your customer’s CRM and provide a custom response upon success.
- Example: expose an endpoint that gets called by your app to pull contacts from their CRM.
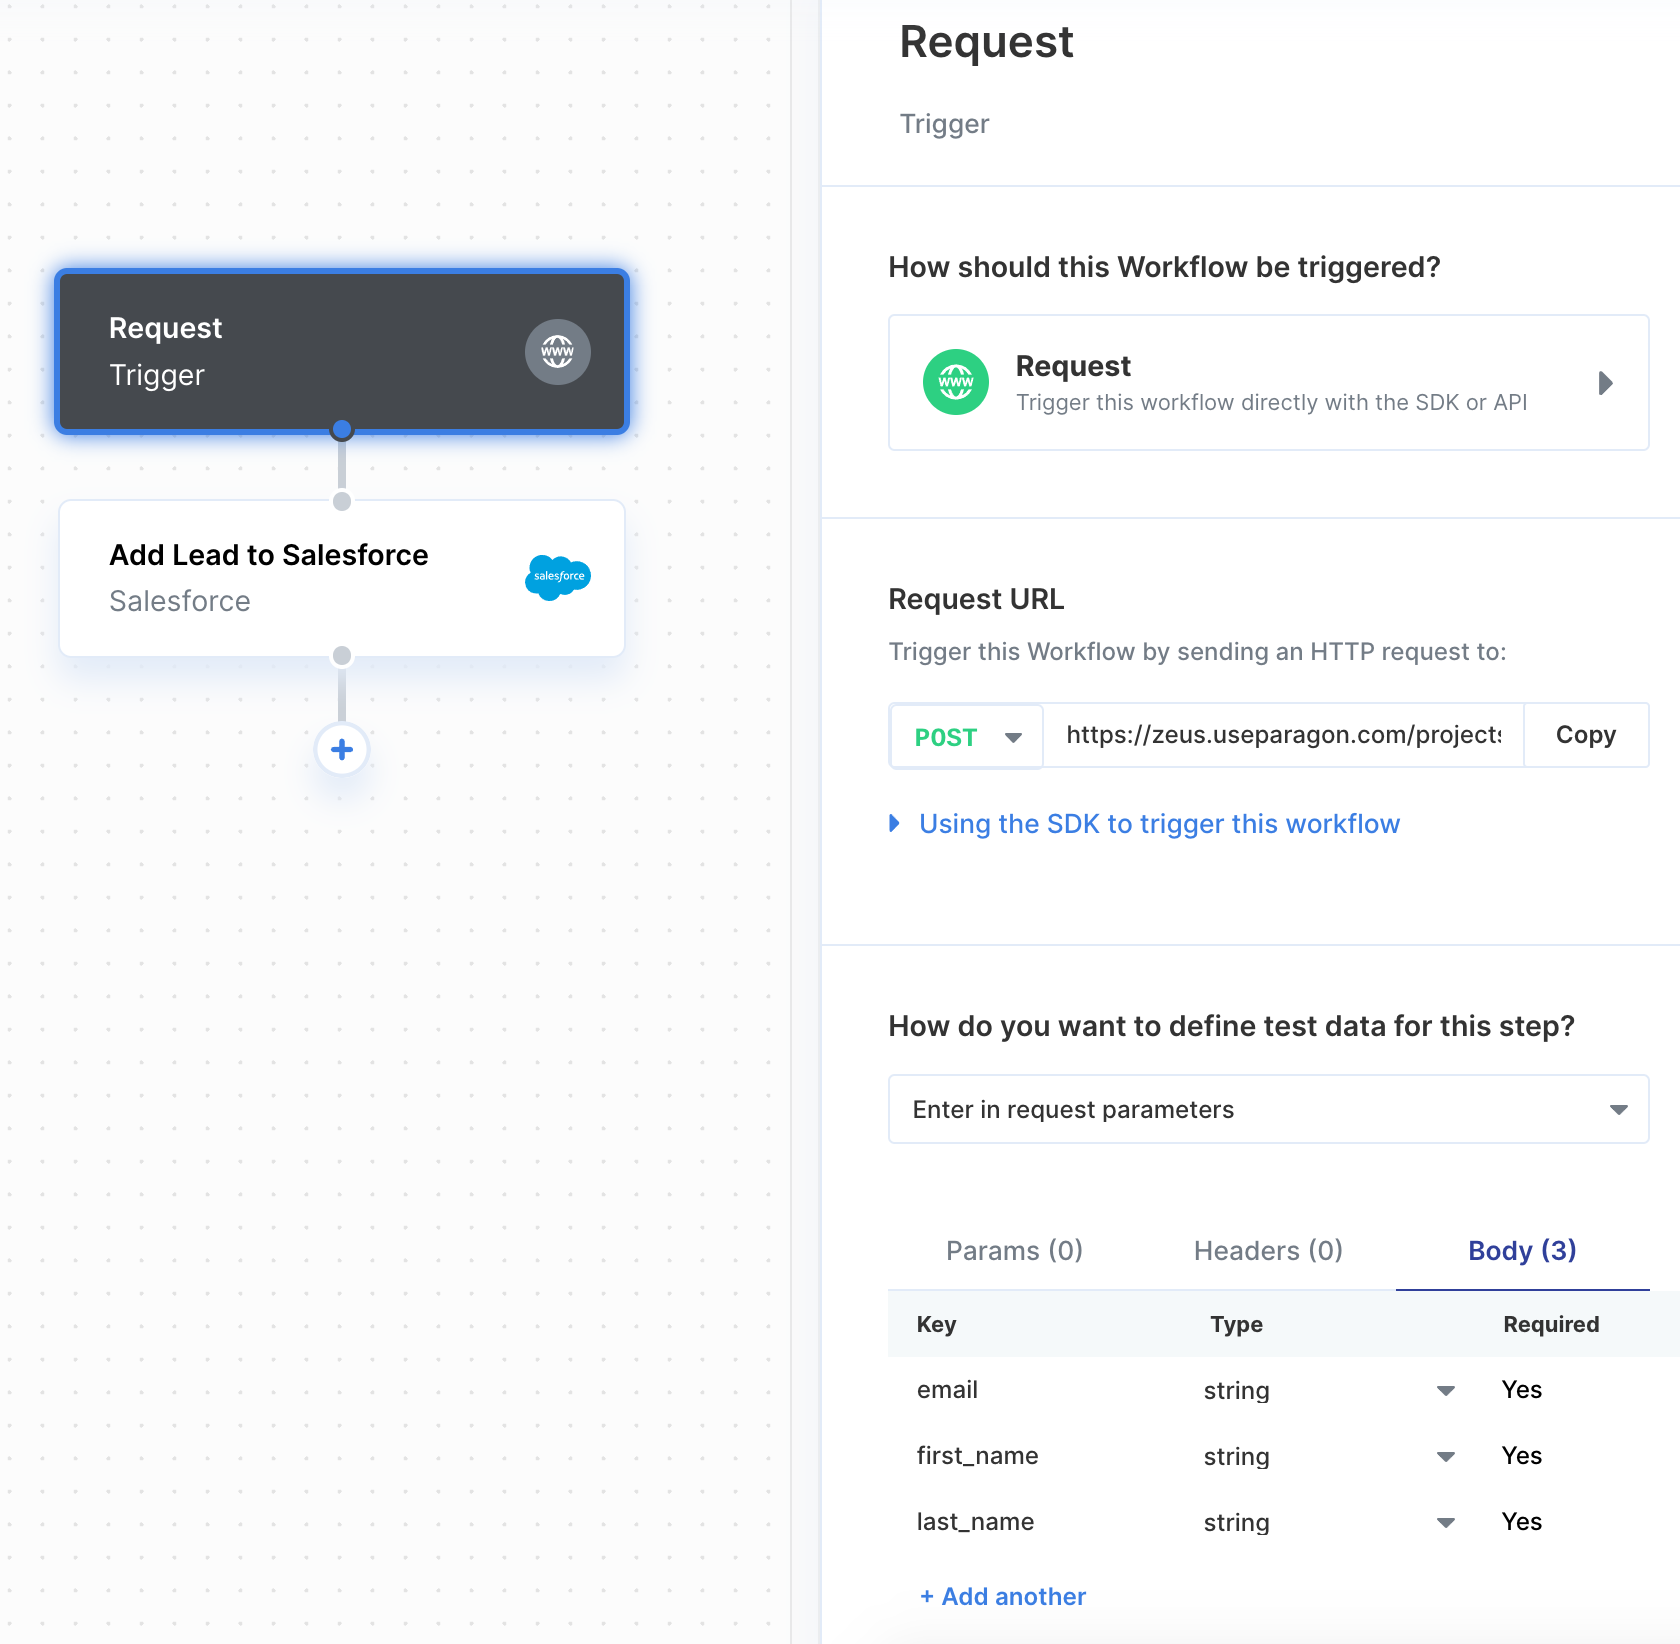
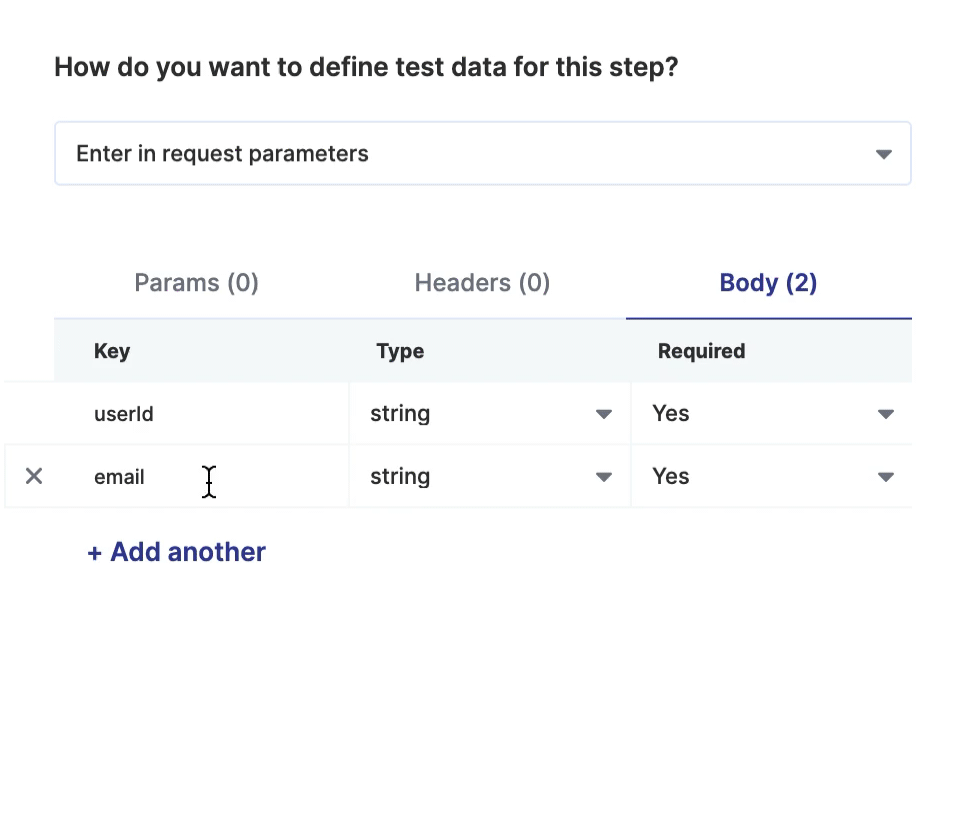
POST request to their unique URL. You can manually enter the expected query parameters (Params), headers (Headers), and body parameters (Body) to use as variables by other steps in the workflow.
- JavaScript SDK
- REST API
Defining Test Data
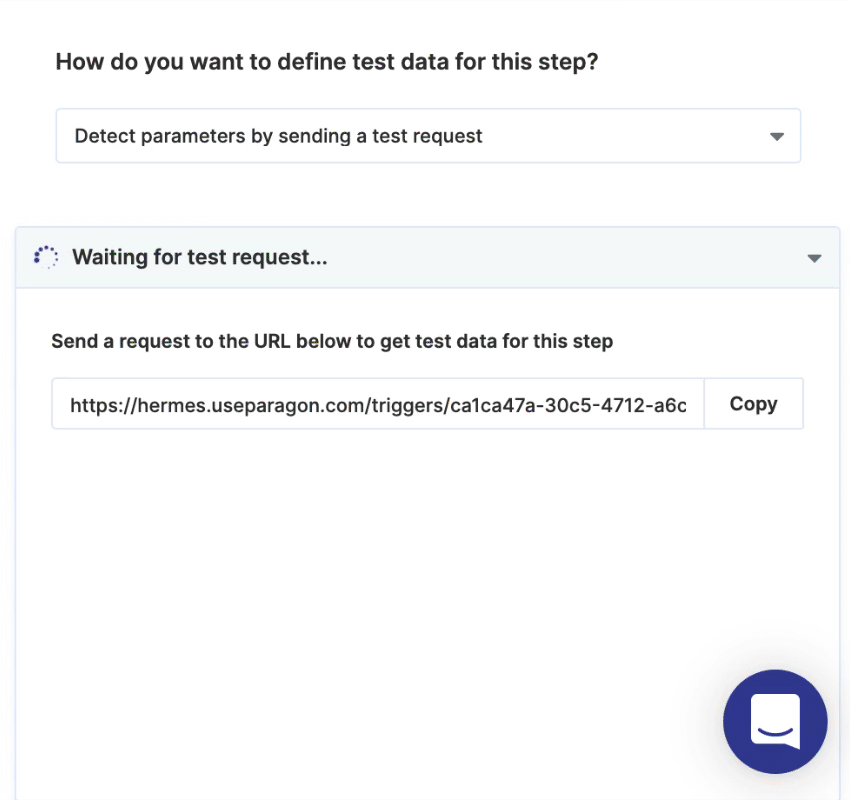
There are two ways to define what data you expect to be sent by incoming requests to the workflow:- Manually entering the expected request data
- Automatically detecting data by sending a test request
Triggering with Files
Paragon offers multiple ways to manage files within your workflows, enabling features like sending email attachments and retrieving files from storage providers such as OneDrive.Hex-encoded file
You can pass in hex-encoded data in a Paragon file object to either an App Event or Request Trigger to be handled in the workflow. Here’s an example file object structure:multipart/form-data
multipart/form-data is a MIME encoding type used for sending binary data, like files, and text data in a single HTTP request.Sending a Response
Request-triggered workflows support sending a custom response to the original HTTP request that triggered the workflow.Note:
- If your Request-triggered workflow does not require a custom response, your workflow will respond immediately upon request with 202 Accepted.
- When using a custom response, your workflow will have a limit of 55 seconds to reach the Response step. If your workflow may potentially run longer, you will need to handle timeout errors. See Response time limitations below for more details.
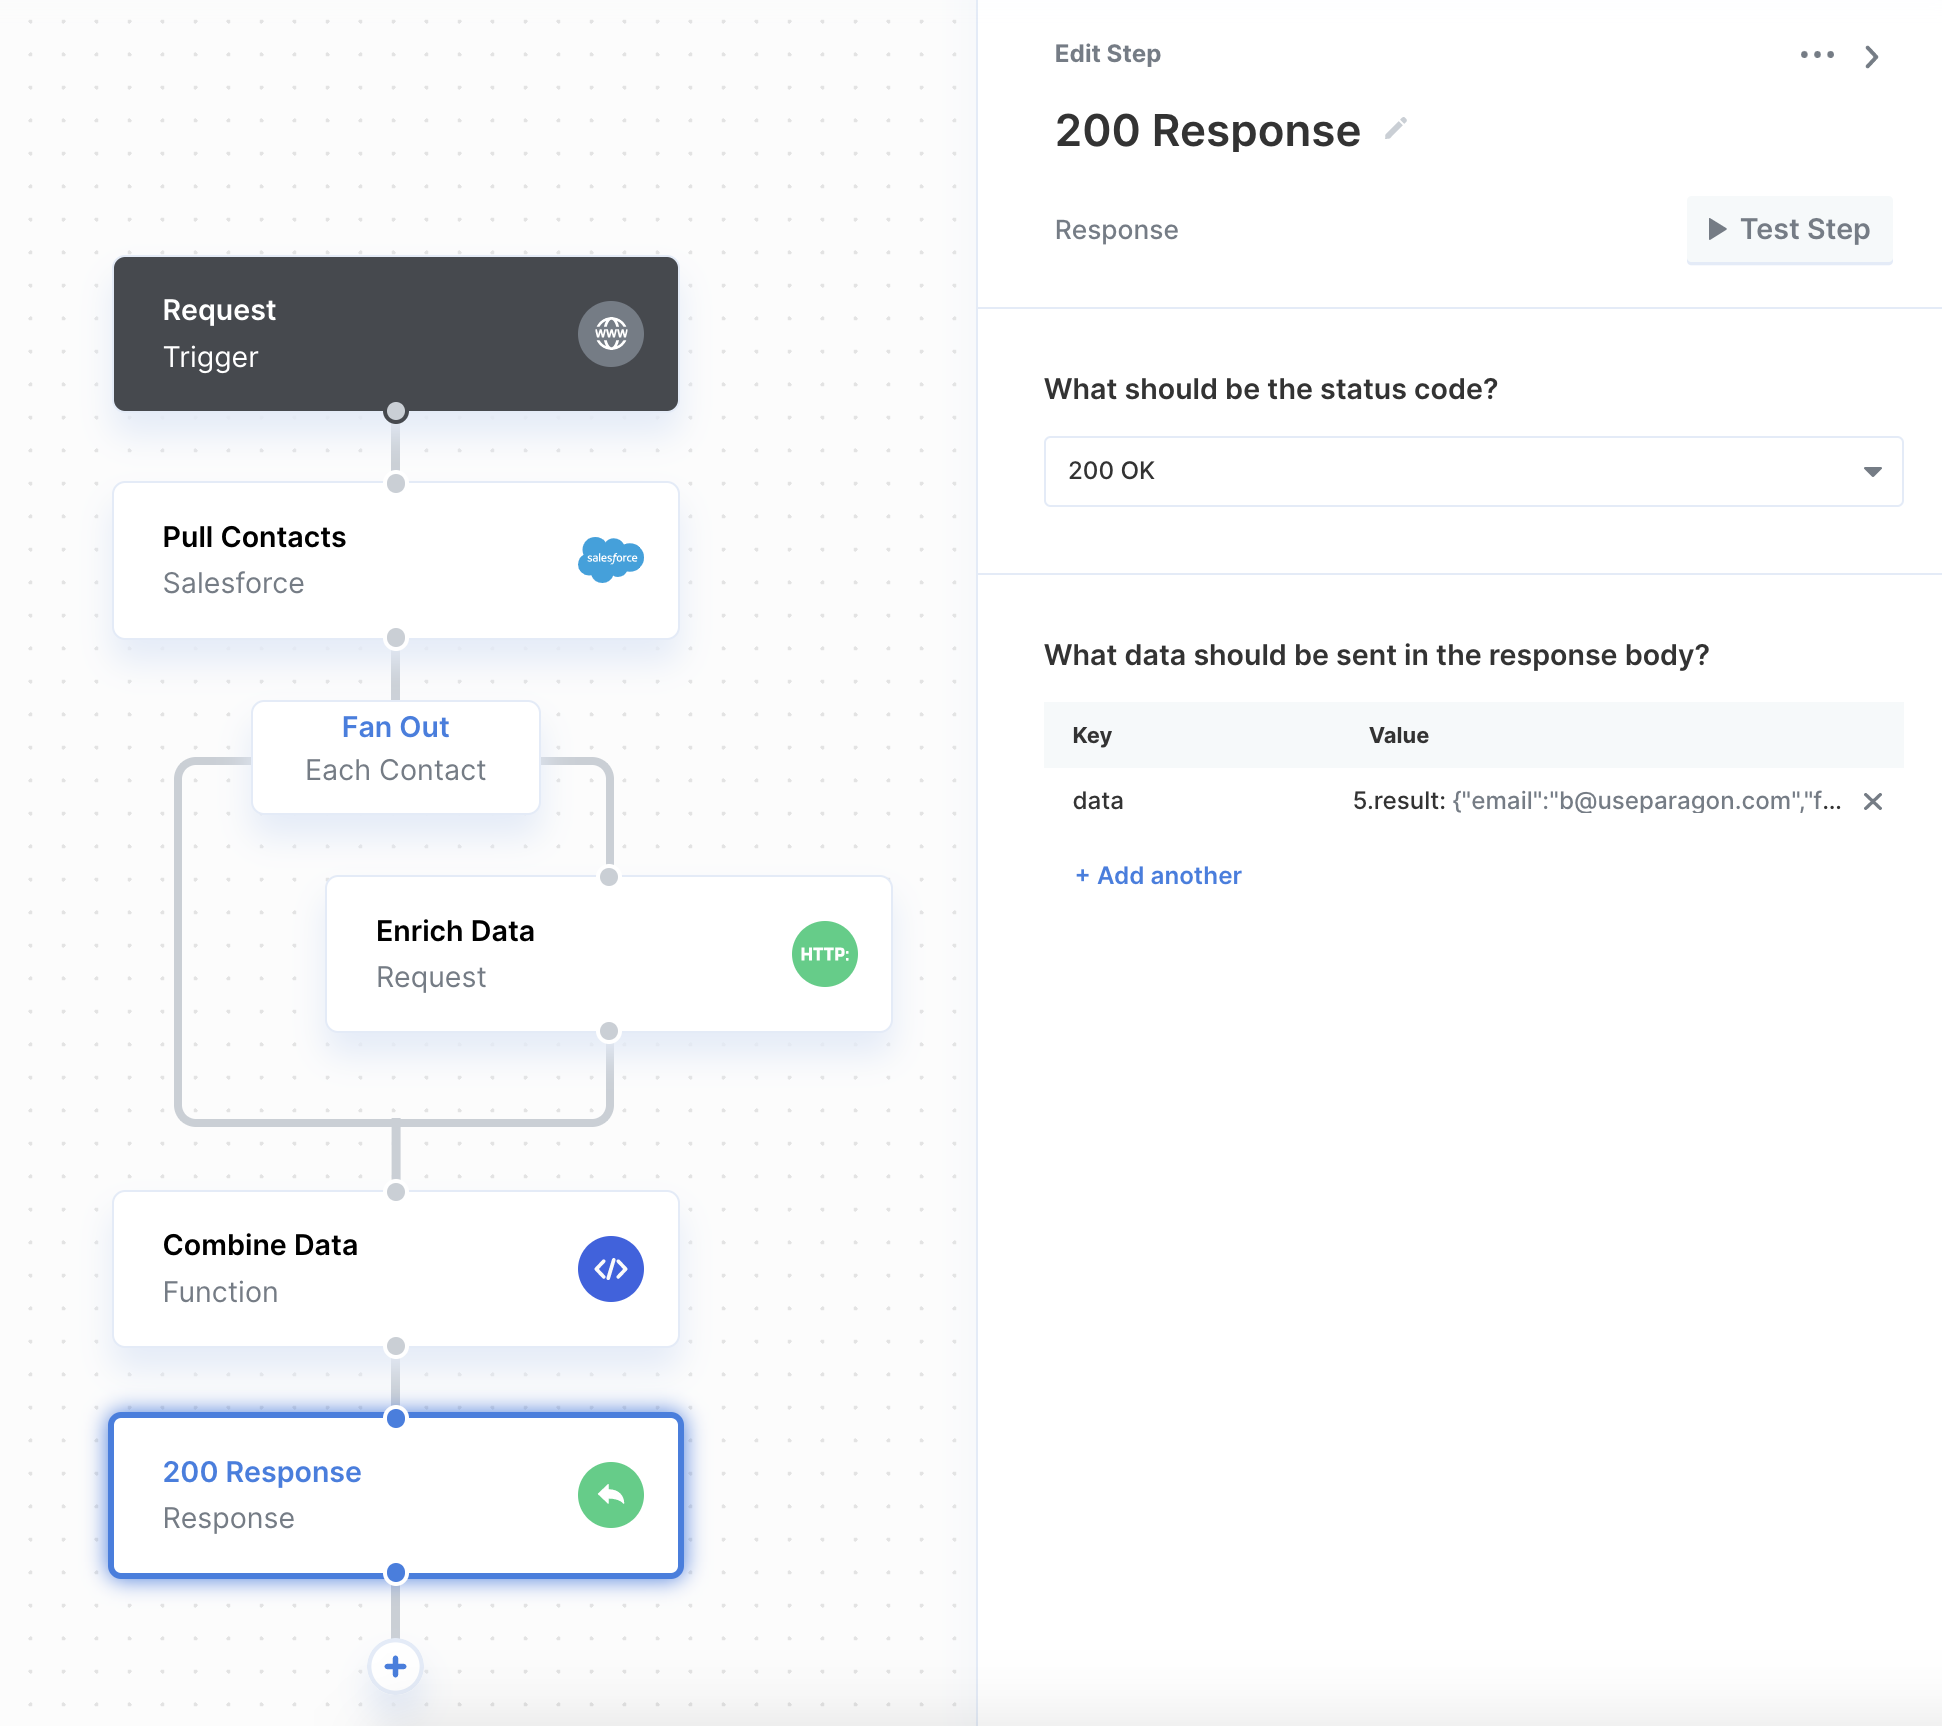
Defining response data
There are two components to a Response: its status code and its data. In general, you should send the200: OK status code if the workflow ran successfully, you can choose from other commonly used status codes for more specific cases (e.g. if a Request failed, send an error response).
You can choose what data to send the response body using the key-value table to reference data from previous steps in the workflow.
Sending files in responses
You can use the Response step to send files to your application. To do so, select “File” as the Response Type and reference a File object from a previous step. File objects are returned from file-related Integration Actions and Request steps which include a file in the response.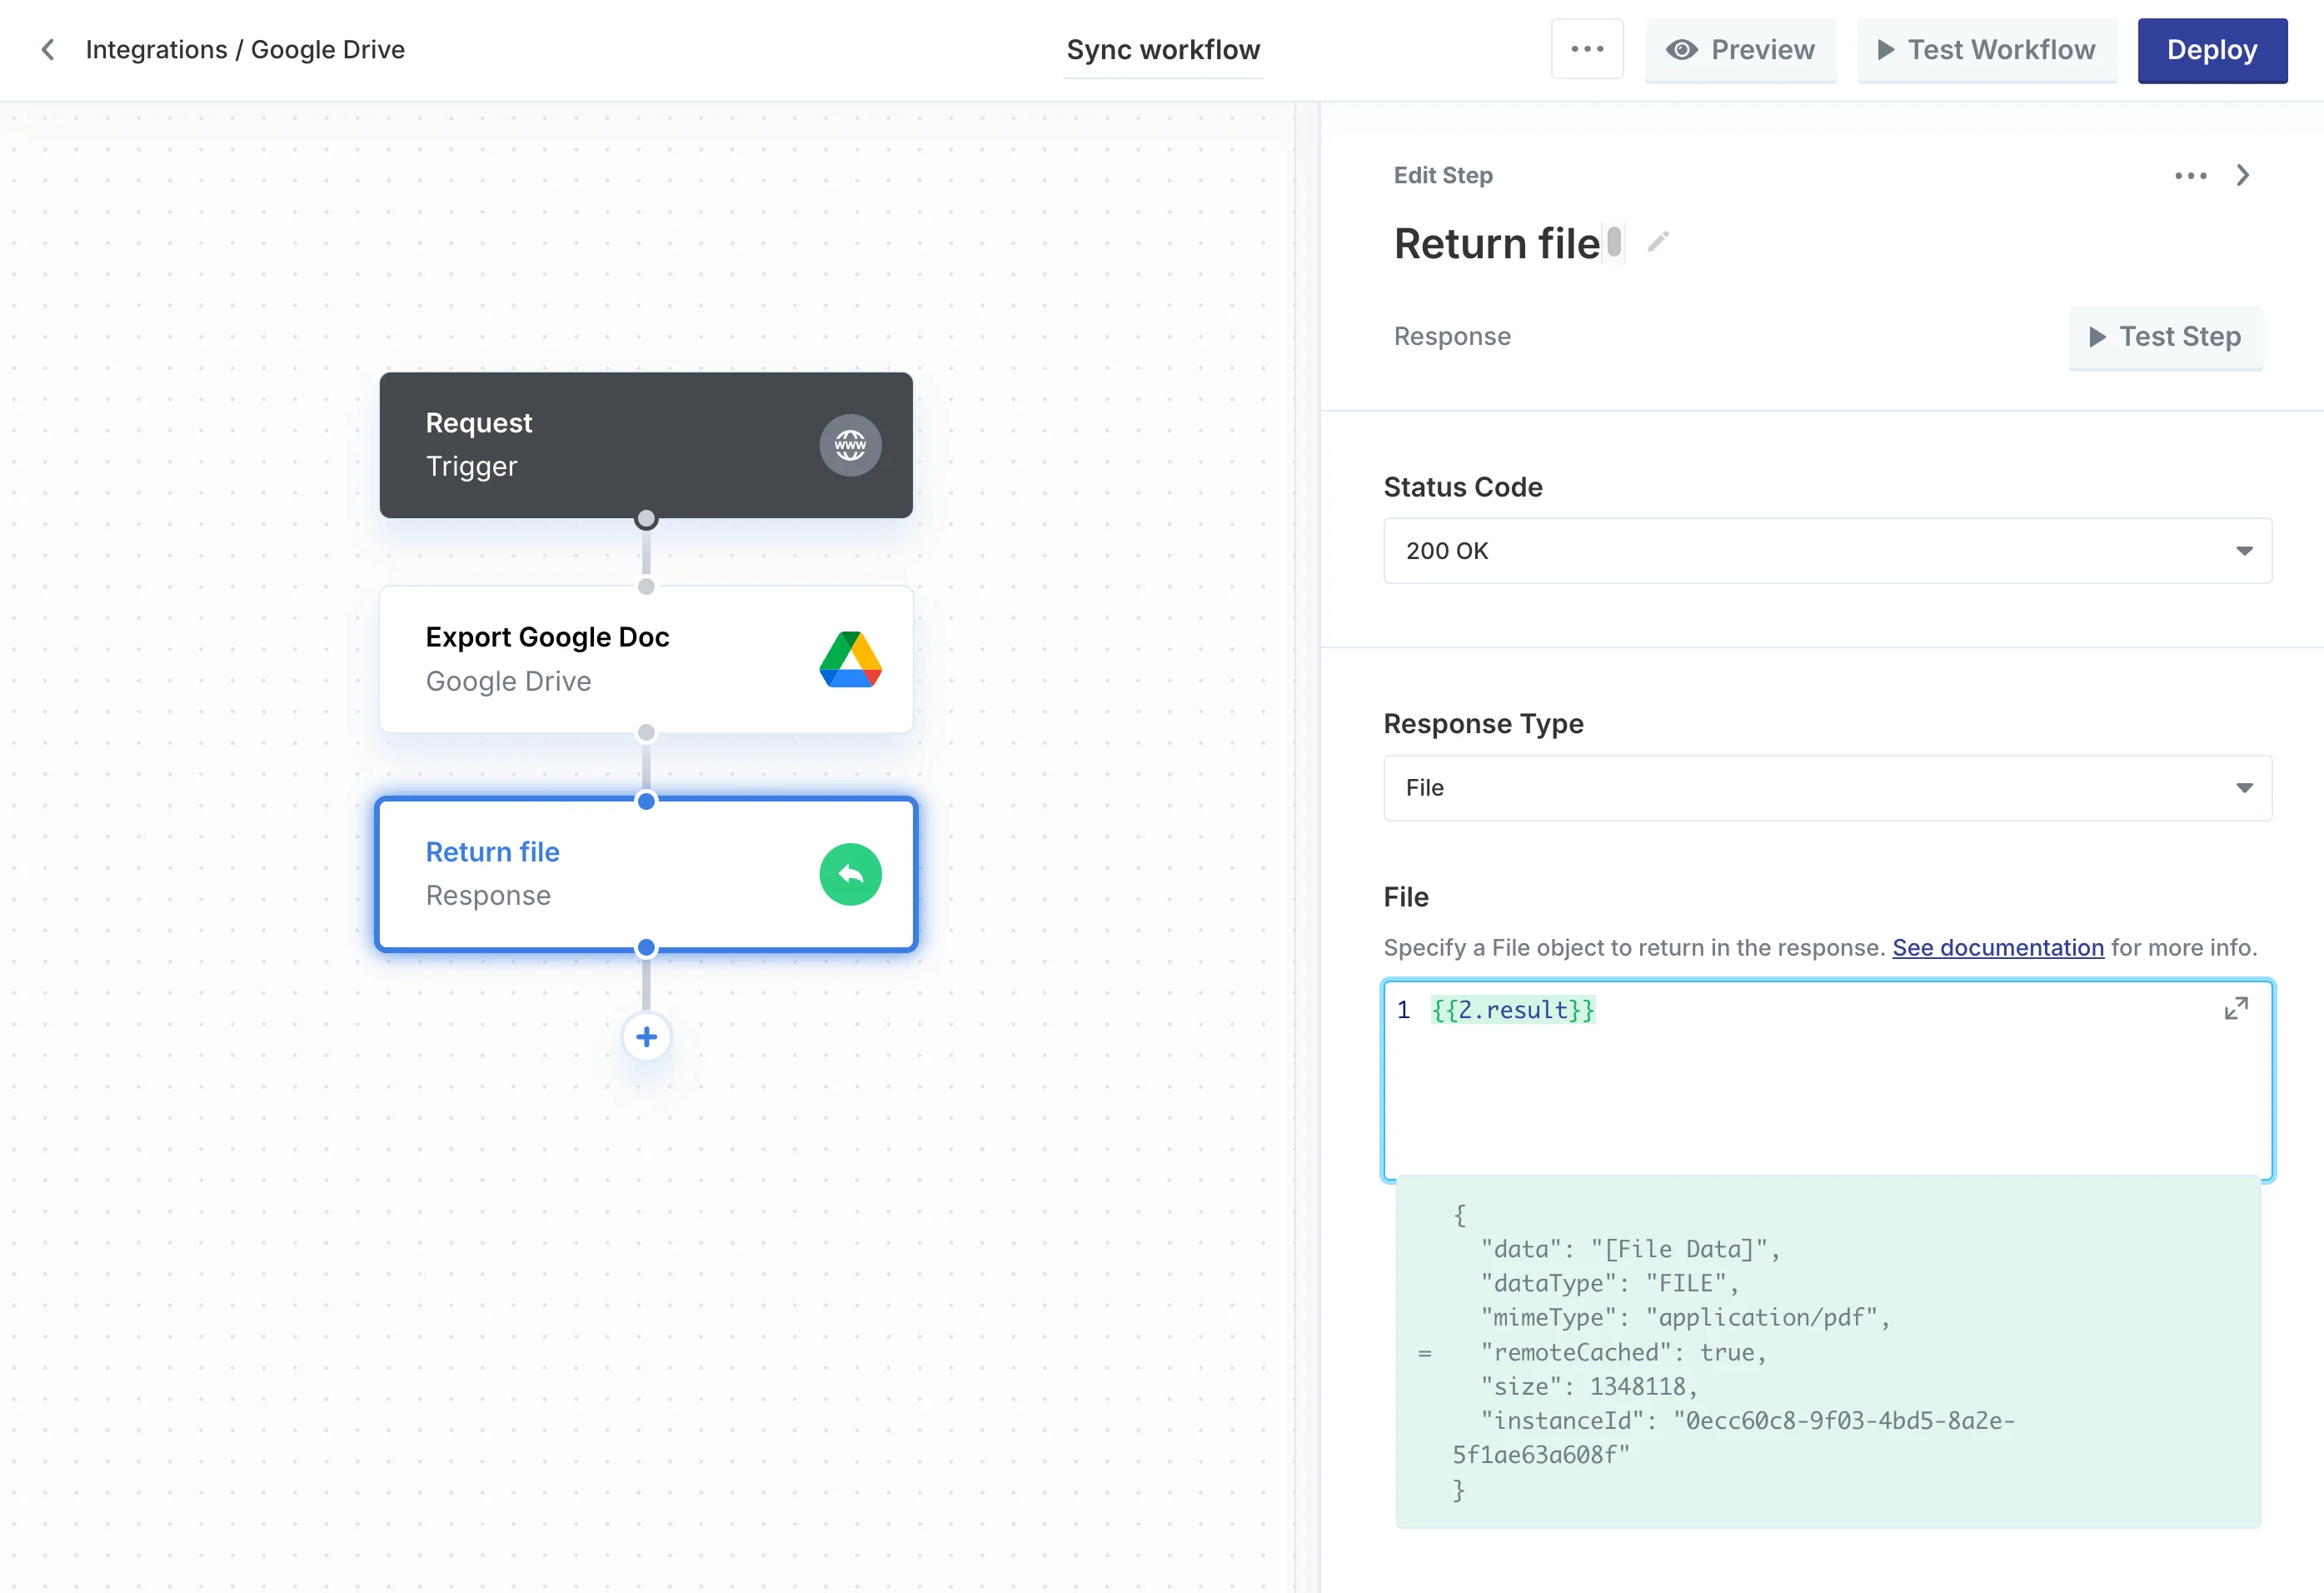
Content-Type of the file’s MIME type and the raw bytes of the underlying file.
Response time limitations
When using a custom response, your workflow will have a limit of 55 seconds to reach the Response step. If your workflow does not reach the Response step in that time, the HTTP request will respond with a 542 status code to indicate a response timeout. A 542 status code does not indicate that your workflow was unsuccessful; your workflow may still be running, but the results were not processed in time to provide a synchronous response. The timeout response will be returned as a JSON body which includes the workflow execution ID for your reference. You can use this ID to retrieve results using the Task History API or to view results in the dashboard’s Monitoring page.- Link to view execution in Monitoring:
https://dashboard.useparagon.com/connect/projects/[Project ID]/monitoring/workflows/[Workflow ID]/executions/[Workflow Execution ID]