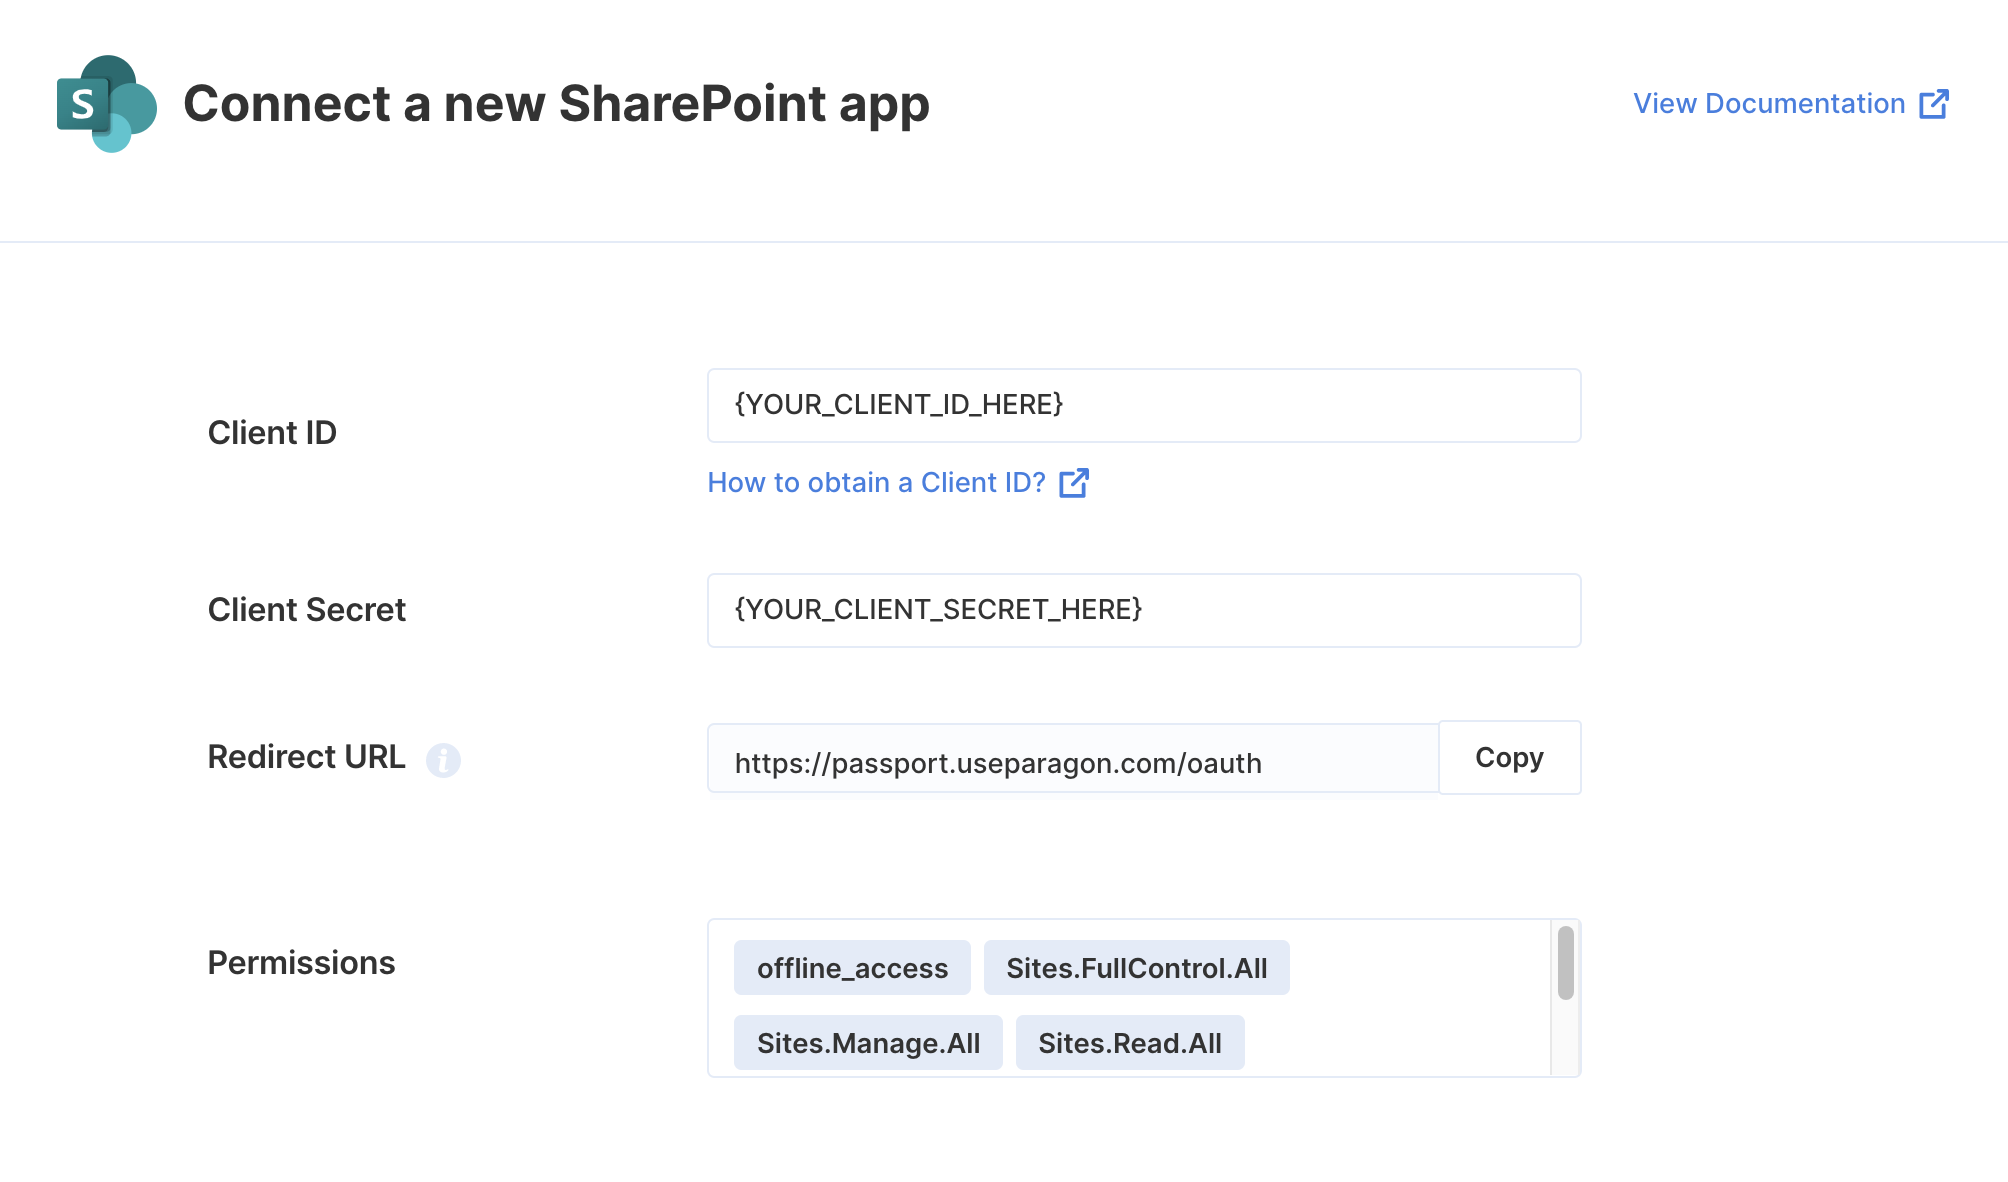
- Client ID
- Client Secret
- Scopes Requested
Prerequisites
- A Microsoft Azure account
Add the Redirect URL to your SharePoint app
Paragon provides a redirect URL to send information to your app. To add the redirect URL to your SharePoint app:- Copy the link under “Redirect URL” in your integration settings in Paragon. The Redirect URL is:
- Log in to the Microsoft Azure Portal using your Microsoft account.
- Navigate to All Services > App Registrations and select your application.
- Select Authentication from the sidebar.
- Under Platform configurations, press the “Add a platform” button.
- Select the Web platform.
- Paste the Redirect URL from Step 1 under Redirect URIs.
- Press the Save button at the top of the page.
Generate a Client Secret
Since SharePoint does not automatically provide you with a Client Secret for your application, we’ll need to make one. To get your Client Secret:- Navigate to Manage > Certificates & secrets in the sidebar.
- Under Client Secrets, press the + New client secret button.
- Name your client credentials and select an expiry that works best for your application. Press Add to create your credentials.
- Copy the displayed Client Secret under the Value column.
Note: You will need to periodically create new and update your Client Secret as they expire for all Microsoft integrations.
Enable Multi-tenancy to your SharePoint app
To allow Microsoft users from outside of your organization to connect to your SharePoint application, you must specify this as an option within the SharePoint application registration.- Log in to the Microsoft Azure Portal using your Microsoft account.
- Navigate to All Services > App Registrations and select your application.
- Select Authentication from the sidebar.
- Under Supported account types, press the “Accounts in any organizational directory” option.
- Click Save.
Using Application Permissions
Application Permissions can be used with SharePoint if your integration should make requests as an application (like a service account), rather than in the context of an authenticated user. Using Application Permissions requires Connected Users to provide organization-wide admin consent for the application, by either:- Requiring Entra ID administrators to follow the Connect Portal flow and checking “Consent on behalf of your organization” during the authorization flow
- OR directing admins to the
/adminconsentURL (described below) to explicitly grant admin consent.
If you are only using Delegated Permissions (the default option to use the integration in the context of an authenticated user), you can skip this section and proceed to Add your SharePoint app to Paragon.
Generate a certificate key pair
Locally on your machine, create a self-signed certificate and private key using This produces two files:
openssl:private-key.pem— the private key (keep this secret, you will provide it to Paragon)certificate.pem— the public certificate (you will upload this to Azure AD)
Get the certificate thumbprint
Extract the SHA-1 thumbprint in hex format (this matches what Azure portal displays):Save the output (a 40-character hex string). You will provide this to Paragon.
Upload the certificate to Azure AD
- In the Azure Portal, navigate to All Services > App Registrations and select your application.
- Navigate to Manage > Certificates & secrets in the sidebar.
- Select the Certificates tab.
-
Click Upload certificate and select the
certificate.pemfile from Step 1. - Confirm the displayed thumbprint matches the value from Step 2.
Add Application Permissions
- In your app registration, navigate to API permissions in the sidebar.
- Click Add a permission > Microsoft Graph > Application permissions.
-
Add the required scopes for your use case. For Managed Sync, add:
Sites.Read.AllFiles.Read.AllUser.Read.AllGroup.Read.All
- Click Add permissions.
Grant admin consent
A tenant admin must grant consent for the Application Permissions. Direct your admin to visit the following URL in their browser:
- Replace
{tenant-id}with the Entra ID Directory (tenant) ID (or useorganizations, if it is not known). - Replace
{client-id}with the Client ID of your App Registration.
Add your certificate to Paragon
Continue in the next section to add your SharePoint app to Paragon.
Add your SharePoint app to Paragon
- Select SharePoint from the Integrations Catalog.
-
Under App Configuration > Configure, fill out your credentials as follows:
- Client ID: Overview > Application (client) ID on your Microsoft app registration.
- Client Secret: The value generated in the Certificates & secrets section of your Microsoft app registration.
- Permissions: The scopes you require for your application, as designated in the API permissions section of your Microsoft app registration.
Note: You should only add the scopes you’ve requested in your app registration to Paragon. Any permissions changes will need to be made in both the Azure Portal and Paragon.
-
If you are using Application Permissions, additionally provide:
- Private Key: The contents of
private-key.pemfrom the certificate generation step. - Certificate Thumbprint: The 40-character SHA-1 hex thumbprint from Azure portal (no colons or spaces).
- Private Key: The contents of
- Press the purple “Save Changes” button to save your credentials.
Connecting to SharePoint
Once your users have connected their SharePoint account, you can use the Paragon SDK to access the SharePoint API on behalf of connected users. See the SharePoint REST API documentation for their full API reference. Any SharePoint API endpoints can be accessed with the Paragon SDK as shown in this example.Building SharePoint workflows
Once your SharePoint account is connected, you can add steps to perform the following actions:- Create Item
- Update Item
- Get Item by ID
- Get Items in a List
- Delete Item
- Create List
- Get List by ID
- Get Lists
- Create List Column
- Get List Columns
{{ to invoke the variable menu.
Using Webhook Triggers
Webhook triggers can be used to run workflows based on events in your users’ Sharepoint account. For example, you might want to trigger a workflow whenever new items are created in Sharepoint to sync your users’ Sharepoint items to your application in real-time.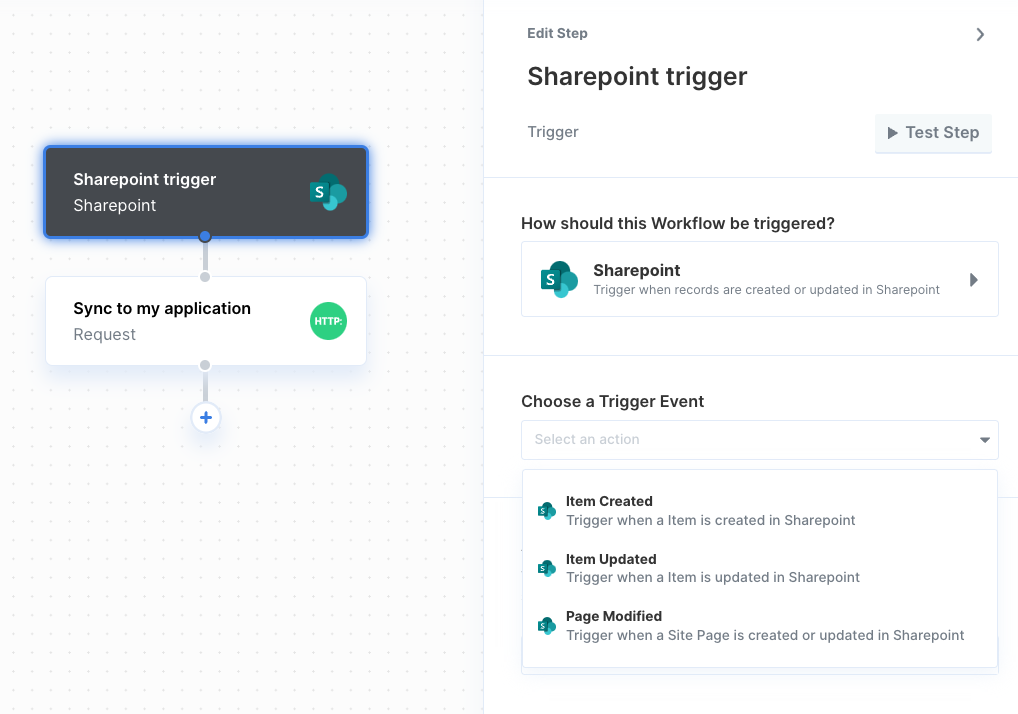
- Item Created
- Item Updated
- File Deleted
- Page Modified
Using the SharePoint File Picker
You can allow your user to select files from their SharePoint account in your app with the SharePoint File Picker provided by the Paragon SDK. Showing the File Picker Use the Paragon SDK in your frontend application to show the File Picker in your app. The SDK provides anExternalFilePicker class to load SharePoint’s JavaScript into your page and authenticate with your user’s connected SharePoint account.
Downloading the Selected File
The SharePoint File Picker callback will return aResponse object describing the user’s file picker interaction including an array of any files selected. Using this array of fileIds, you can use the Proxy API to perform an authenticated proxy requests to download the files.