Setup Guide
You can find your Stripe app credentials by visiting your Stripe API Key SettingsNote: You’ll need to create a new Stripe API Key if you don’t already have one.
Connecting to Stripe
Once your users have connected their Stripe account, you can use the Paragon SDK to access the Stripe API on behalf of connected users. See the Stripe REST API documentation for their full API reference. Any Stripe API endpoints can be accessed with the Paragon SDK as shown in this exampleJavaScript
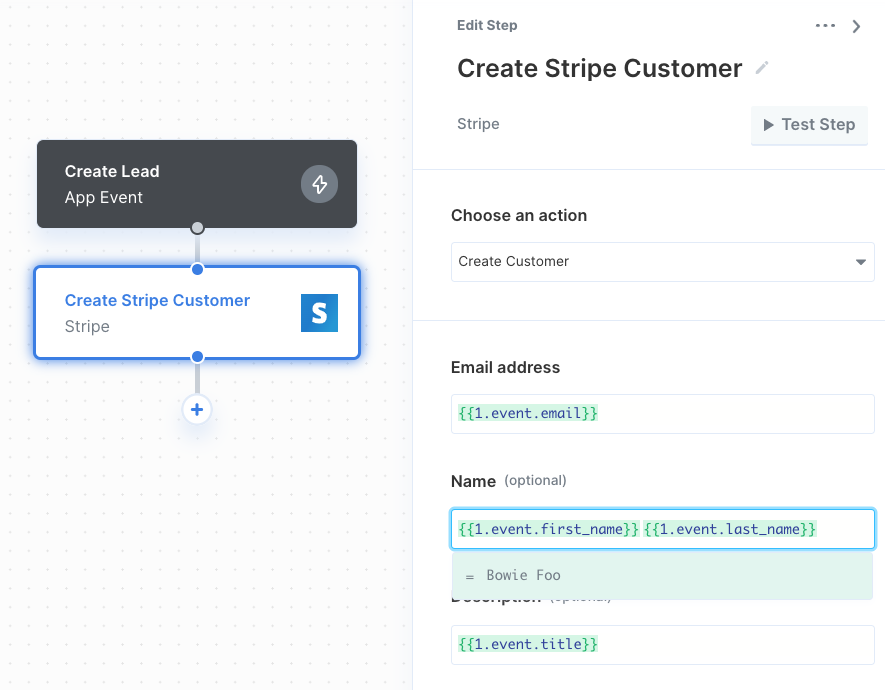
Building Stripe workflows
Once your Stripe account is connected, you can add steps to perform the following actions:- Create Customer
- Update Customer
- Get Customer by ID
- List Customers
- Create Subscription
- List Subscriptions
- Create Product
- Get Product by ID
- List Products
- List Balance Transaction
- List Plans
{{ to invoke the variable menu.
Using the Connect Portal
The Connect Portal supports Secret API keys and Restricted API keys. While Secret API keys can be used immediately, some configuration is required for Restricted API keys. The Restricted API key must allow therak_connected_account_read permission (called “All Connect resources” in the Resource Types section of configuring a Restricted API key). The Connect Portal cannot save the key if it does not include this permission.