Setup Guide
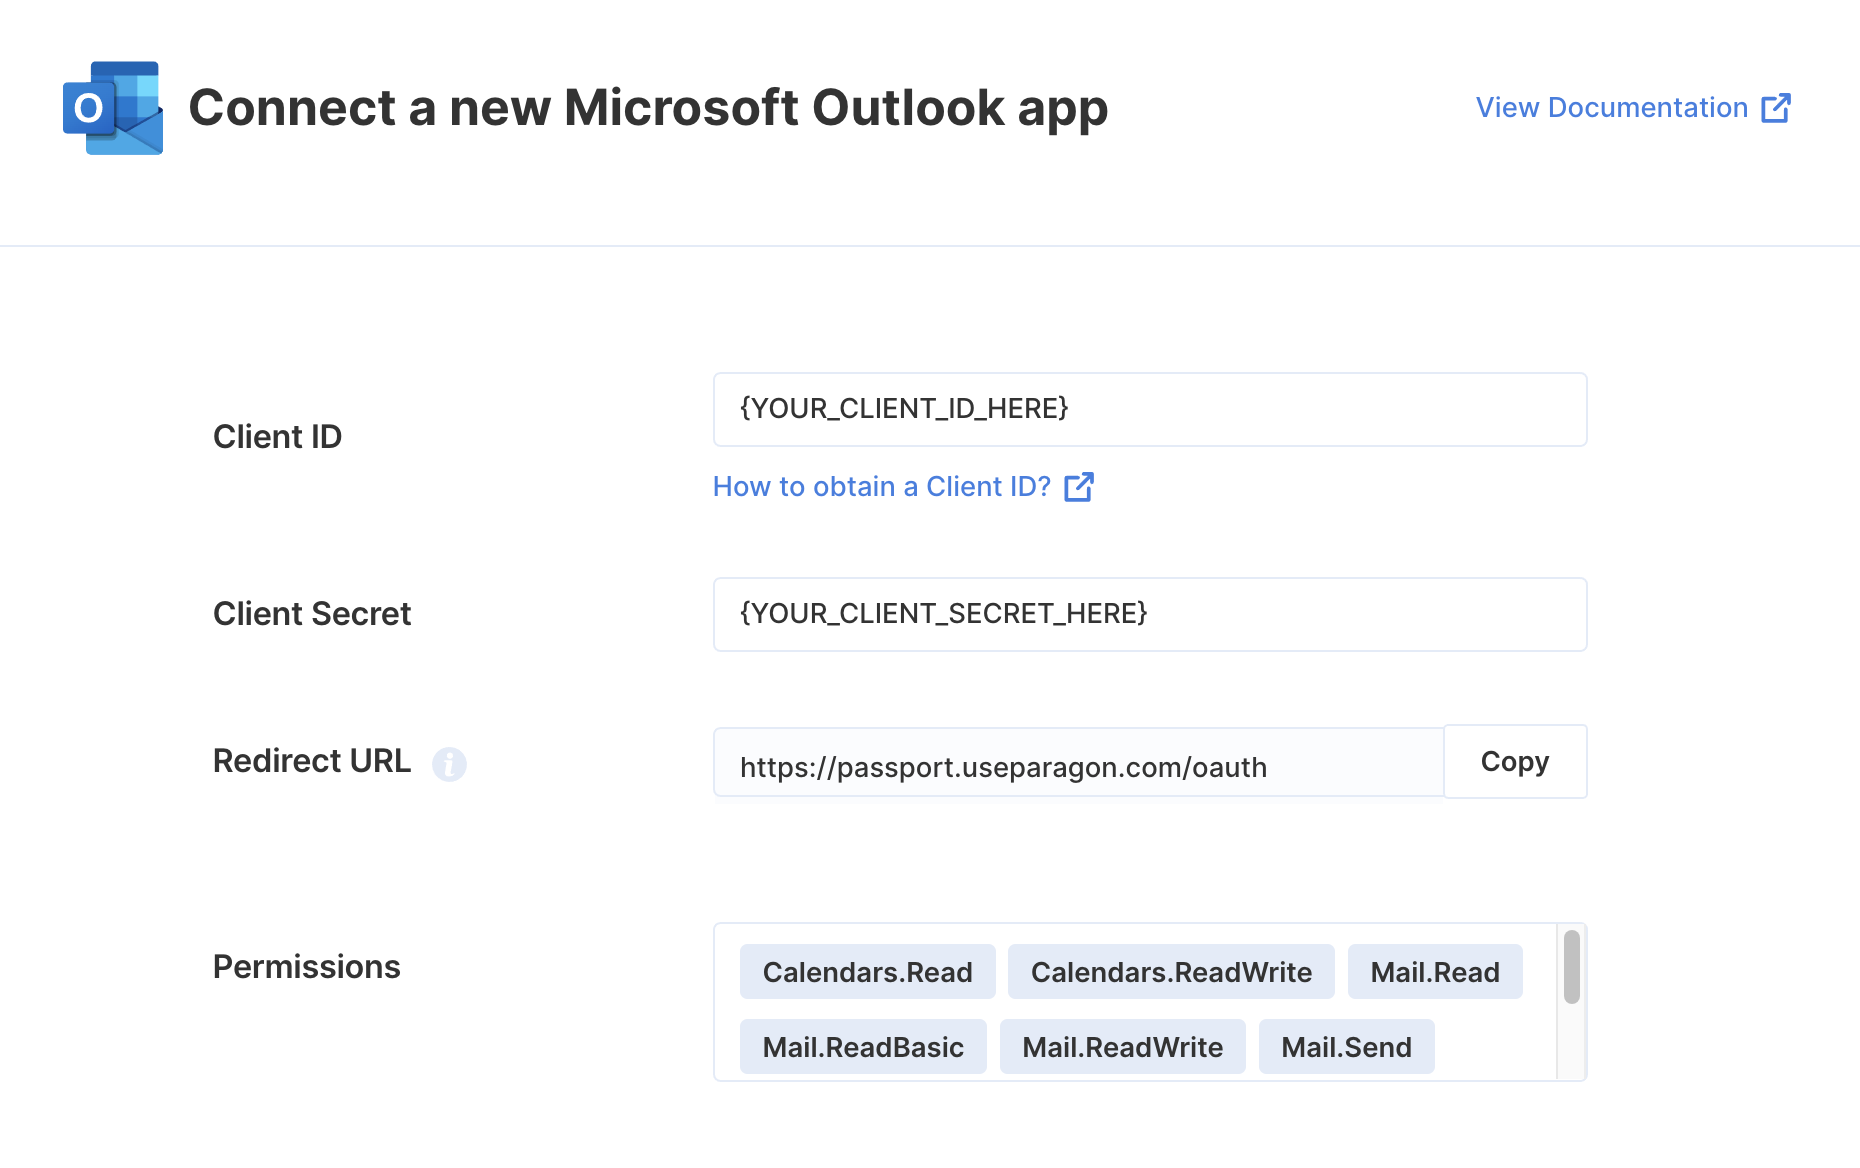
You can find your Microsoft Outlook application credentials by visiting your Microsoft Azure Portal. You’ll need the following information to set up your Microsoft Outlook app with Paragon Connect:- Client ID
- Client Secret
- Scopes Requested
Prerequisites
- A Microsoft Azure account
Add the Redirect URL to your Microsoft Outlook app
Paragon provides a redirect URL to send information to your app. To add the redirect URL to your Microsoft Outlook app:- Copy the link under “Redirect URL” in your integration settings in Paragon. The Redirect URL is:
- Log in to the Microsoft Azure Portal using your Microsoft account.
- Navigate to All Services > App Registrations and select your application.
- Select Authentication from the sidebar.
- Under Platform configurations, press the “Add a platform” button.
- Select the Web platform.
- Paste the Redirect URL from Step 1 under Redirect URIs.
- Press the Save button at the top of the page.
Generate a Client Secret
Since Microsoft Outlook does not automatically provide you with a Client Secret for your application, we’ll need to make one. To get your Client Secret:- Navigate to Manage > Certificates & secrets in the sidebar.
- Under Client Secrets, press the + New client secret button.
- Name your client credentials and select an expiry that works best for your application. Press Add to create your credentials.
- Copy the displayed Client Secret under the Value column.
Note: You will need to periodically create new and update your Client Secret as they expire for all Microsoft integrations.
Enable Multi-tenancy to your Outlook app
To allow Microsoft users from outside of your organization to connect to your Outlook application, you must specify this as an option within the Outlook application registration.- Log in to the Microsoft Azure Portal using your Microsoft account.
- Navigate to All Services > App Registrations and select your application.
- Select Authentication from the sidebar.
- Under Supported account types, press the “Accounts in any organizational directory” option.
- Click Save.
Add your Microsoft Outlook app to Paragon
- Select Microsoft Outlook from the Integrations Catalog.
- Under Integrations > Connected Integrations > Microsoft Outlook > App Configuration > Configure, fill out your credentials from the end of Step 1 in their respective sections:
- Client ID: Found under Essentials > Application (client) ID on your Microsoft Azure Portal app page.
- Client Secret: Found under Manage > Certificates & secrets on your Microsoft Azure Portal app page.
- Permissions: Select the scopes you’ve requested for your application. For a list of recommended scopes, please view this integration within your Paragon dashboard. View dashboard.
Note: You should only add the scopes you’ve requested in your application page to Paragon.
Connecting to Microsoft Outlook
Once your users have connected their Microsoft Outlook account, you can use the Paragon SDK to access the Microsoft Outlook API on behalf of connected users. See the Microsoft Outlook REST API documentation for their full API reference. Any Microsoft Outlook API endpoints can be accessed with the Paragon SDK as shown in this example:Building Microsoft Outlook workflows
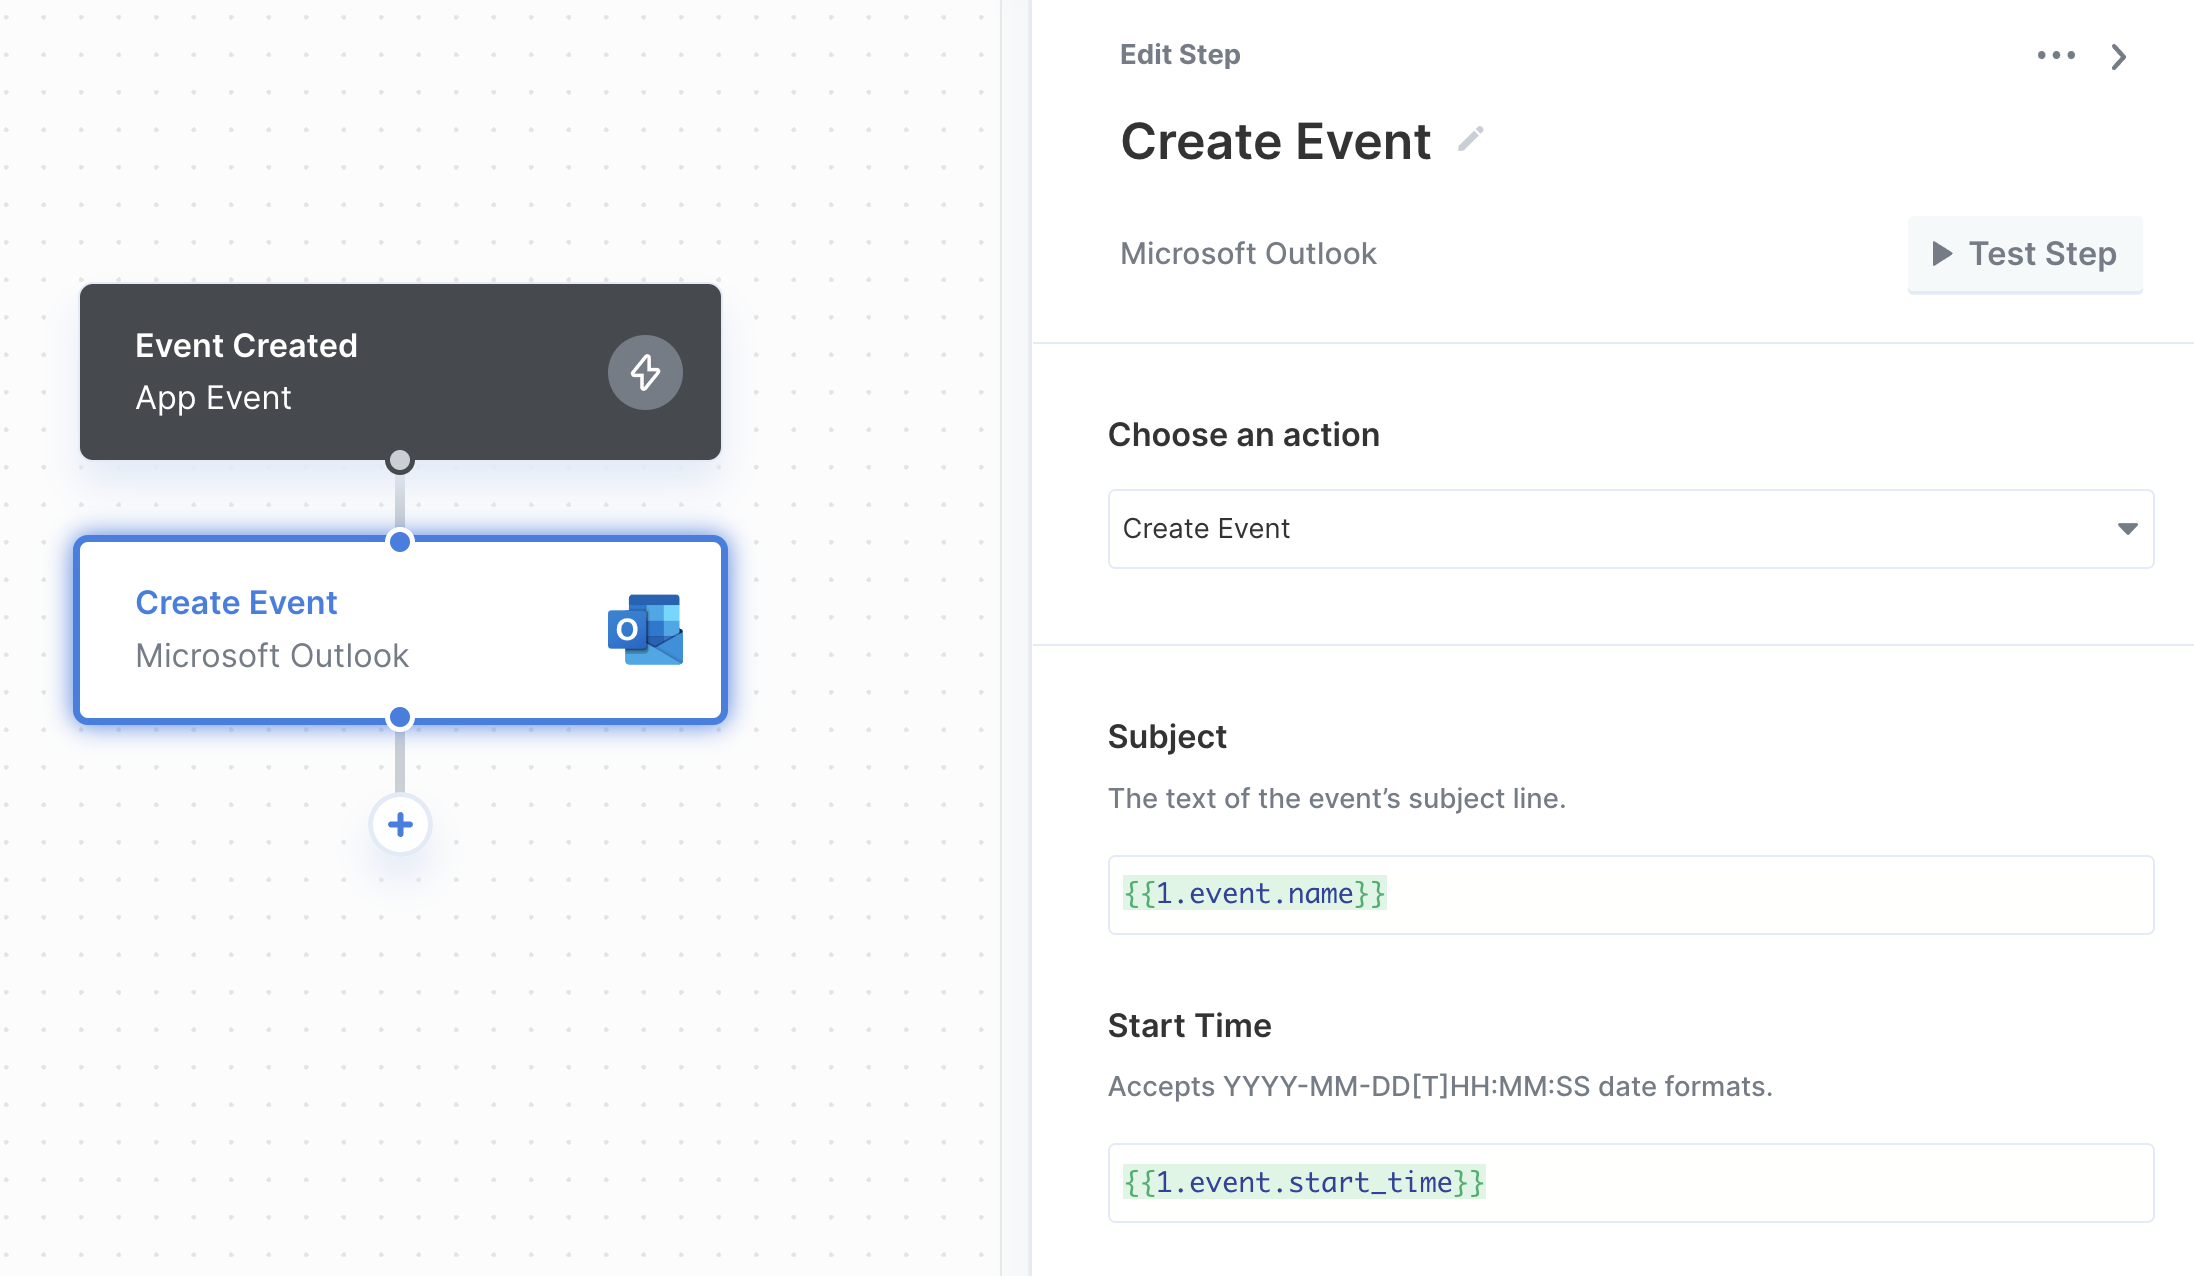
Once your Microsoft Outlook account is connected, you can add steps to perform the following actions:- Create Event
- Update Event
- Get Event by ID
- Get Events
- Delete Event
- Get Messages
- Send Message
- Get Message by ID
{{ to invoke the variable menu.
Using Webhook Triggers
Webhook triggers can be used to run workflows based on events in your users’ Microsoft Outlook accounts. For example, you might want to trigger a workflow whenever new events are created Microsoft Outlook to sync your users’ Microsoft Outlook events to your application in real-time.
- Event Created
- Event Updated
- Event Removed
- New Message