Don’t have a Paragon account yet?Sign up for Paragon on our website to get started!
1. Set a trigger
We’ll start by choosing a trigger for our workflow. In this case, we probably want to run the workflow every 10 minutes to check for new content, so we’ll choose the Scheduler trigger option. From there, you can choose how often you’d like your workflow to run.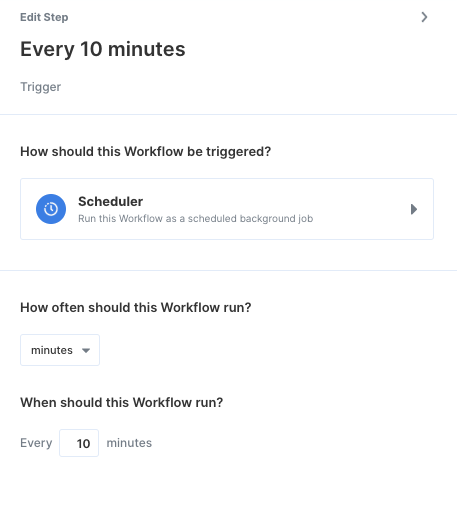
2. Query your Airtable base
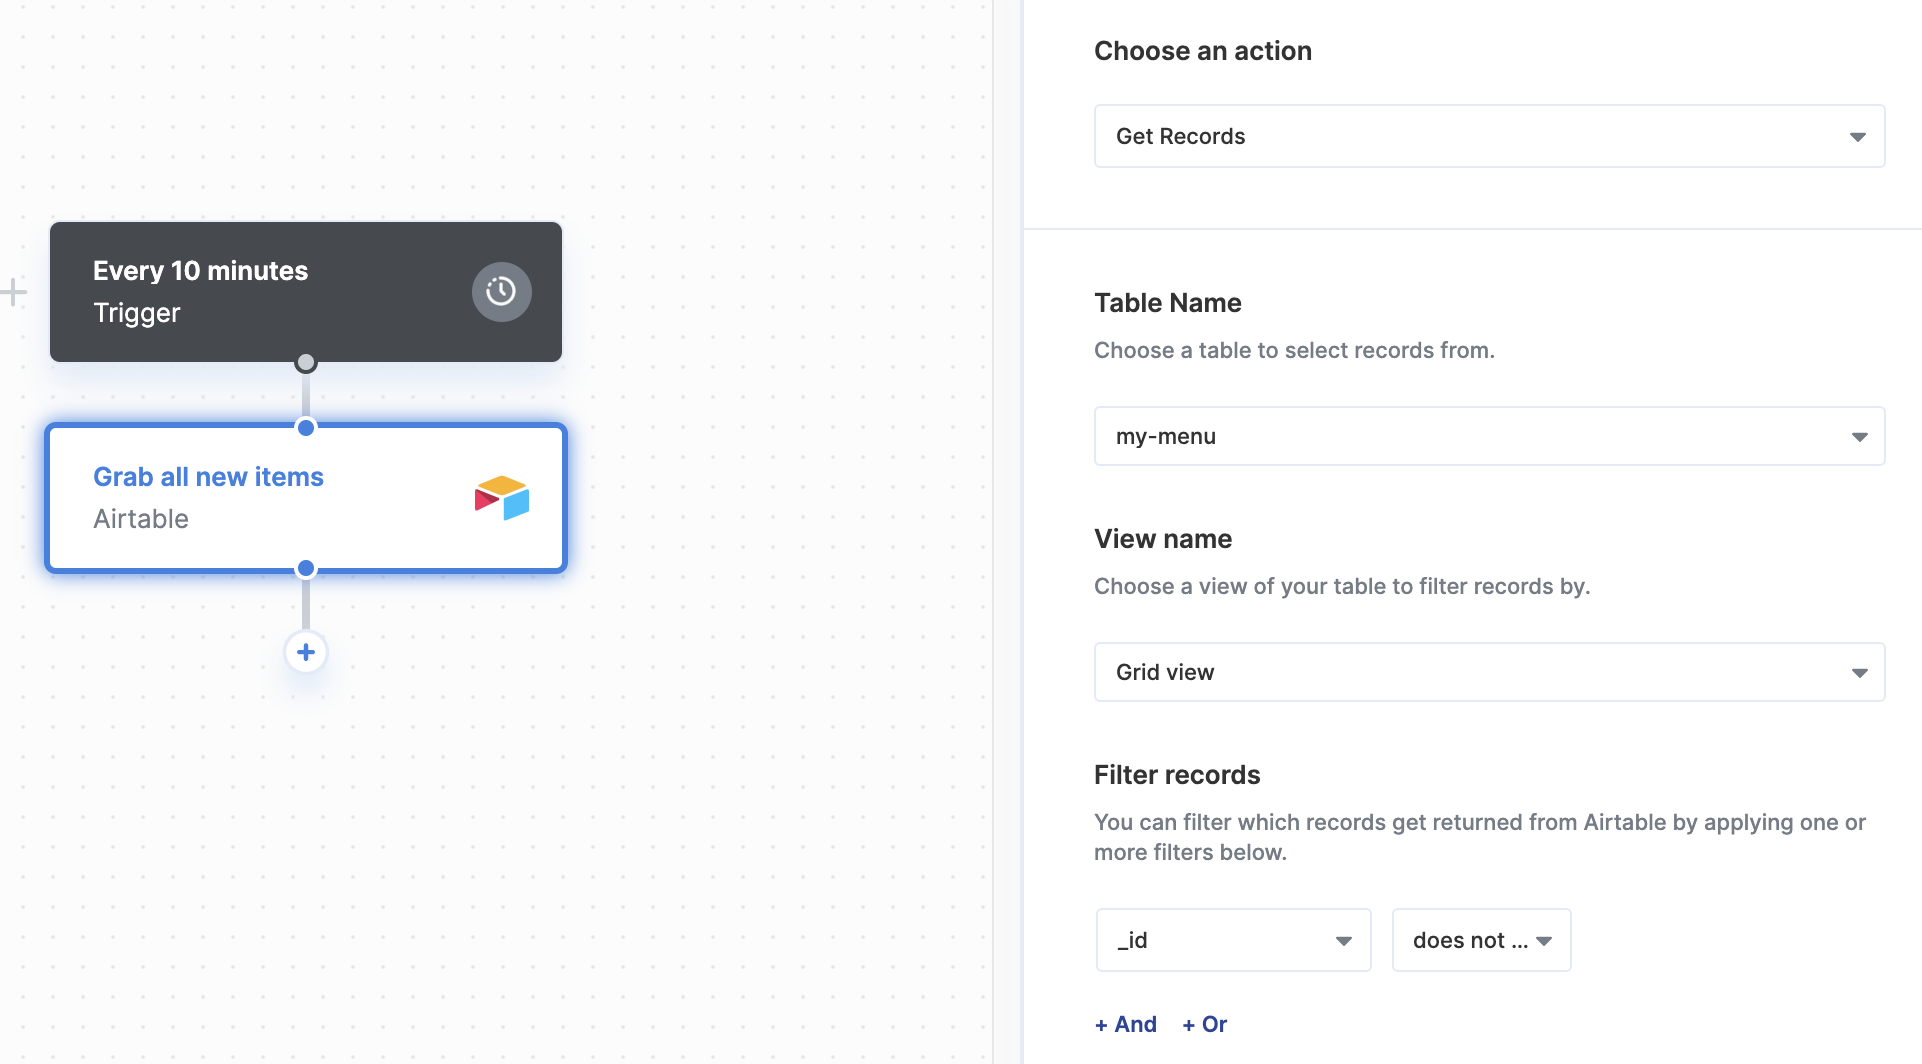
First, connect your Airtable account to Paragon and create a new column labeled_id. We’ll use this column to let us know when Webflow includes the item to our CMS successfully. This gives us a list of items that aren’t added and prevents duplicates by filtering records without the _id column filled out.
3. Fan Out records
Next, let’s Fan Out the records from our Airtable base so we can iterate over each item and add it to Webflow. Add a Fan Out step to your workflow and choose the array of items from your Airtable. Now, any steps within the Fan Out will be performed for each item.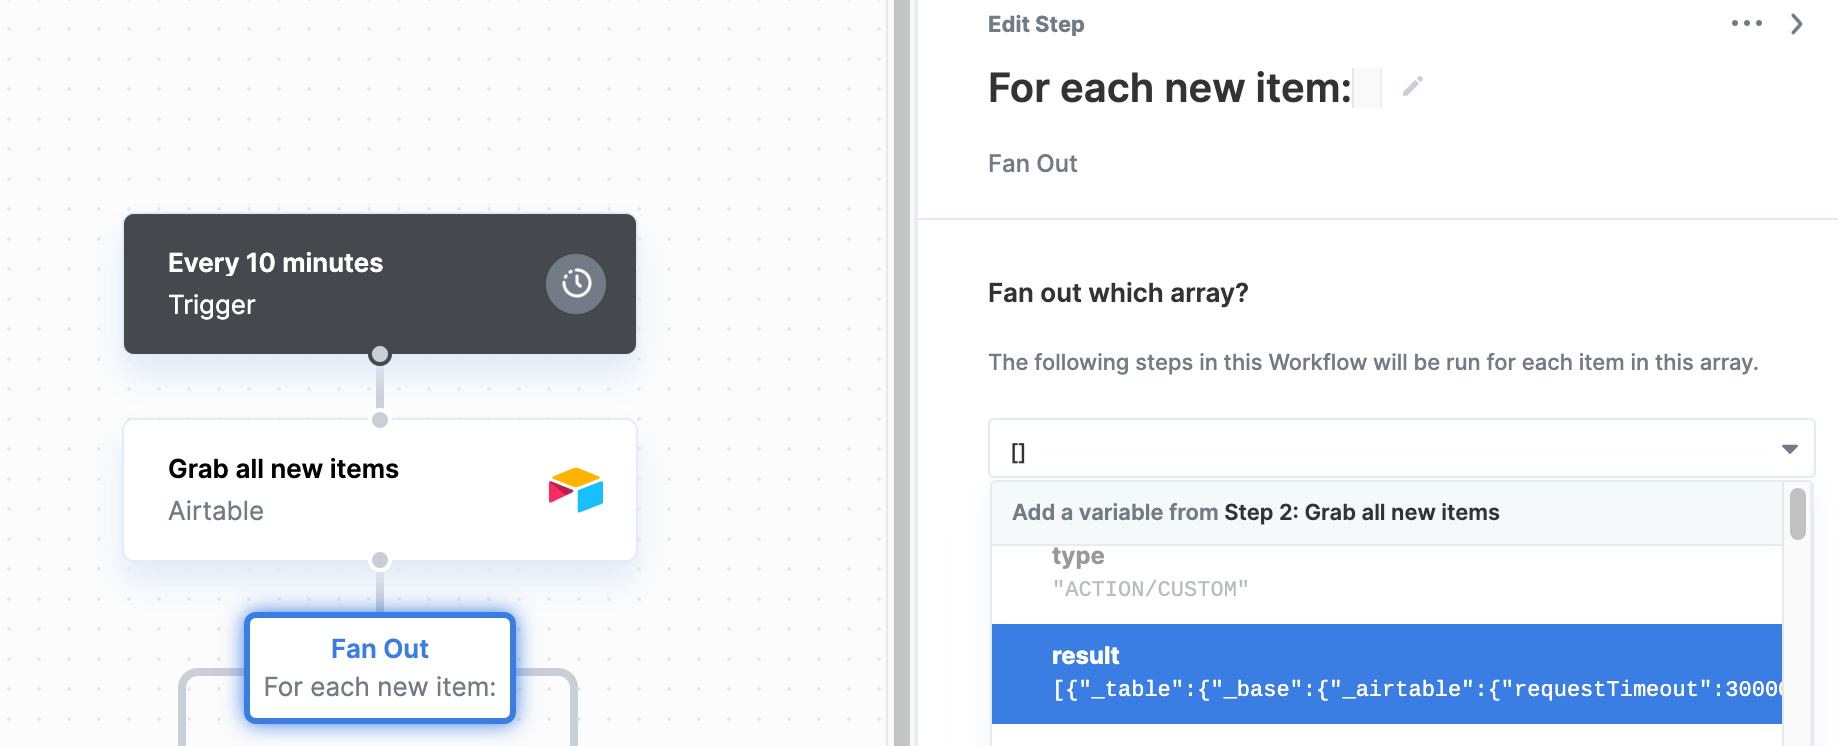
4. Create the fields JSON using Function
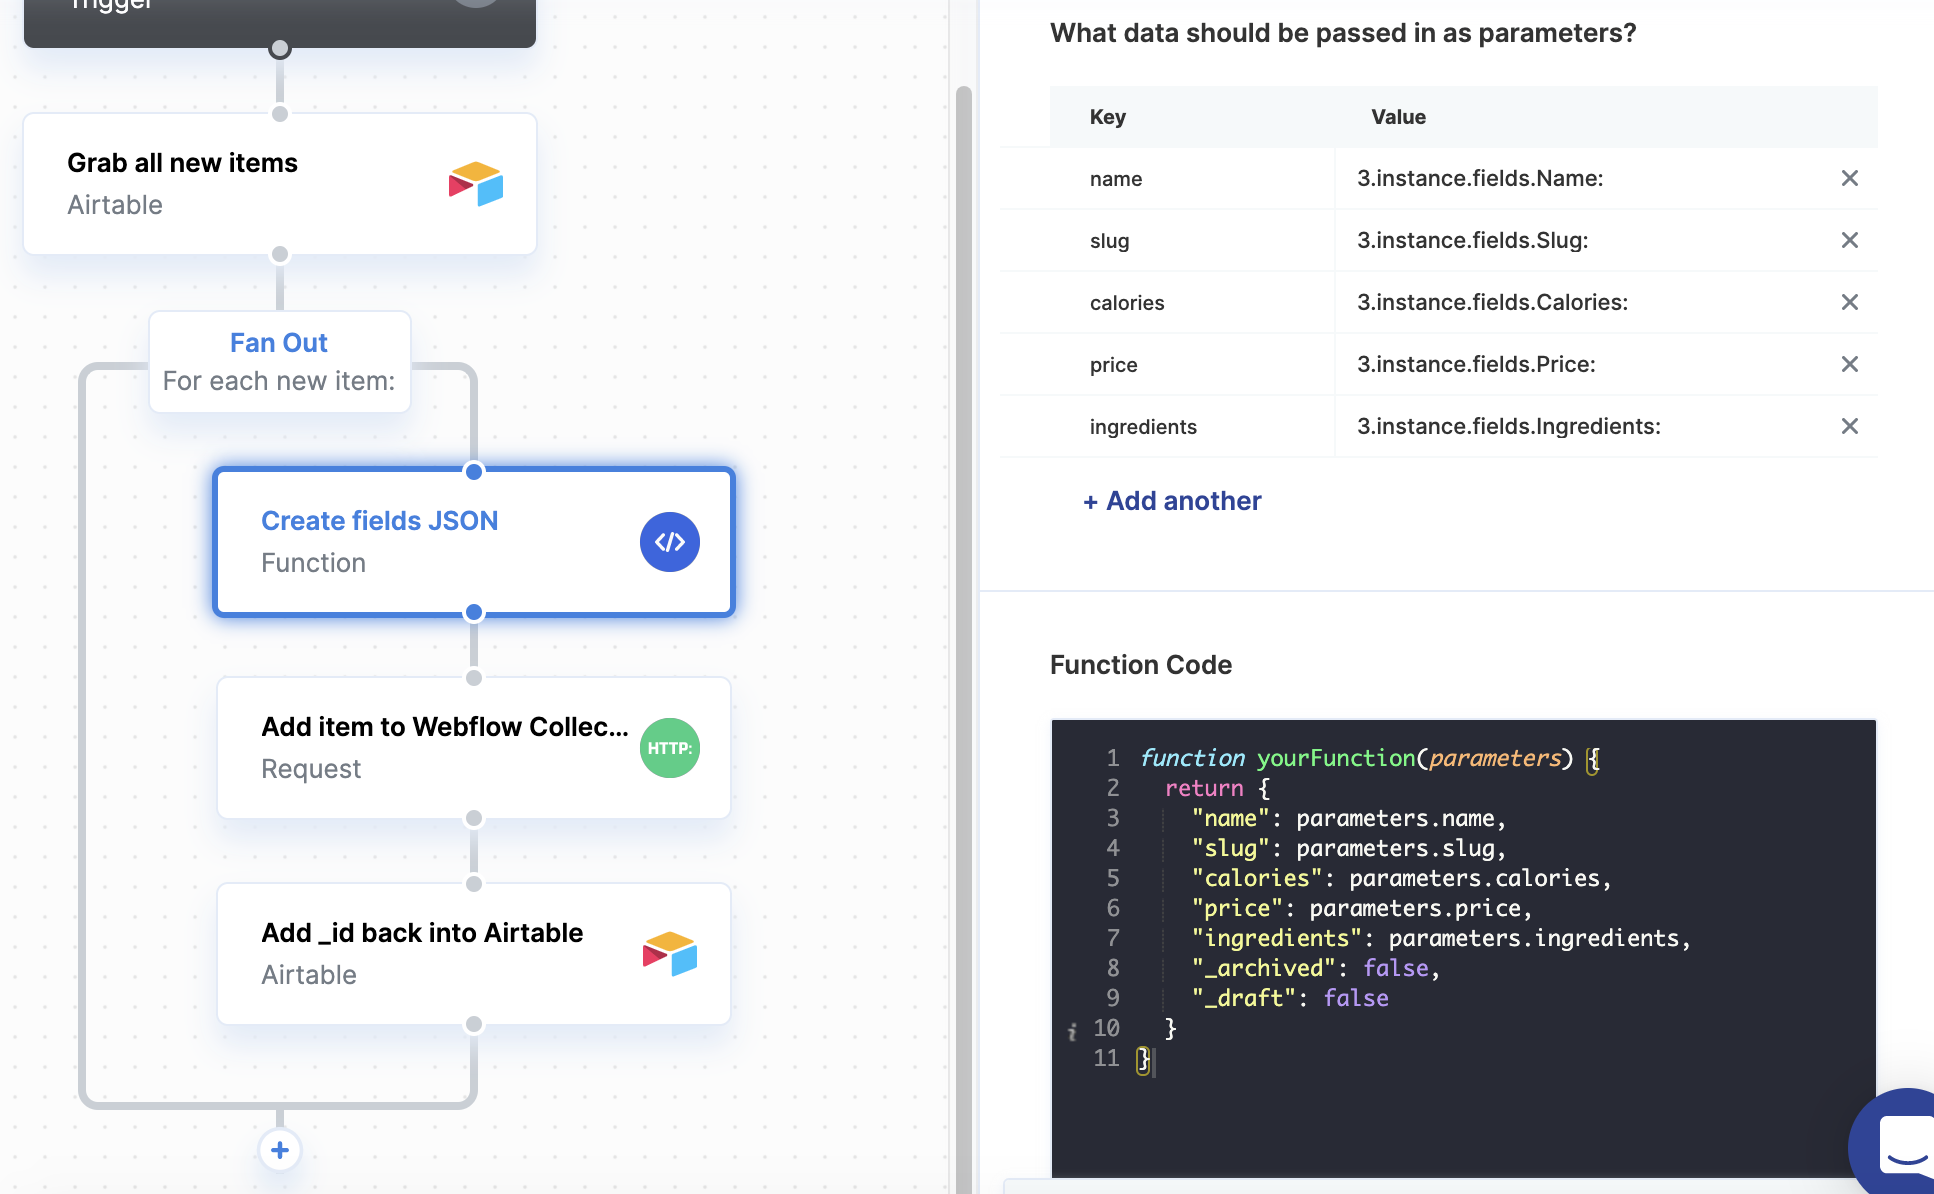
Add a Function step to your workflow to construct the JSON structure Webflow needs to add an item to your collection. You will want to pass in the column headings from your Airtable base as parameters for the function. To do so, type the column name underKey and choose the variable from the previous step that matches the name of the column. For example, a key called name should match up with a variable called instance.fields.Name. You’ll want to do this for every column you’d like to include in each item. You can find a detailed list of fields inside Webflow’s Item documentation.
JavaScript
5. Add the new item to the Webflow Collection
Now that we have our formatted JSON, we can make an HTTP request to our Webflow Collection! You should make aPOST request to https://api.webflow.com/collections/[YOUR_COLLECTION_ID]/items, replacing [YOUR_COLLECTION_ID] with the ID of your Webflow Collection you’d like to add your items to.
Including KeysMake sure to include the
Authorization and accept-version keys in the request headers. You can find your Webflow API key by checking out Webflow’s API Documentation
6. Update Airtable with the Webflow Item _id
Now that we successfully added the item into our collection, we should update the Airtable record with its Webflow Item ID. This ensures the record won’t be duplicated the next time this workflow runs.
Let’s update our Airtable record to include the _id variable we received in the response from our Request from Step 5.

_id field in each record, we just need to fill out with the variable we want to change it to. Leaving the other columns blank won’t change the information currently stored within them.
7. Deploy your workflow
Now that your workflow is all set up, deploy your workflow by clicking the Deploy button in the top-right of your screen. Once you do, your workflow will begin running at the scheduled Trigger time.
Want to build your own workflows?Sign up for Paragon on our website to get started!