> ## Documentation Index
> Fetch the complete documentation index at: https://docs.useparagon.com/llms.txt
> Use this file to discover all available pages before exploring further.
# Run a Real-time Action
> This tutorial series walks through building a real-time integration feature using ActionKit for webhook events and tool calls
In this tutorial series, we will:
1. Interact with your users' integration data using [ActionKit Tools](/actionkit/overview)
2. React to your users' integration events via webhook subscriptions using [ActionKit Triggers](/actionkit/triggers/overview)
3. Provide an example of an integration feature that uses Triggers to kick off an agent with Tools to write-back data
In this first chapter, we'll set up an integration, allow users to authenticate in your app, and run a real-time action
## Set up your Paragon integration
### Configure your 3rd-party App
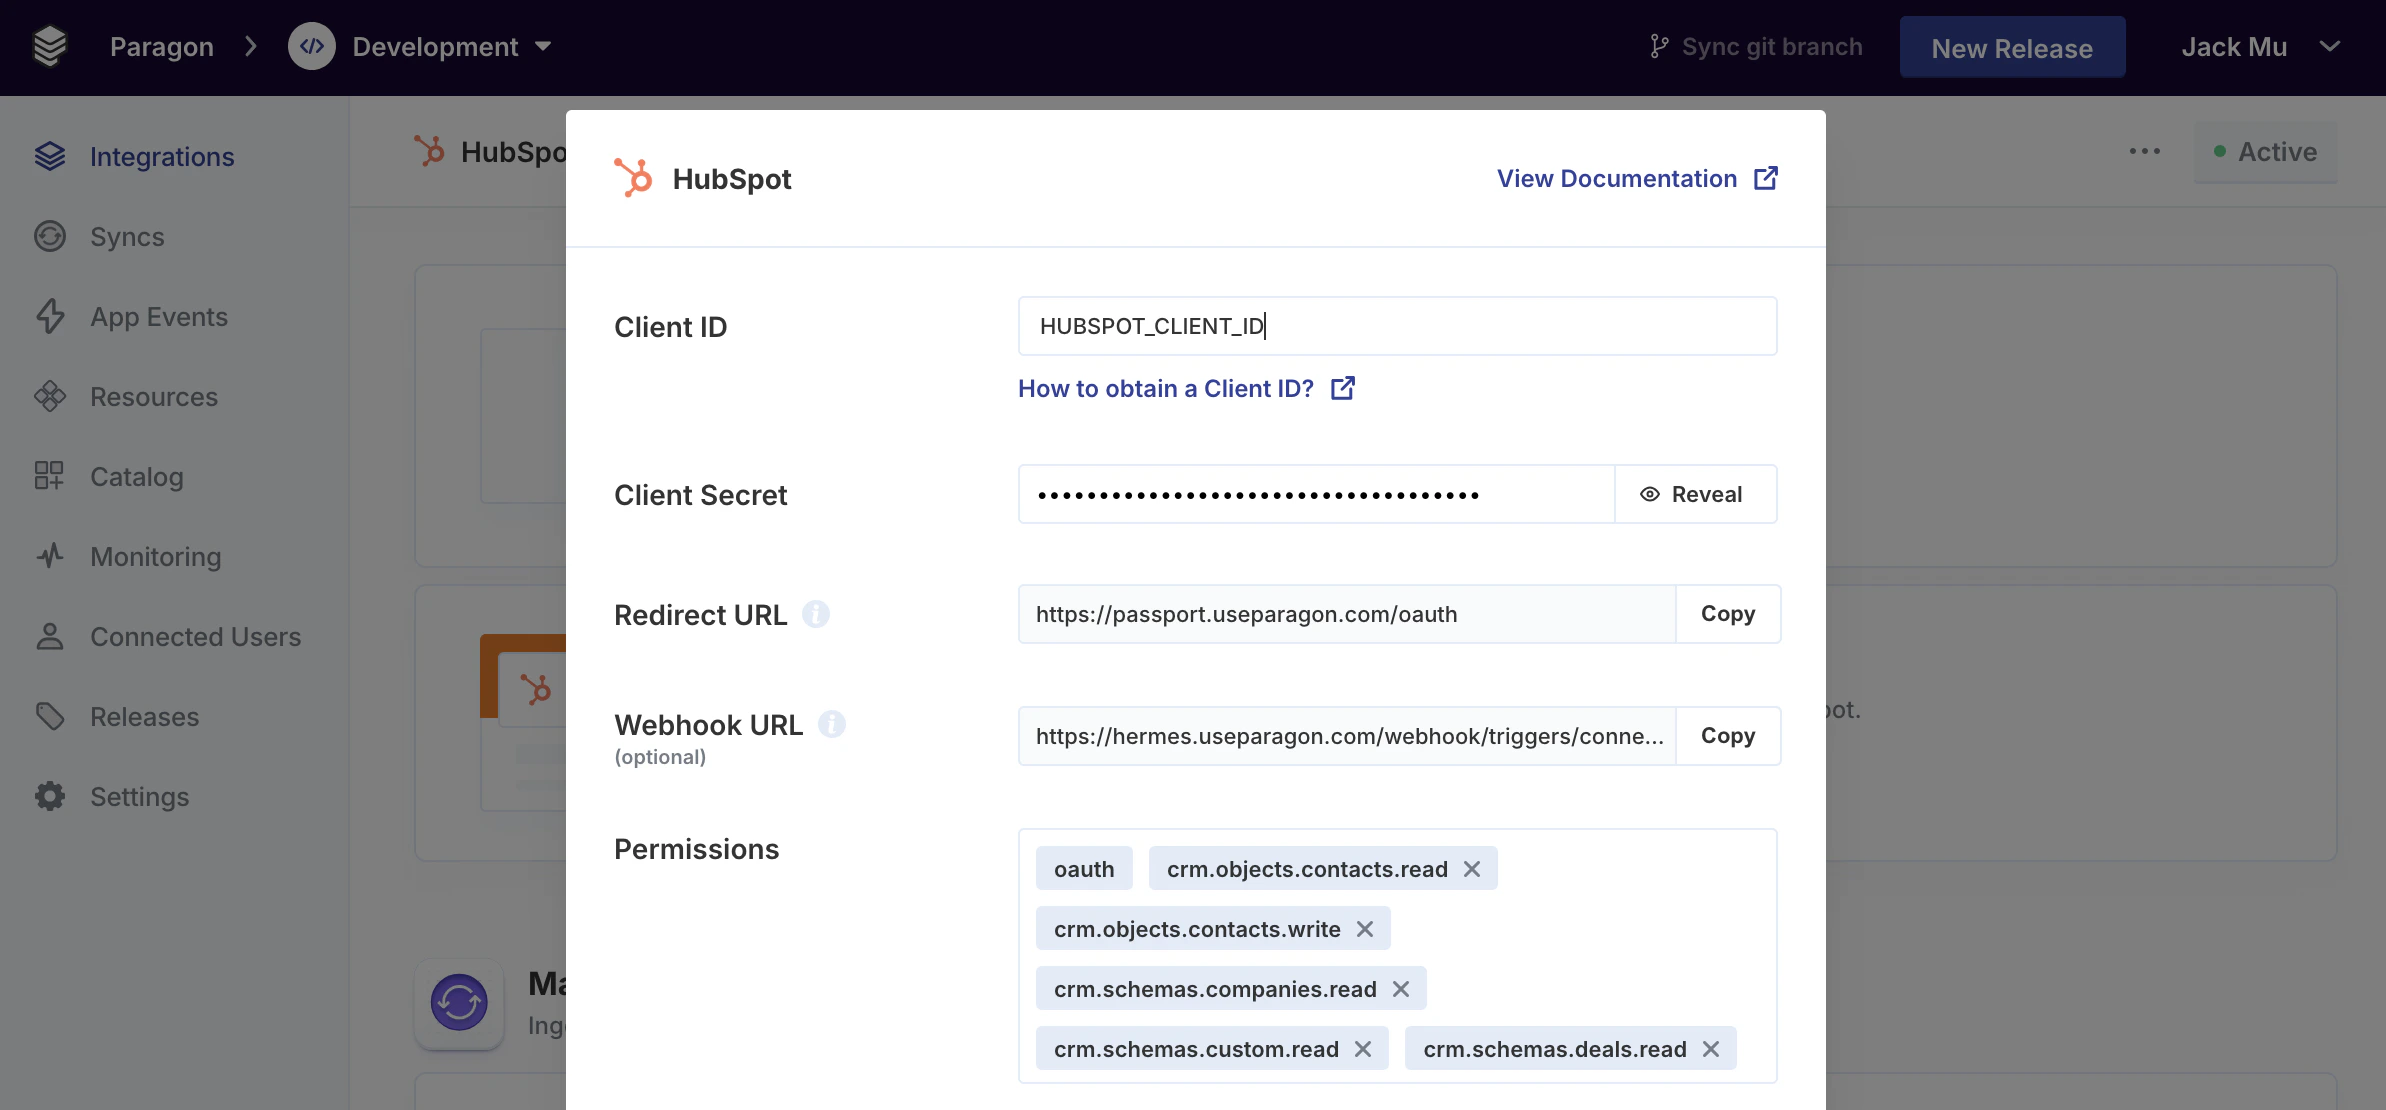
The first step is to configure and enable your integration on the Paragon dashboard.
For the purposes of this tutorial, we will be using HubSpot. If you're following along, visit our [HubSpot guide](/resources/integrations/hubspot) to configure your integration.
If you're setting up a different integration, visit our [integration catalog](/resources/integrations) for a full list of integrations and how to set up your 3rd-party app in Paragon.
### Generate a Paragon Signing Key
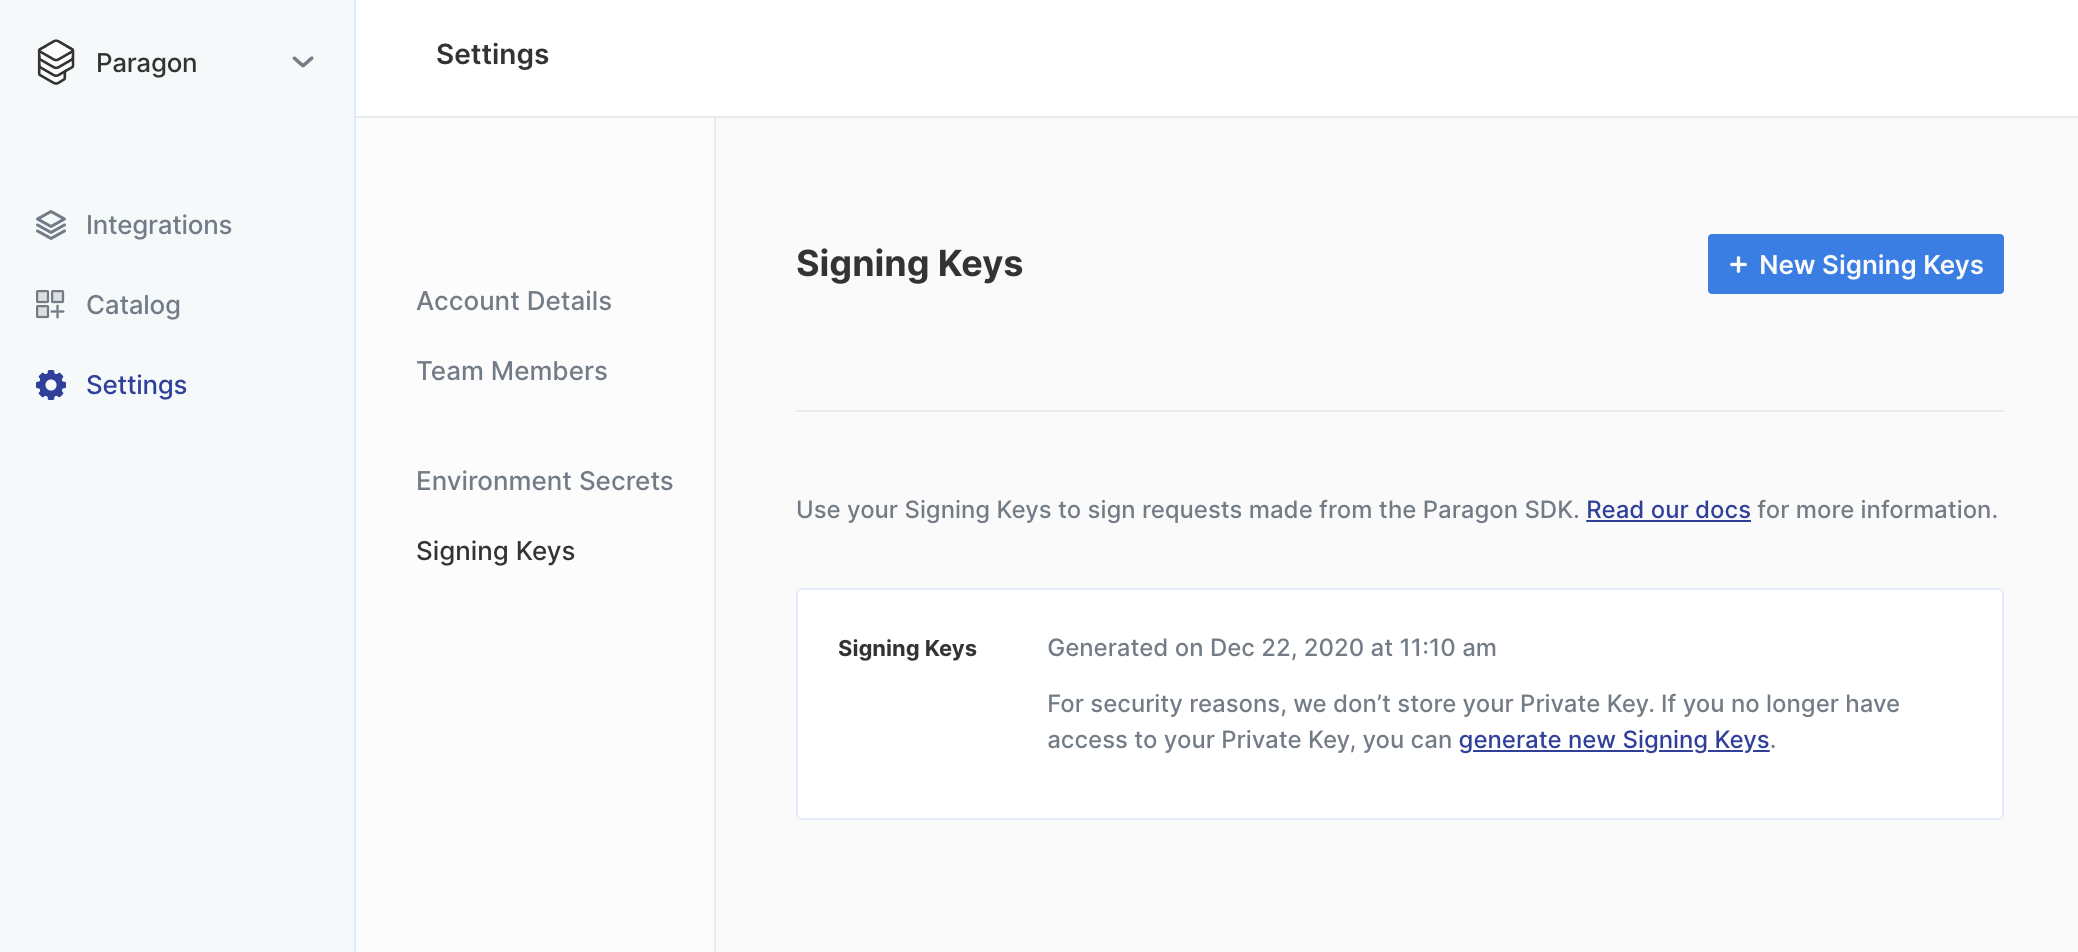
To generate a Signing Key, go to **Settings > Signing Keys** in your Paragon dashboard. You should store this key in an environment secrets file.
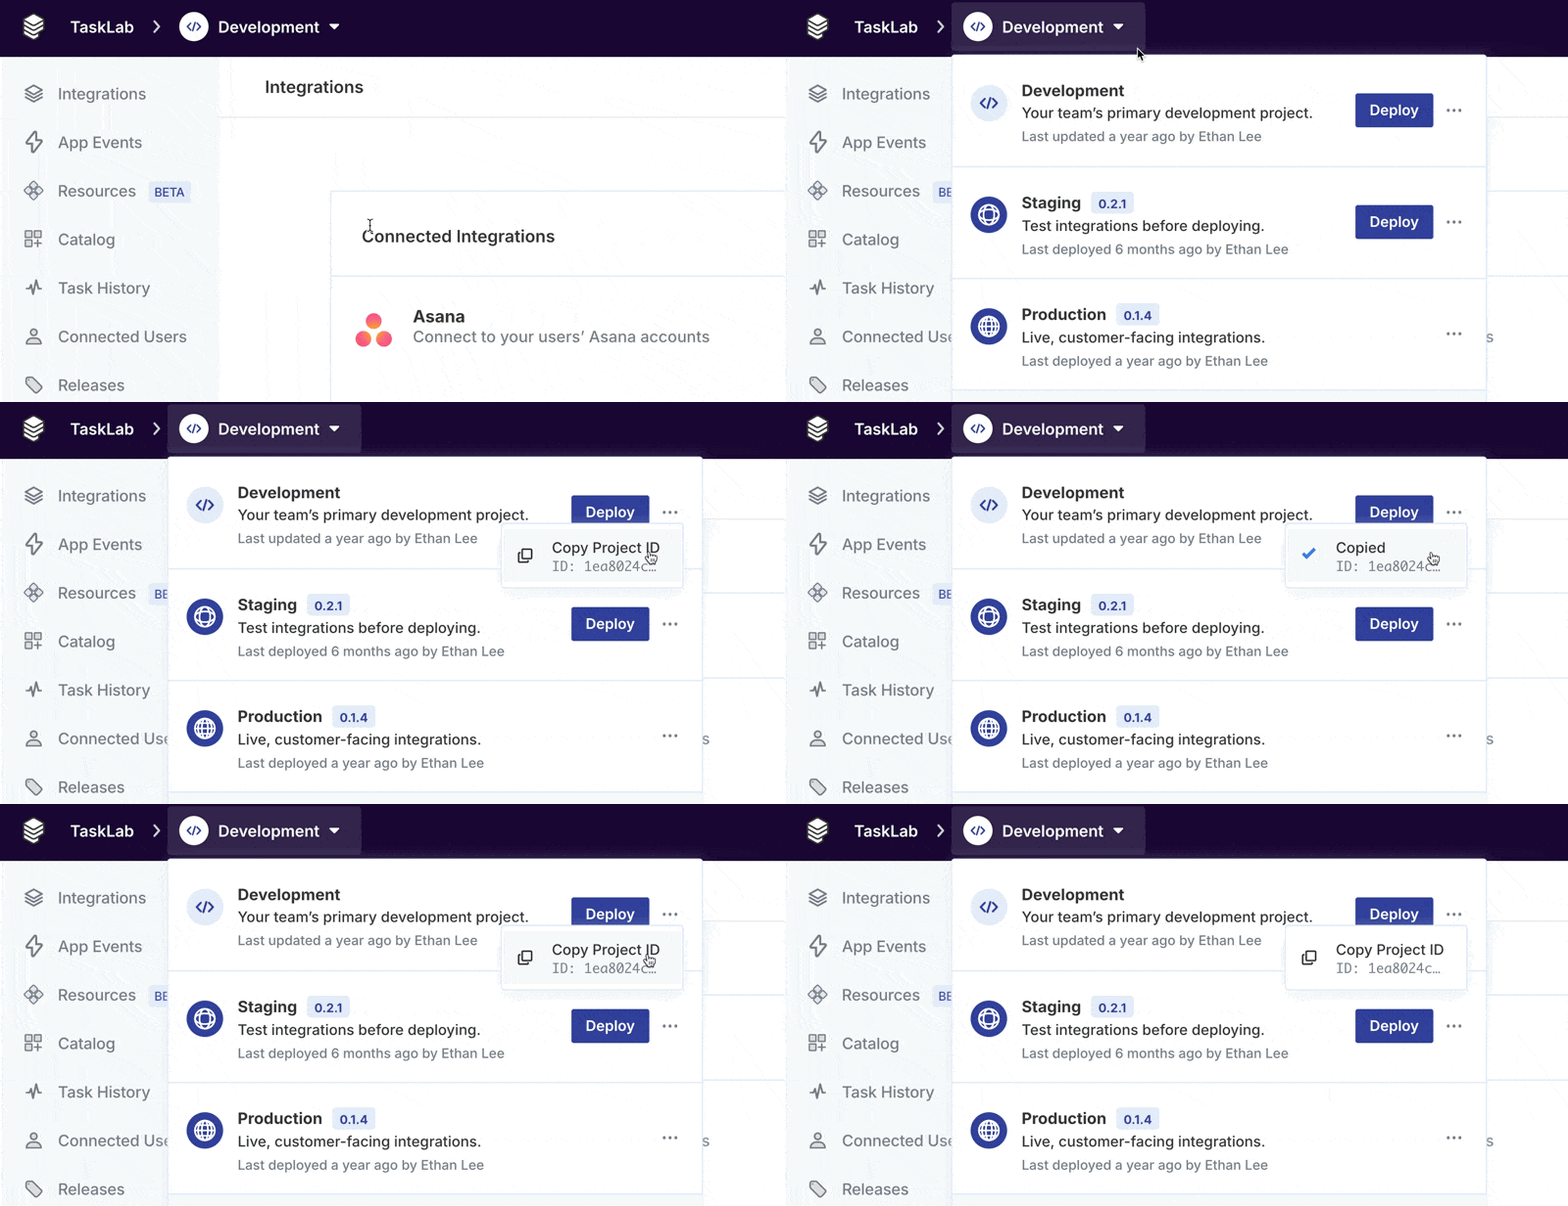
We will also need your **Paragon Project ID**. You can copy your Project ID by clicking Copy Project ID under the Environment switcher:
Your **Signing Key** and **Project ID** will be used as environment variables in your application.
## Authenticate your users
### Start with the Paragon Skill to embed Paragon in your app
Install the [Paragon Skill](/building-with-agents) in your coding agent for a guided experience.
```bash theme={null}
npx skills add useparagon/paragon-skills
```
The Paragon Skill will steer your agent through [setting up the Paragon SDK](/getting-started/installing-the-connect-sdk) and embedding the [Connect Portal](/connect-portal/connect-portal-customization).
```markdown Add the Paragon SDK wrap theme={null}
/paragon-setup-skill Look at my app and set up the Paragon SDK, including all dependencies and required setup steps.
I will provide the following environment variables for your reference:
- `PARAGON_PROJECT_ID`: The Paragon Project UUID.
- `PARAGON_SIGNING_KEY`: The Signing Key as a PKCS8-encoded private key.
```
Your agent should have set up the following:
1. A server-side route that creates a signed JWT for each of your users
```js expandable theme={null}
// server.js - Adding middleware to sign an authenticated user's token
const jwt = require('jsonwebtoken');
app.use((req, res, next) => {
if (!req.user) {
return next();
}
// JWT NumericDates specified in seconds:
const currentTime = Math.floor(Date.now() / 1000);
res.locals({
paragonToken: jwt.sign(
{
sub: req.user.id, // Your user's or their company's ID
aud: `useparagon.com/${process.env.PARAGON_PROJECT_ID}`, // Replace with your actual project ID
iat: currentTime,
exp: currentTime + (60 * 60), // 1 hour from now
},
process.env.PARAGON_SIGNING_KEY,
{
algorithm: "RS256",
}
),
});
next();
});
```
2. Paragon SDK used on your front-end client to authenticate your users
```js theme={null}
await paragon.authenticate(
process.env.PARAGON_PROJECT_ID,
SIGNED_JWT
);
```
3. Front-end components to bring up the Connect Portal for users to connect their integrations
```js theme={null}
```
If you would like to set up Paragon without an agent, see the [setup guide](/getting-started/installing-the-connect-sdk)
## Run your first real-time ActionKit Tool
ActionKit's [Tool API](/actionkit/api-reference) gives your agent or app hundreds of pre-built tools that execute real-time actions.
### Get Tools
Get available tools programmatically via the `GET Tools` endpoint.
```js theme={null}
fetch(`https://actionkit.useparagon.com/projects/${process.env.PARAGON_PROJECT_ID}/tools`, {
method: 'GET',
headers: {Authorization: `Bearer ${SIGNED_JWT}`}
}
).then(res => res.json())
.then(res => console.log(res))
.catch(err => console.error(err));
```
```json Example response expandable theme={null}
{
"tools": {
"hubspot": [
{
"type": "function",
"function": {
"name": "HUBSPOT_CREATE_RECORD_CONTACTS",
"description": "Create a contact in HubSpot CRM",
"parameters": {
"type": "object",
"properties": {
"field-email": {
"type": "string",
"description": "Email"
},
"field-firstname": {
"type": "string",
"description": "First Name"
},
"field-lastname": {
"type": "string",
"description": "Last Name"
},
"field-jobtitle": {
"type": "string",
"description": "Job Title"
},
"field-company": {
"type": "string",
"description": "Company Name"
},
"field-hubspot_owner_id": {
"type": "string",
"description": "Contact Owner: The HubSpot user who is assigned to this contact. Use Connect Portal Workflow Settings to allow users to select an Owner. (example value: \"{{settings.owner}}\")"
},
"field-lifecyclestage": {
"type": "string",
"description": "Lifecycle Stage: Defaults to the user's first Lifecycle Stage if not provided. Use Connect Portal Workflow Settings to allow users to select a Lifecycle Stage. (example value: \"{{settings.lifecycleStage}}\")"
},
"field-hs_lead_status": {
"type": "string",
"description": "Lead Status: Defaults to the user's first Lead Status if not provided. Use Connect Portal Workflow Settings to allow users to select a Lead Status. (example value: \"{{settings.leadStatus}}\")"
},
"additionalFieldsJSON": {
"type": "string",
"description": "Additional Fields: Specify any other fields that should be updated in JSON below. Use Connect Portal Workflow Settings to allow users to select which Contact fields to update. (example value: \"{\\n \\\"property_number\\\": \\\"17\\\",\\n \\\"property_dropdown\\\": \\\"choice_b\\\",\\n \\\"property_radio\\\": \\\"option_1\\\",\\n \\\"property_string\\\": \\\"value\\\",\\n \\\"property_date\\\": \\\"1572480000000\\\"\\n}\")"
}
},
"required": [
"recordType",
"field-email"
],
"additionalProperties": false,
"$schema": "http://json-schema.org/draft-07/schema#"
}
}
}
]
},
"errors": []
}
```
If you have a specific Tool in mind, you can also visit the [ActionKit docs](/actionkit/overview) to browse every available Tool.
### Execute Tool
To execute a tool, run a `POST /tools` call against the ActionKit API with the **tool name** and any **tool parameters**.
```js theme={null}
fetch(`https://actionkit.useparagon.com/projects/${process.env.PARAGON_PROJECT_ID}/tools`, {
method: 'POST',
headers: {Authorization: `Bearer ${SIGNED_JWT}`, 'Content-Type': 'application/json'},
body: JSON.stringify({
tool: 'HUBSPOT_CREATE_RECORD_CONTACTS',
parameters: {
email: 'jack@email.com',
firstname: 'jack',
lastname: 'm',
jobtitle: 'developer',
company: 'Paragon',
}
})
}).then(res => res.json())
.then(res => console.log(res))
.catch(err => console.error(err));
```
And that's all it takes to run any integration action with the Tools API! In the next chapter, we'll be subscribing to HubSpot webhooks through ActionKit's Triggers API.
 We will also need your **Paragon Project ID**. You can copy your Project ID by clicking Copy Project ID under the Environment switcher:
 Your **Signing Key** and **Project ID** will be used as environment variables in your application.
## Authenticate your users
### Start with the Paragon Skill to embed Paragon in your app
Install the [Paragon Skill](/building-with-agents) in your coding agent for a guided experience.
```bash theme={null}
npx skills add useparagon/paragon-skills
```
The Paragon Skill will steer your agent through [setting up the Paragon SDK](/getting-started/installing-the-connect-sdk) and embedding the [Connect Portal](/connect-portal/connect-portal-customization).
```markdown Add the Paragon SDK wrap theme={null}
/paragon-setup-skill Look at my app and set up the Paragon SDK, including all dependencies and required setup steps.
I will provide the following environment variables for your reference:
- `PARAGON_PROJECT_ID`: The Paragon Project UUID.
- `PARAGON_SIGNING_KEY`: The Signing Key as a PKCS8-encoded private key.
```
Your agent should have set up the following:
1. A server-side route that creates a signed JWT for each of your users
```js expandable theme={null}
// server.js - Adding middleware to sign an authenticated user's token
const jwt = require('jsonwebtoken');
app.use((req, res, next) => {
if (!req.user) {
return next();
}
// JWT NumericDates specified in seconds:
const currentTime = Math.floor(Date.now() / 1000);
res.locals({
paragonToken: jwt.sign(
{
sub: req.user.id, // Your user's or their company's ID
aud: `useparagon.com/${process.env.PARAGON_PROJECT_ID}`, // Replace with your actual project ID
iat: currentTime,
exp: currentTime + (60 * 60), // 1 hour from now
},
process.env.PARAGON_SIGNING_KEY,
{
algorithm: "RS256",
}
),
});
next();
});
```
2. Paragon SDK used on your front-end client to authenticate your users
```js theme={null}
await paragon.authenticate(
process.env.PARAGON_PROJECT_ID,
SIGNED_JWT
);
```
3. Front-end components to bring up the Connect Portal for users to connect their integrations
```js theme={null}
```
Your **Signing Key** and **Project ID** will be used as environment variables in your application.
## Authenticate your users
### Start with the Paragon Skill to embed Paragon in your app
Install the [Paragon Skill](/building-with-agents) in your coding agent for a guided experience.
```bash theme={null}
npx skills add useparagon/paragon-skills
```
The Paragon Skill will steer your agent through [setting up the Paragon SDK](/getting-started/installing-the-connect-sdk) and embedding the [Connect Portal](/connect-portal/connect-portal-customization).
```markdown Add the Paragon SDK wrap theme={null}
/paragon-setup-skill Look at my app and set up the Paragon SDK, including all dependencies and required setup steps.
I will provide the following environment variables for your reference:
- `PARAGON_PROJECT_ID`: The Paragon Project UUID.
- `PARAGON_SIGNING_KEY`: The Signing Key as a PKCS8-encoded private key.
```
Your agent should have set up the following:
1. A server-side route that creates a signed JWT for each of your users
```js expandable theme={null}
// server.js - Adding middleware to sign an authenticated user's token
const jwt = require('jsonwebtoken');
app.use((req, res, next) => {
if (!req.user) {
return next();
}
// JWT NumericDates specified in seconds:
const currentTime = Math.floor(Date.now() / 1000);
res.locals({
paragonToken: jwt.sign(
{
sub: req.user.id, // Your user's or their company's ID
aud: `useparagon.com/${process.env.PARAGON_PROJECT_ID}`, // Replace with your actual project ID
iat: currentTime,
exp: currentTime + (60 * 60), // 1 hour from now
},
process.env.PARAGON_SIGNING_KEY,
{
algorithm: "RS256",
}
),
});
next();
});
```
2. Paragon SDK used on your front-end client to authenticate your users
```js theme={null}
await paragon.authenticate(
process.env.PARAGON_PROJECT_ID,
SIGNED_JWT
);
```
3. Front-end components to bring up the Connect Portal for users to connect their integrations
```js theme={null}
```