> ## Documentation Index
> Fetch the complete documentation index at: https://docs.useparagon.com/llms.txt
> Use this file to discover all available pages before exploring further.
# User-Configured OAuth
> Allow your users to authorize integrations with their own OAuth client and customize scopes.
## Overview
User-Configured OAuth allows your users to connect an integration with their **own** OAuth client (Client ID and Client Secret) instead of the OAuth credentials you've configured in Paragon.
This is useful when:
* Your customers have stricter security or compliance requirements that require them to bring their own OAuth app.
* Your customers need to customize OAuth scopes that are requested.
* Your customers want to manage rate limits, audit logs, or app-level settings on their own OAuth app.
* Your customers belong to organizations that only allow connections to internally registered apps.
When User-Configured OAuth is enabled, the Connect Portal prompts the user to enter their own Client ID, Client Secret, and (optionally) scopes during the install flow. Paragon will use those credentials to perform the OAuth handshake and authenticate the user, but otherwise will manage the connection like any other integration.
## Supported Integrations
User-Configured OAuth is currently supported for the following integrations:
* [Gmail](/resources/integrations/gmail#user-configured-oauth)
* [Jira](/resources/integrations/jira#user-configured-oauth)
* [Microsoft Outlook](/resources/integrations/outlook#user-configured-oauth)
* [Salesforce](/resources/integrations/salesforce#user-configured-oauth)
* [SharePoint](/resources/integrations/sharepoint#user-configured-oauth)
* [Slack](/resources/integrations/slack#user-configured-oauth)
* [Zendesk](/resources/integrations/zendesk#user-configured-oauth)
## Enabling User-Configured OAuth
User-Configured OAuth is exposed as an additional **Account Type** on the integration. To offer it to your users, pass an `accountType` array to [`paragon.installIntegration`](/apis/api-reference#installintegration) (or [`paragon.connect`](/apis/api-reference#connect)) listing the account types you want to make available.
```js theme={null}
paragon.installIntegration("zendesk", {
accountType: ["default", "user-configured-oauth"],
});
```
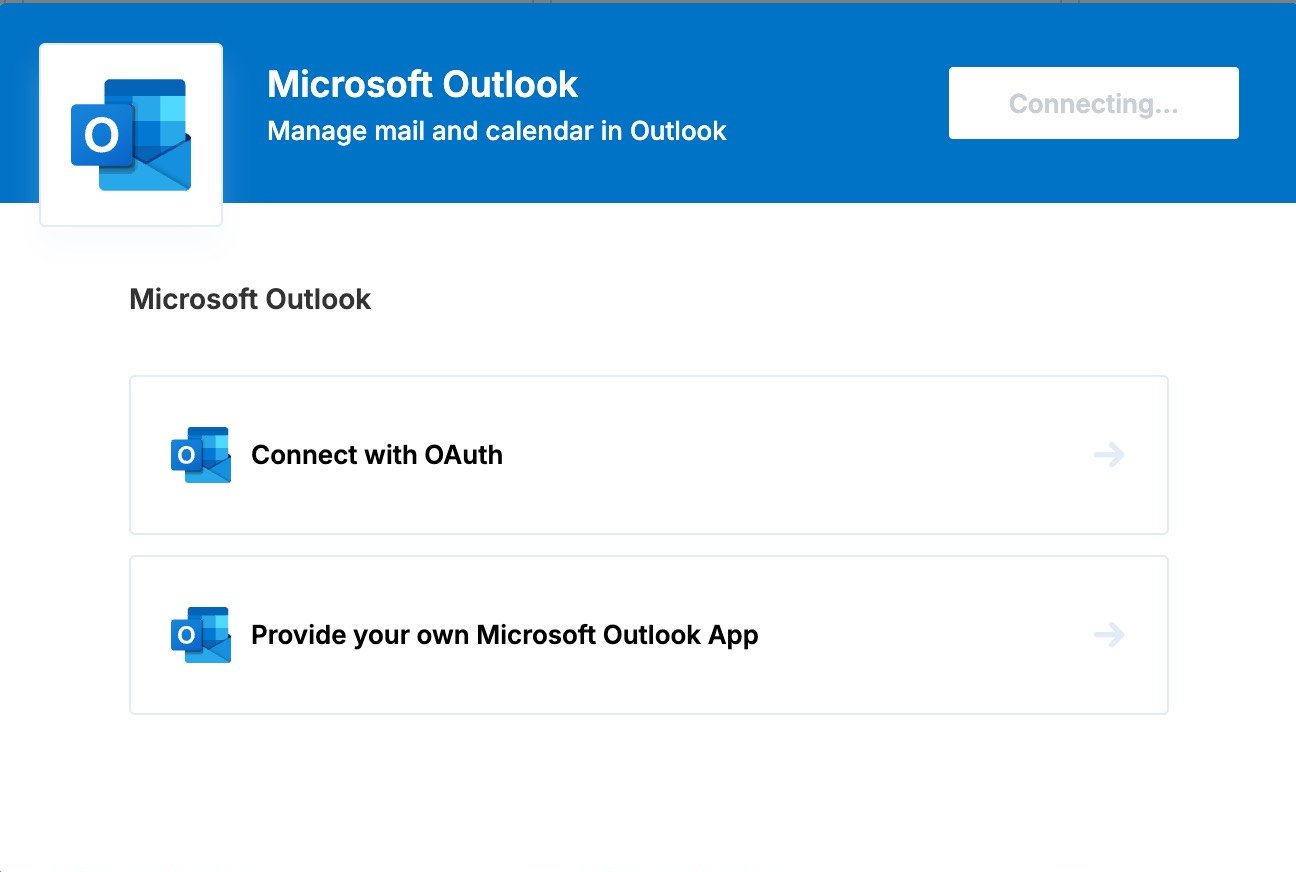 When more than one account type is provided, the Connect Portal will show an Account Type selection screen so the user can choose between connecting with the default OAuth app you've configured in Paragon and providing their own credentials.
To restrict your integration to **only** support User-Configured OAuth (and skip the account type prompt), pass `"user-configured-oauth"` as the only value:
```js theme={null}
paragon.installIntegration("zendesk", {
accountType: ["user-configured-oauth"],
});
```
The same option can be passed to `paragon.connect` to launch the Connect Portal with the same behavior:
```js theme={null}
paragon.connect("zendesk", {
accountType: ["default", "user-configured-oauth"],
});
```
### What your users will be prompted for
After selecting the **User-Configured OAuth** account type, the user will be prompted to enter:
* **Client ID**: The Client ID of their OAuth application.
* **Client Secret**: The Client Secret of their OAuth application.
* **Scopes** (optional): A list of OAuth scopes to request. The default scopes configured for your Paragon integration will be pre-filled in this input, but users can add or remove their own scopes.
* **Redirect URL**: A read-only field showing the redirect URL the user must add to their OAuth application. By default, this is `https://passport.useparagon.com/oauth`.
* Other integration-specific settings may appear in this step if required by the integration.
After saving, Paragon will run the OAuth flow against the user's app and store the resulting credentials, just like any other connected integration.
## Using User-Configured OAuth with the Headless Connect Portal
If you're using the [Headless Connect Portal](/connect-portal/headless-connect-portal), pass the same `accountType` option to `paragon.installFlow.start`:
```js theme={null}
paragon.installFlow.start("zendesk", {
accountType: ["default", "user-configured-oauth"],
onNext: (next) => {
// Render the appropriate UI for the current install stage
},
onComplete: () => {
// Installation has completed successfully
},
});
```
When `accountType` is an array of more than one value, the install flow will emit an [`AccountTypeStage`](/apis/api-reference#installflowstage) in the `onNext` callback. You can render the available options and call [`paragon.installFlow.setAccountType`](/apis/api-reference#setaccounttype) when the user selects one.
If the user chooses `"user-configured-oauth"`, the install flow will subsequently emit a [`PostOptionsStage`](/apis/api-reference#installflowstage) containing inputs for the Client ID, Client Secret, scopes, and the read-only Redirect URL. See the [Input Types Reference](/connect-portal/input-types-reference) for help rendering these inputs.
User-Configured OAuth requires `@useparagon/connect` **v2.1.1** or higher to be supported by the Headless Connect Portal. See the [SDK changelog](/changelog/sdk) for more details.
When more than one account type is provided, the Connect Portal will show an Account Type selection screen so the user can choose between connecting with the default OAuth app you've configured in Paragon and providing their own credentials.
To restrict your integration to **only** support User-Configured OAuth (and skip the account type prompt), pass `"user-configured-oauth"` as the only value:
```js theme={null}
paragon.installIntegration("zendesk", {
accountType: ["user-configured-oauth"],
});
```
The same option can be passed to `paragon.connect` to launch the Connect Portal with the same behavior:
```js theme={null}
paragon.connect("zendesk", {
accountType: ["default", "user-configured-oauth"],
});
```
### What your users will be prompted for
After selecting the **User-Configured OAuth** account type, the user will be prompted to enter:
* **Client ID**: The Client ID of their OAuth application.
* **Client Secret**: The Client Secret of their OAuth application.
* **Scopes** (optional): A list of OAuth scopes to request. The default scopes configured for your Paragon integration will be pre-filled in this input, but users can add or remove their own scopes.
* **Redirect URL**: A read-only field showing the redirect URL the user must add to their OAuth application. By default, this is `https://passport.useparagon.com/oauth`.
* Other integration-specific settings may appear in this step if required by the integration.
After saving, Paragon will run the OAuth flow against the user's app and store the resulting credentials, just like any other connected integration.
## Using User-Configured OAuth with the Headless Connect Portal
If you're using the [Headless Connect Portal](/connect-portal/headless-connect-portal), pass the same `accountType` option to `paragon.installFlow.start`:
```js theme={null}
paragon.installFlow.start("zendesk", {
accountType: ["default", "user-configured-oauth"],
onNext: (next) => {
// Render the appropriate UI for the current install stage
},
onComplete: () => {
// Installation has completed successfully
},
});
```
When `accountType` is an array of more than one value, the install flow will emit an [`AccountTypeStage`](/apis/api-reference#installflowstage) in the `onNext` callback. You can render the available options and call [`paragon.installFlow.setAccountType`](/apis/api-reference#setaccounttype) when the user selects one.
If the user chooses `"user-configured-oauth"`, the install flow will subsequently emit a [`PostOptionsStage`](/apis/api-reference#installflowstage) containing inputs for the Client ID, Client Secret, scopes, and the read-only Redirect URL. See the [Input Types Reference](/connect-portal/input-types-reference) for help rendering these inputs.
User-Configured OAuth requires `@useparagon/connect` **v2.1.1** or higher to be supported by the Headless Connect Portal. See the [SDK changelog](/changelog/sdk) for more details.