> ## Documentation Index
> Fetch the complete documentation index at: https://docs.useparagon.com/llms.txt
> Use this file to discover all available pages before exploring further.
# Personalize Welcome Emails
> Personalize and send meaningful welcome emails to new users after a couple of hours.
Let's say we want to send a personalized welcome email to users a couple of hours after they've signed up on our app.
**We'll build a workflow that does this in 5 minutes**.
Don't have a Paragon account yet?
[Sign up for Paragon](https://app.useparagon.com/signup) on our website to get started!
## 1. Create an event-based trigger
In this example, let's assume the frontend of our app connects user sign-ups to our PostgreSQL database. We'll start by setting up our Paragon workflow with an [Event-based trigger](/automate/building-workflows/triggers#event-based) so that our workflow runs when a new user is created in our PostgreSQL database.
[Connect your PostgreSQL database](/automate/resources/integrations-catalog/postgresql#setup-guide) to Paragon and create a new column labeled `signedUp`. We'll use this column to let us know the date and time our user signs-up.
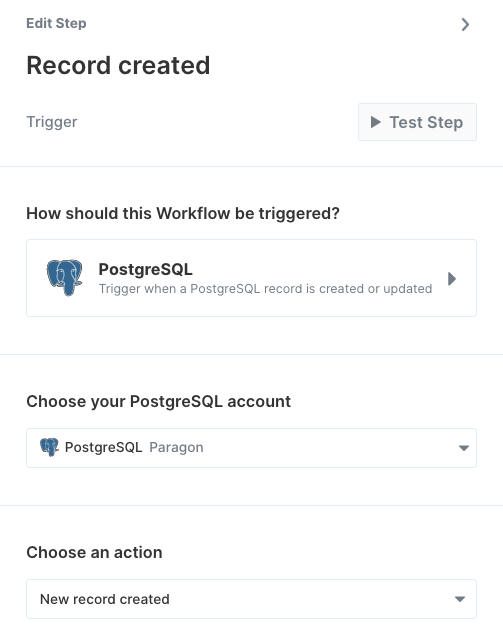 Under **Choose an action**, select **New record created**.
Under **Table**, choose the table you'd like to check for new users.
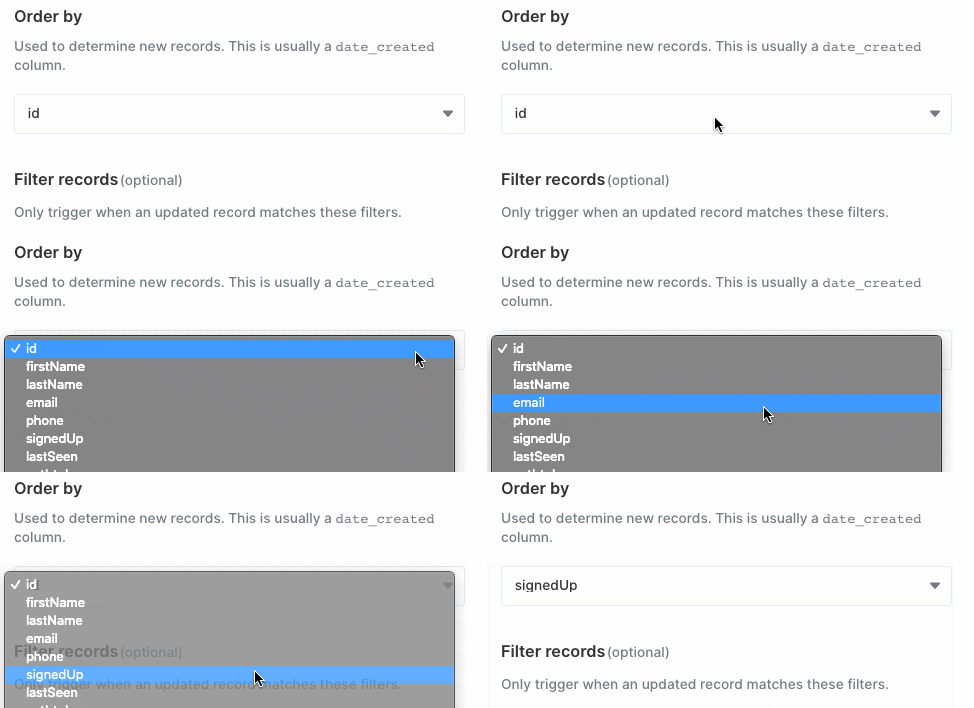
Under **Order by**, choose the column that **represents the time and date** the user signed up. In this example, we'll select `signedUp`.
Under **Choose an action**, select **New record created**.
Under **Table**, choose the table you'd like to check for new users.
Under **Order by**, choose the column that **represents the time and date** the user signed up. In this example, we'll select `signedUp`.
 ## 2. Delay immediately sending the email
We'll use the **Delay** step to wait a certain amount of time before executing the next steps in our workflow.
## 2. Delay immediately sending the email
We'll use the **Delay** step to wait a certain amount of time before executing the next steps in our workflow.
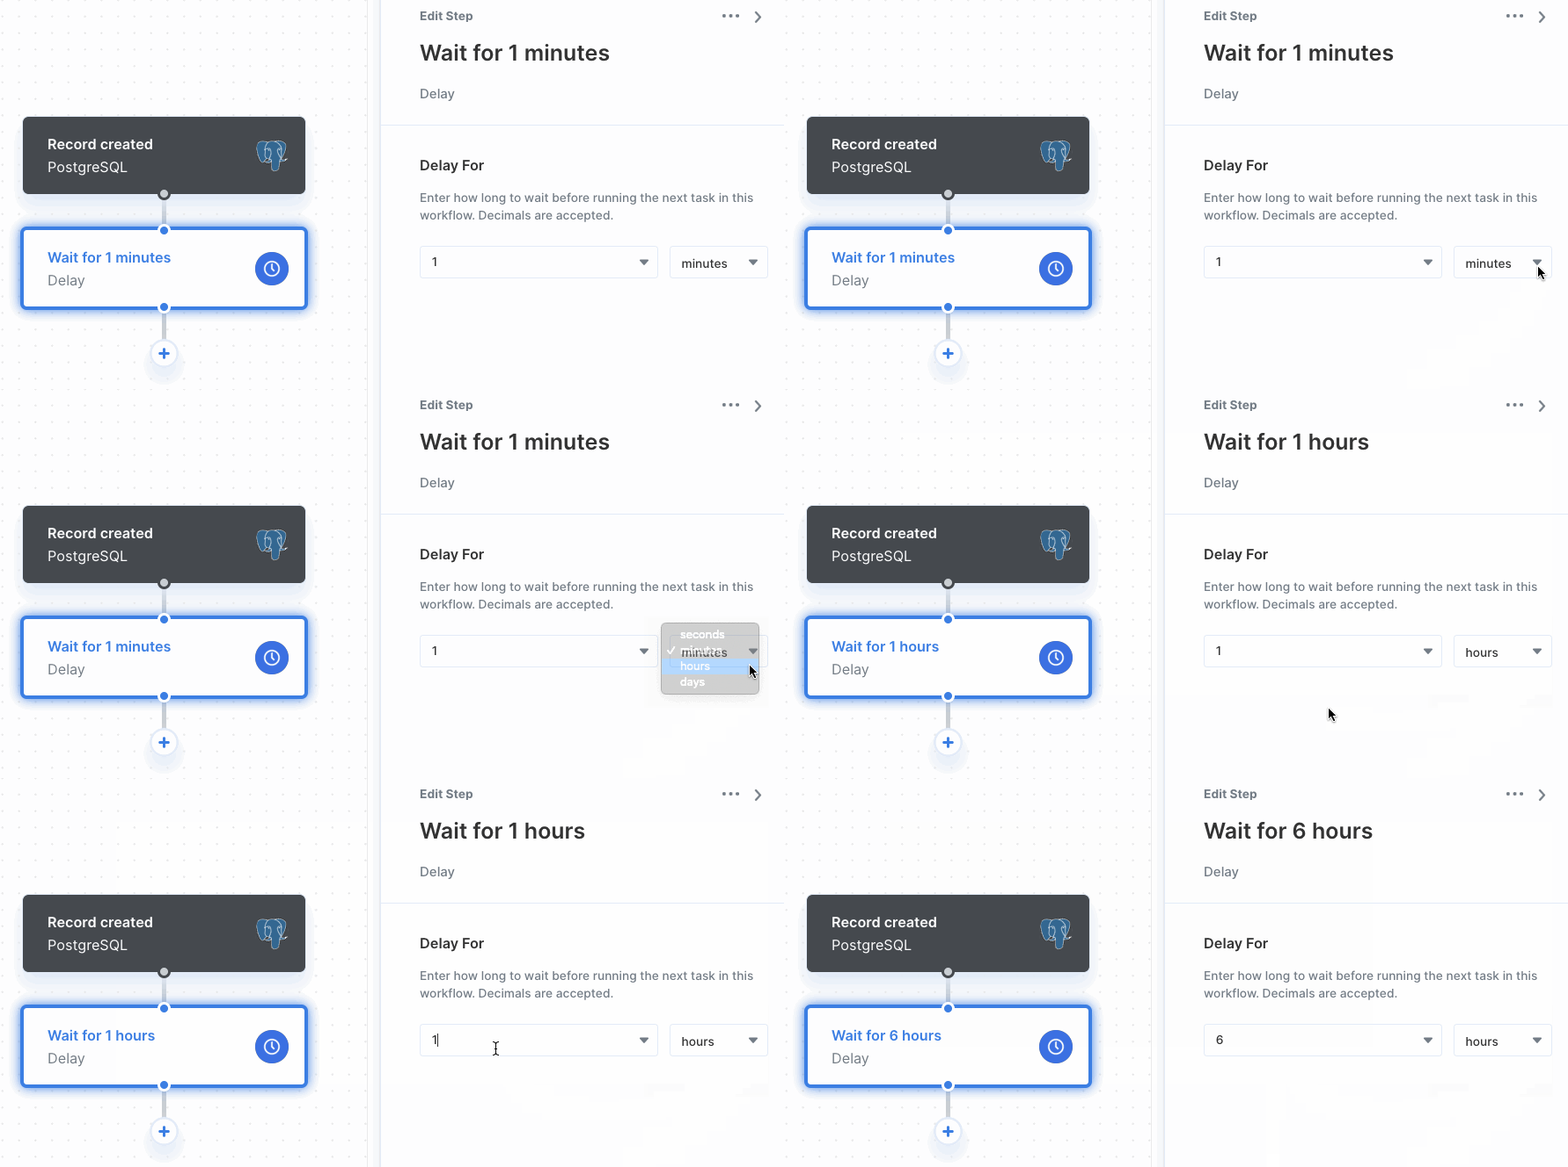 In this example, we want to delay our welcome email to our new users by 6 hours. Once the workflow reaches this point, it'll wait 6 hours before continuing with the next steps.
**Note:** Delaying a workflow doesn't prevent future executions of your workflow from starting.
Check out your workflow executions in your [Task History](/automate/building-workflows/viewing-task-history#overview).
## 3. Send the user an email
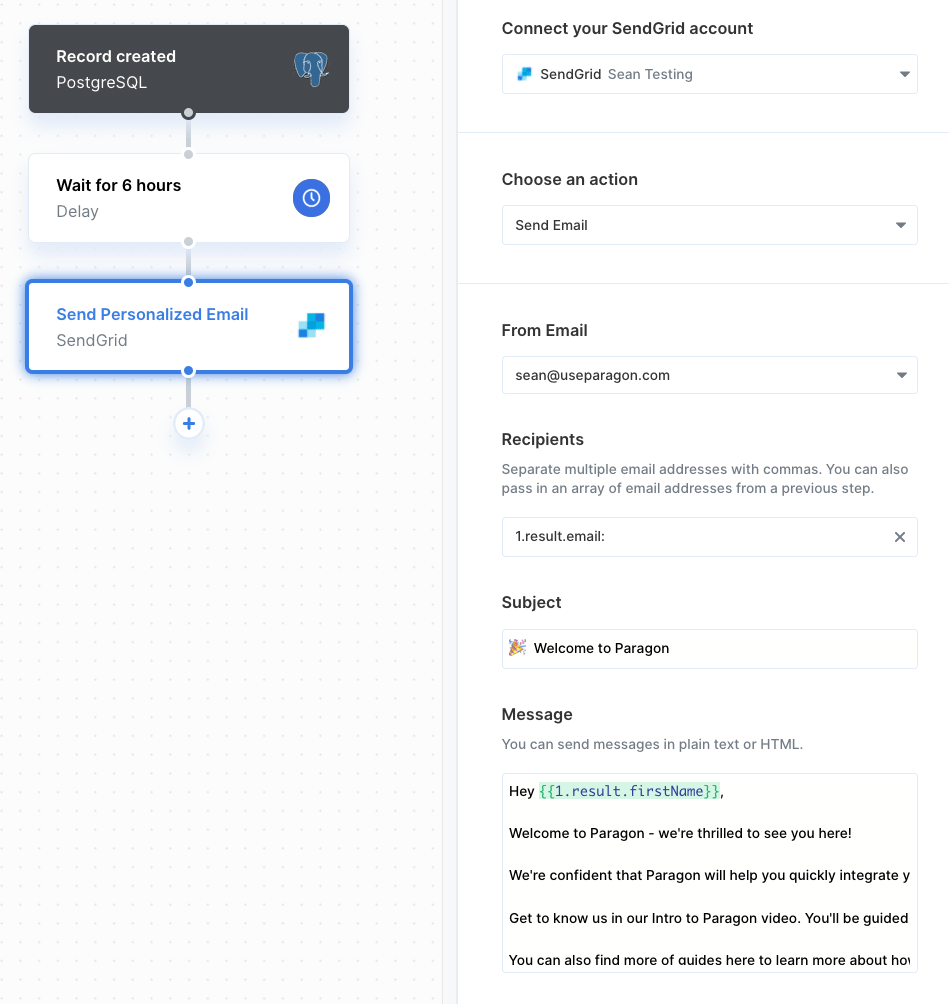
Paragon supports [several integrations](/automate/resources/integrations-catalog#messaging) for messaging – and for this example, we'll use [Sendgrid](/automate/resources/integrations-catalog/sendgrid) to send each user an email. Add a Sendgrid step to your workflow, connect your Sendgrid account, and choose the **Send Email** action.
Under **Recipients**, click the dropdown to bring up the variable menu and choose the user's email address from the [PostgreSQL event-based trigger.](/automate/resources/integrations-catalog/postgresql#event-trigger) In the **Subject** and **Message** fields, you can insert data from previous steps (e.g. your users' name, etc.) by typing `{{` to bring up the variable menu.
In this example, we want to delay our welcome email to our new users by 6 hours. Once the workflow reaches this point, it'll wait 6 hours before continuing with the next steps.
**Note:** Delaying a workflow doesn't prevent future executions of your workflow from starting.
Check out your workflow executions in your [Task History](/automate/building-workflows/viewing-task-history#overview).
## 3. Send the user an email
Paragon supports [several integrations](/automate/resources/integrations-catalog#messaging) for messaging – and for this example, we'll use [Sendgrid](/automate/resources/integrations-catalog/sendgrid) to send each user an email. Add a Sendgrid step to your workflow, connect your Sendgrid account, and choose the **Send Email** action.
Under **Recipients**, click the dropdown to bring up the variable menu and choose the user's email address from the [PostgreSQL event-based trigger.](/automate/resources/integrations-catalog/postgresql#event-trigger) In the **Subject** and **Message** fields, you can insert data from previous steps (e.g. your users' name, etc.) by typing `{{` to bring up the variable menu.
 ## 4. Deploy your workflow
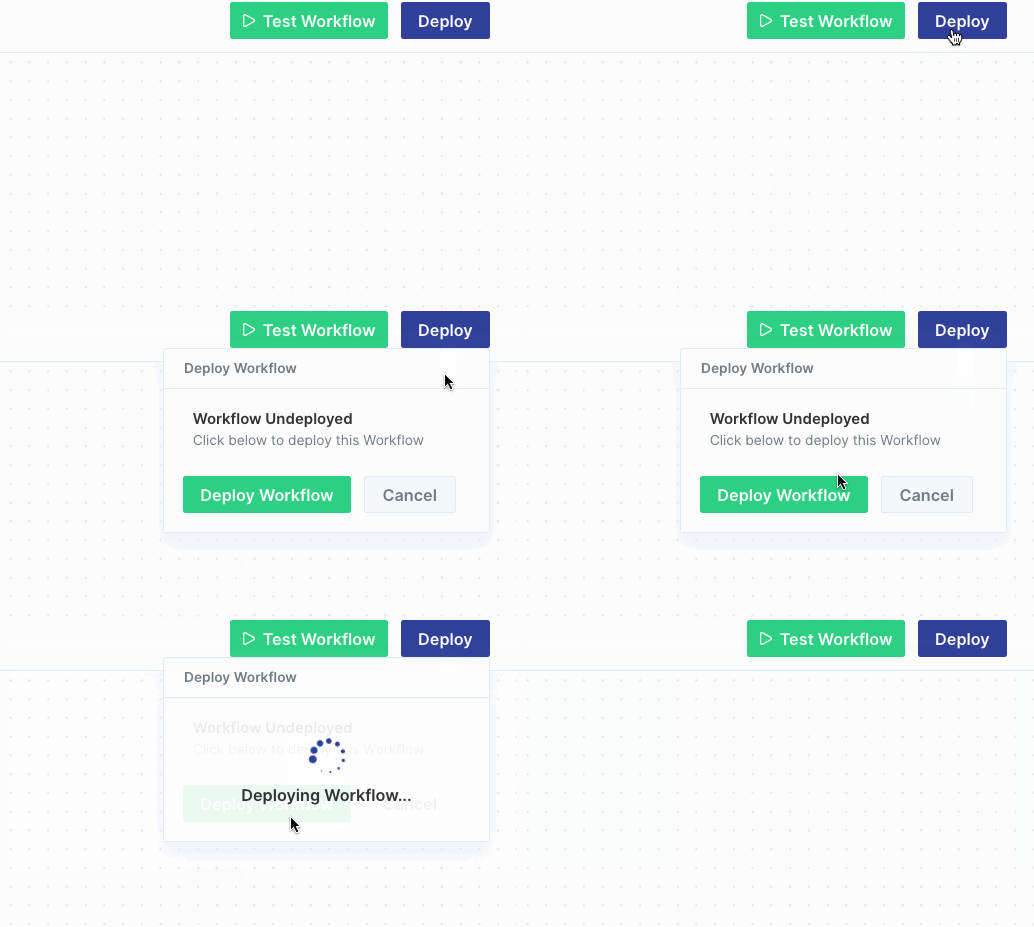
Now that your workflow is all set up, deploy your workflow by clicking the "Deploy" button in the top-right of your screen. Once you do, your workflow's Trigger URL will go live and you can start making requests to it.
## 4. Deploy your workflow
Now that your workflow is all set up, deploy your workflow by clicking the "Deploy" button in the top-right of your screen. Once you do, your workflow's Trigger URL will go live and you can start making requests to it.
 Great work! We just built a workflow to send personalized welcome emails to new users a couple of hours after they've signed up!
Of course, this is just a basic example of what you can do with Paragon, and there's much more we could add to this workflow, e.g. issuing a refund, marking the user as canceled in your database, etc. We hope it gives you an idea of how to use Paragon for your own internal workflows!
Want to build your own workflows?
[Sign up for Paragon](https://app.useparagon.com/signup) on our website to get started!
Great work! We just built a workflow to send personalized welcome emails to new users a couple of hours after they've signed up!
Of course, this is just a basic example of what you can do with Paragon, and there's much more we could add to this workflow, e.g. issuing a refund, marking the user as canceled in your database, etc. We hope it gives you an idea of how to use Paragon for your own internal workflows!
Want to build your own workflows?
[Sign up for Paragon](https://app.useparagon.com/signup) on our website to get started!