> ## Documentation Index
> Fetch the complete documentation index at: https://docs.useparagon.com/llms.txt
> Use this file to discover all available pages before exploring further.
# Intercom OAuth
> Connect your Intercom app for OAuth in Paragon.
## Setup Guide
You can find your Intercom app credentials by visiting your [Intercom Developer Hub](https://developers.intercom.com/).
**Note:** You'll need to create a new Intercom app if you don't already have
one. To access your customer's Intercom data by using OAuth, you'll need to
[submit your app for a
review](https://developers.intercom.com/building-apps/docs/review-publish-your-app#changing-your-review-or-listing).
You'll need the following information to set up your Intercom App with Paragon:
* App Name
* Client ID
* Client Secret
* Scopes Requested
### 1. Add the Redirect URL to your Intercom app
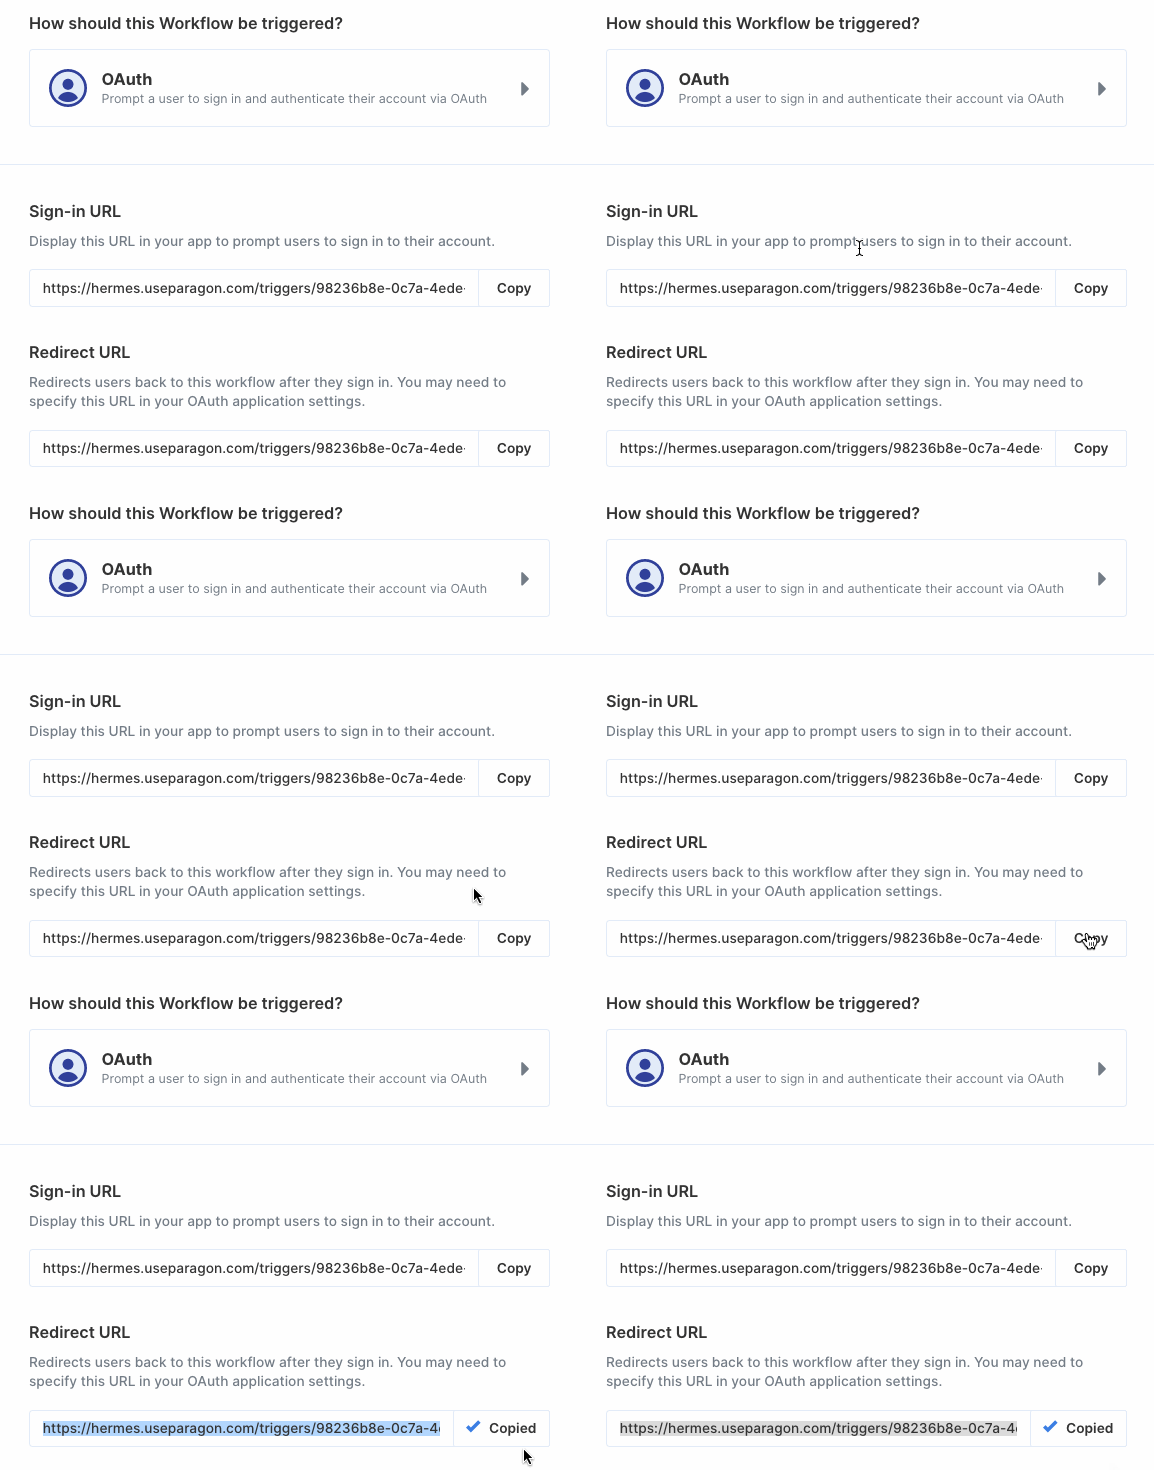
Paragon provides a redirect URL to send information to your Intercom app. To add the redirect URL to your Intercom app:
1\. Copy the link under "**Redirect URL"** in Paragon.
 2\. In your [Intercom developer dashboard](https://developers.intercom.com/), select your application.
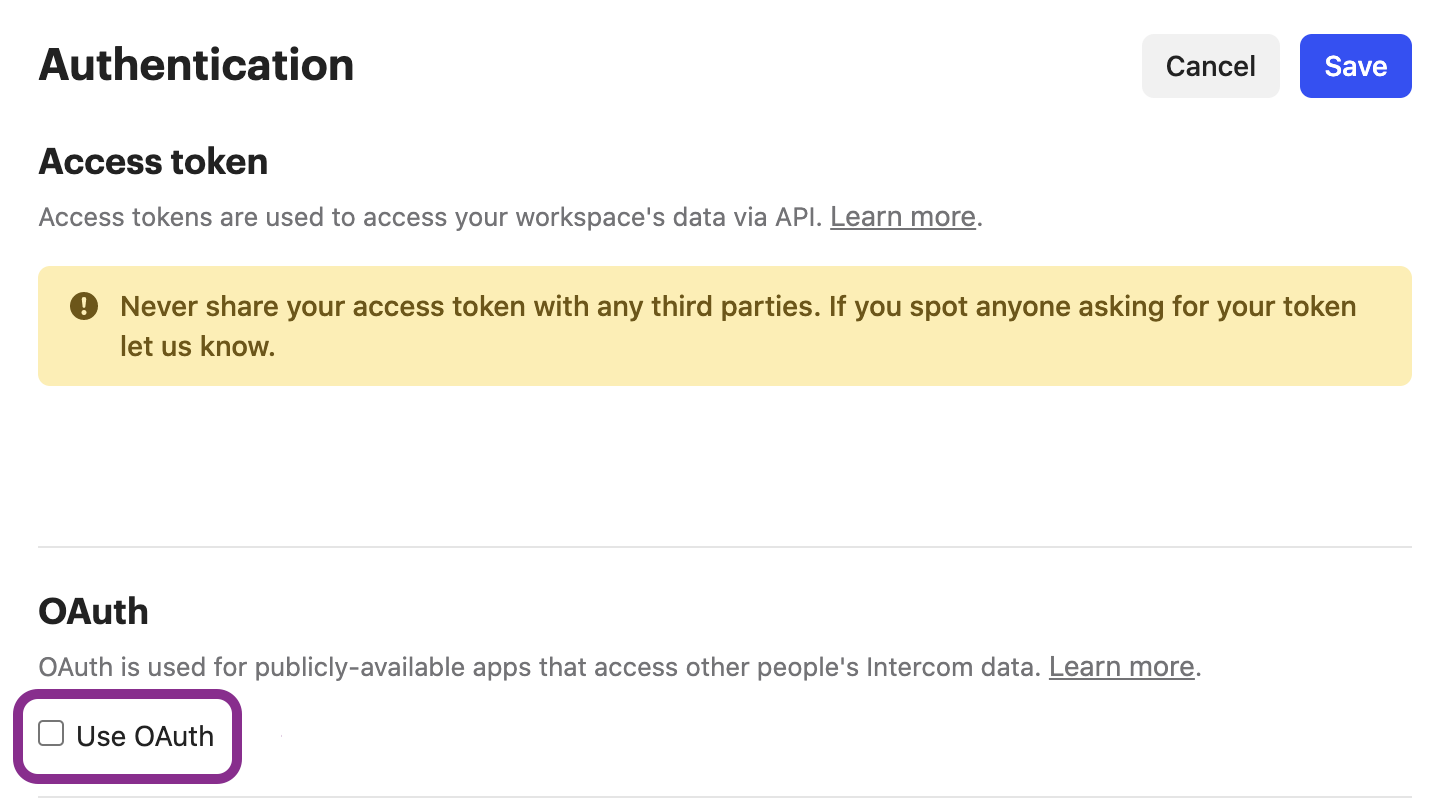
3\. Under **Configure > Authentication**, click the **Edit** button.
4\. Tick the **Use OAuth** option.
2\. In your [Intercom developer dashboard](https://developers.intercom.com/), select your application.
3\. Under **Configure > Authentication**, click the **Edit** button.
4\. Tick the **Use OAuth** option.
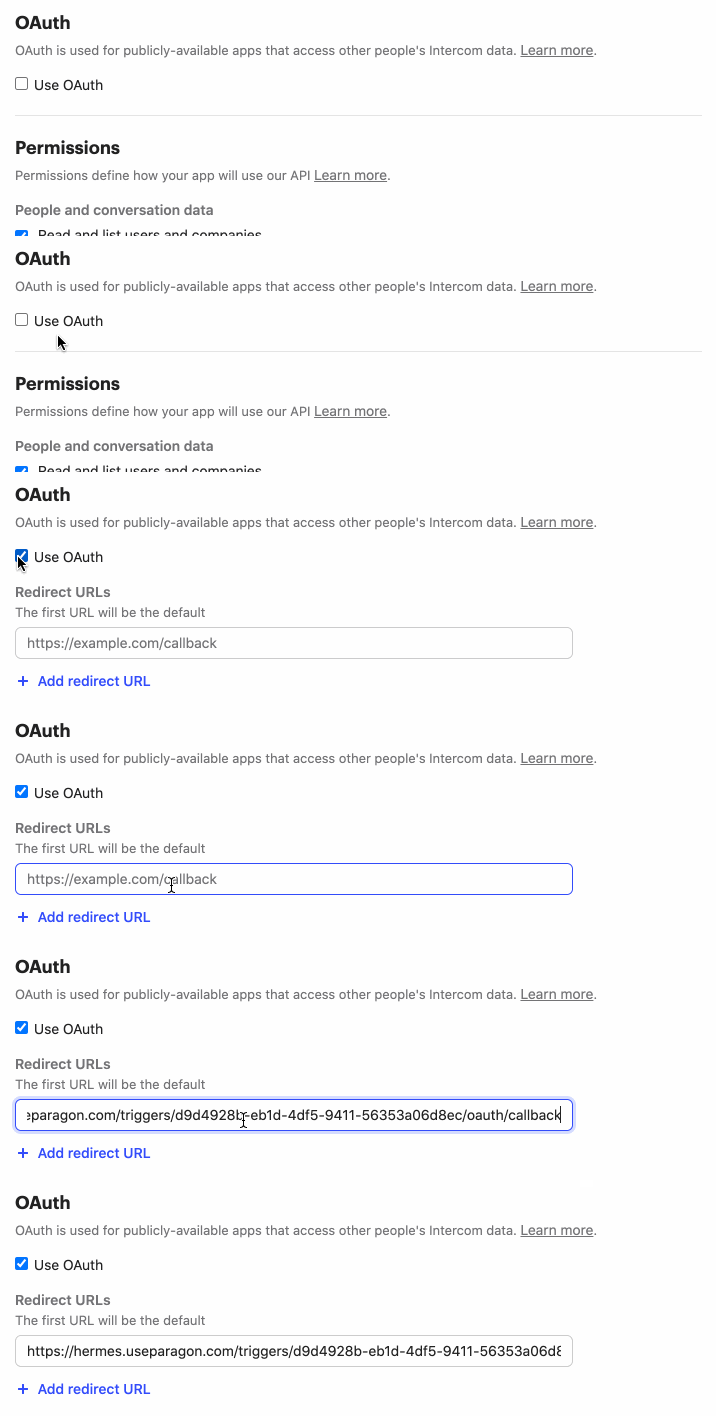
 5\. Under **Redirect URLs**, paste-in the redirect URL from Paragon. Click the **Save** button to save your changes.
 ### 2. Add your Intercom app to Paragon
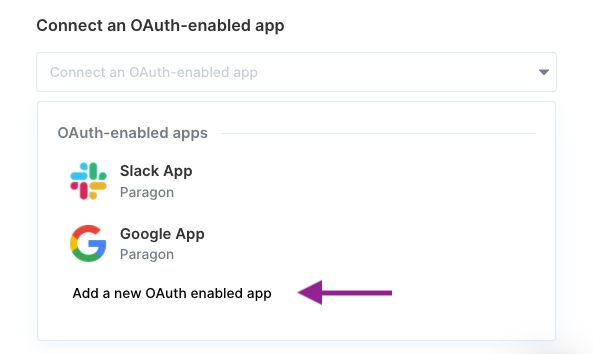
1. Click the "**Trigger**" step in the workflow canvas, and choose **OAuth** from the sidebar.
2. Under **Connect an OAuth-enabled app**, choose "**Add a new OAuth-enabled app**" and select "**Intercom**".
### 2. Add your Intercom app to Paragon
1. Click the "**Trigger**" step in the workflow canvas, and choose **OAuth** from the sidebar.
2. Under **Connect an OAuth-enabled app**, choose "**Add a new OAuth-enabled app**" and select "**Intercom**".
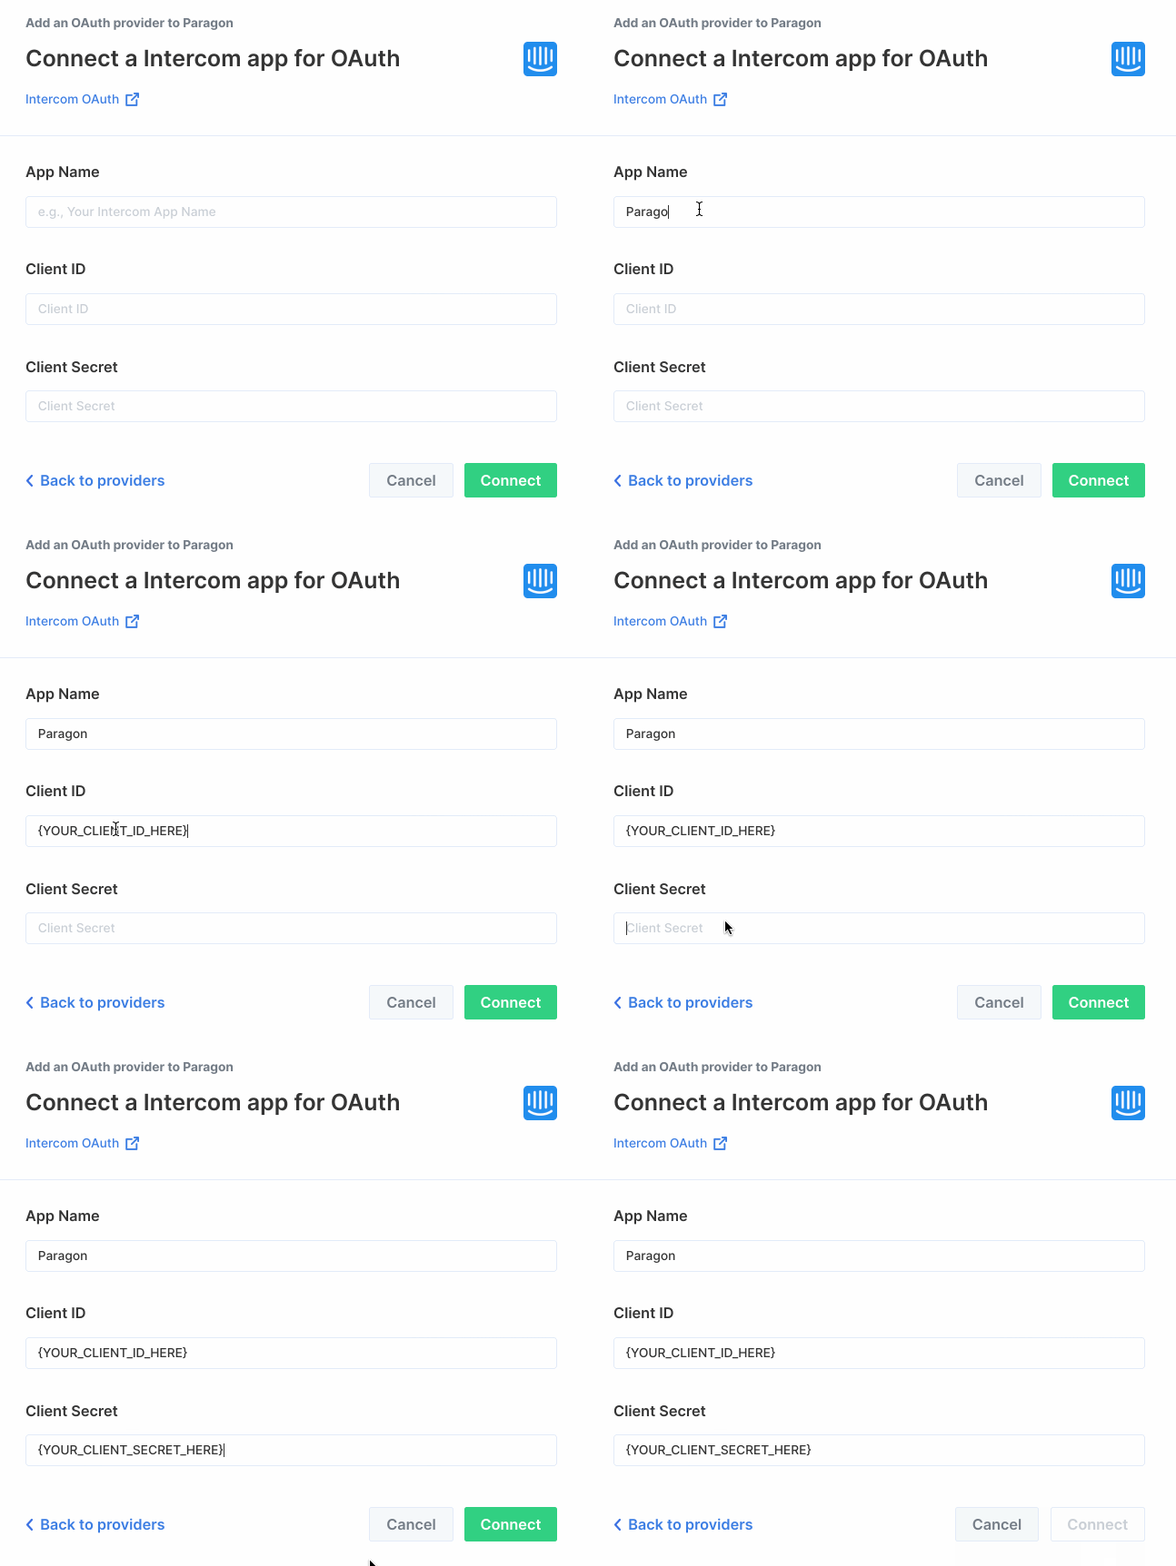
 ### 3. Input your credentials
Fill out your credentials from [Step 1](/automate/resources/oauth/intercom#1-add-the-redirect-url-to-your-intercom-app) in their respective sections:
* **App Name:** Chosen name for your application.
* **Client ID:** Found under Configure > Basic Information > Client ID on your Intercom app page.
* **Client Secret:** Found under Configure > Basic Information > Client Secret on your Intercom app page.
* **Scopes Requested:** A space-separated list of OAuth scopes. A complete list of Intercom's scopes is [here](https://developers.intercom.com/building-apps/docs/oauth-scopes#summary-of-all-oauth-scopes).
Press the green "Connect" button to save your credentials.
### 3. Input your credentials
Fill out your credentials from [Step 1](/automate/resources/oauth/intercom#1-add-the-redirect-url-to-your-intercom-app) in their respective sections:
* **App Name:** Chosen name for your application.
* **Client ID:** Found under Configure > Basic Information > Client ID on your Intercom app page.
* **Client Secret:** Found under Configure > Basic Information > Client Secret on your Intercom app page.
* **Scopes Requested:** A space-separated list of OAuth scopes. A complete list of Intercom's scopes is [here](https://developers.intercom.com/building-apps/docs/oauth-scopes#summary-of-all-oauth-scopes).
Press the green "Connect" button to save your credentials.