> ## Documentation Index
> Fetch the complete documentation index at: https://docs.useparagon.com/llms.txt
> Use this file to discover all available pages before exploring further.
# PostgreSQL Integration
> Connect your PostgreSQL database to Paragon.
## Setup Guide
### 1. Get PostgreSQL Details & Whitelist Paragon IP Addresses
You can get your database credentials from whoever set up the database. You'll also need to get them to whitelist the Paragon IP addresses:
* `18.205.92.162`
* `54.235.127.238`
* `18.215.215.164`
* `34.225.59.94`
* `44.210.155.28`
* `52.45.12.206`
### 2. Add PostgreSQL Paragon
To add PostgreSQL to Paragon, click the "+" button in the workflow canvas and choose the PostgreSQL from the sidebar. Under **Connect to a PostgreSQL account**, choose "Add new account for PostgreSQL" and enter your database credentials. We recommend setting up separate accounts for read and write access to make it harder to accidentally cause unwanted changes to your database.
 ### 3. Query PostgreSQL
Once your PostgreSQL database is connected, you can add steps to perform the following actions:
* Write SQL
* Find Records
* Find Record by ID
* Create Record
* Update Records
* Update Record by ID
* Delete Records
* Delete Record by ID
### 3. Query PostgreSQL
Once your PostgreSQL database is connected, you can add steps to perform the following actions:
* Write SQL
* Find Records
* Find Record by ID
* Create Record
* Update Records
* Update Record by ID
* Delete Records
* Delete Record by ID
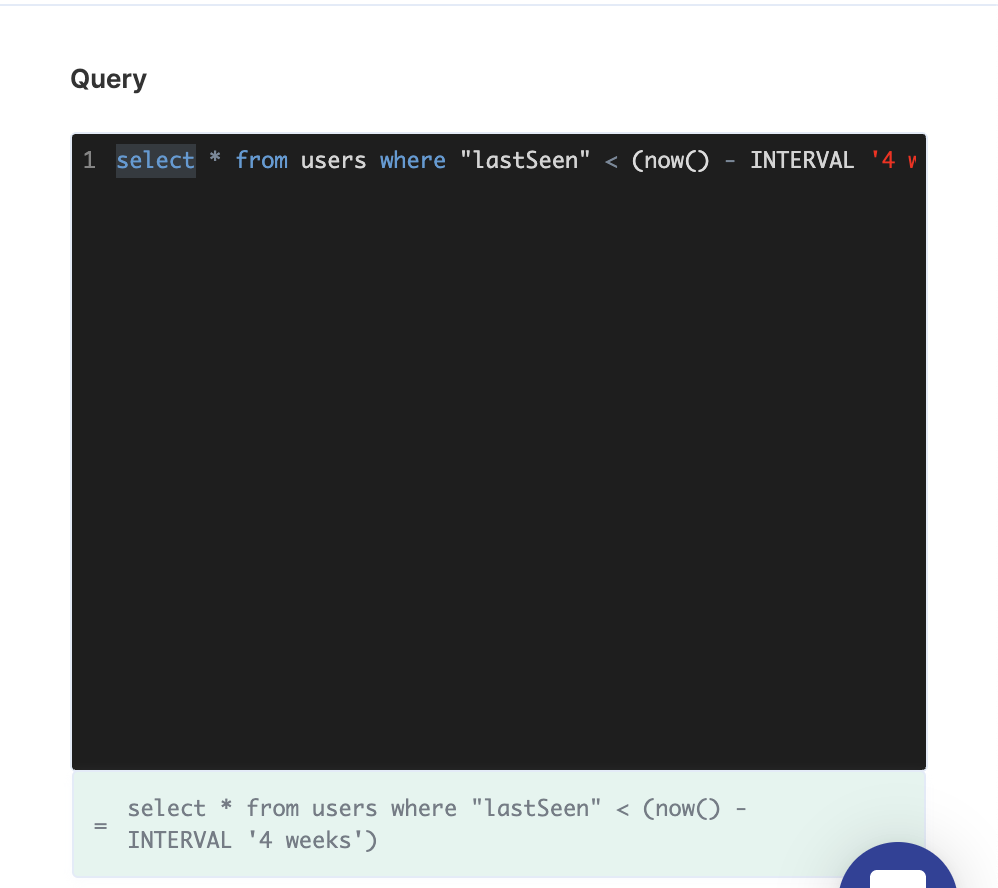
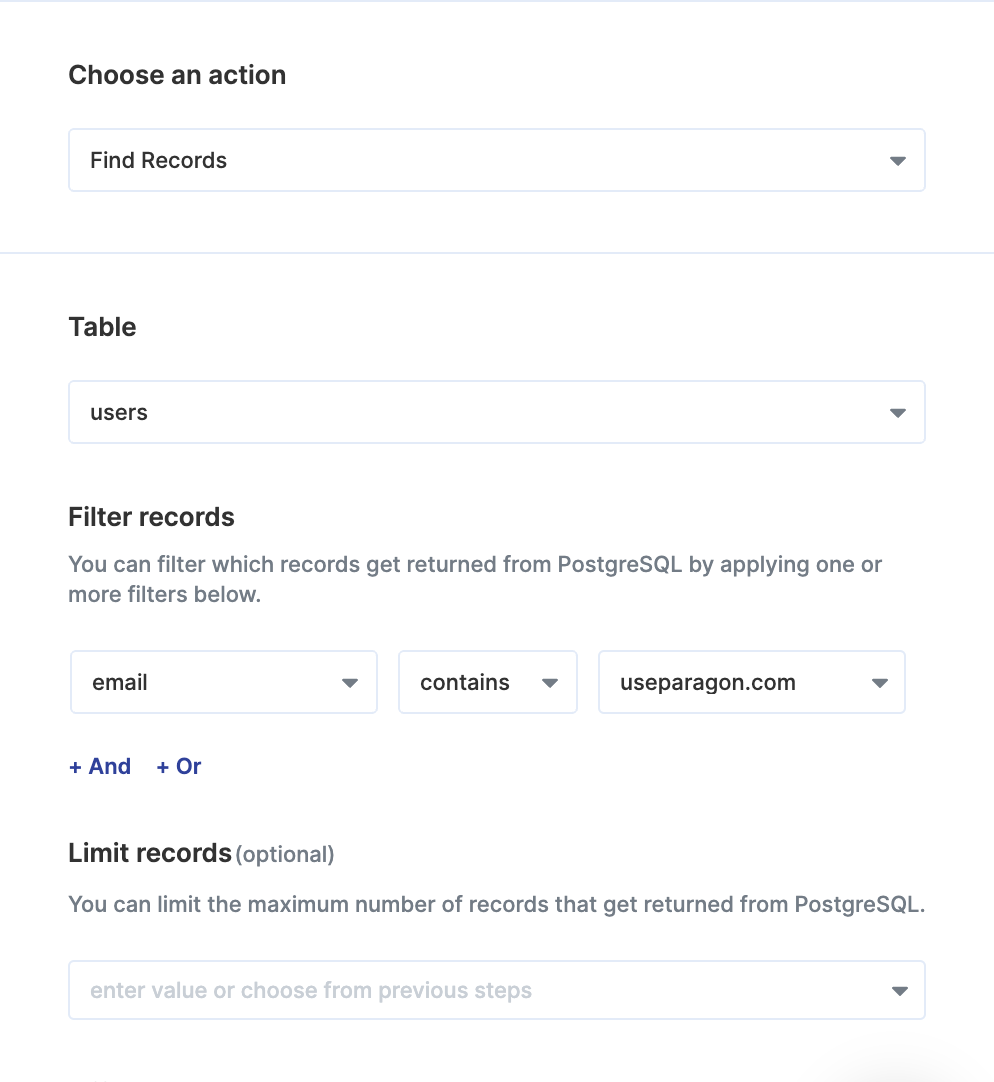 You can query PostgreSQL by writing SQL or using Paragon's visual query editor. When writing SQL, you can reference data from previous steps by typing `{{` to invoke the variable menu.
 ## Event Trigger
With the PostgreSQL trigger, Paragon checks for new data from your trigger every minute in order to start your workflow. Your workflow runs for each record meeting the trigger criteria. For example, five new records in your database with a "new record created" action would run your workflow five separate times, each with information from the corresponding record.
The PostgreSQL trigger provides the following trigger options:
* **New record created**
* **Record updated**
**Note:** You'll need to include a **date column** in your PostgreSQL database
for this event trigger to work properly.
### Ordering Records
Paragon displays new and updated records ordered by date in your workflow, with the newest records appearing first. You should order your records by a date column, such as `date_created` or `lastSeen`, to properly determine new or updated records.
## Event Trigger
With the PostgreSQL trigger, Paragon checks for new data from your trigger every minute in order to start your workflow. Your workflow runs for each record meeting the trigger criteria. For example, five new records in your database with a "new record created" action would run your workflow five separate times, each with information from the corresponding record.
The PostgreSQL trigger provides the following trigger options:
* **New record created**
* **Record updated**
**Note:** You'll need to include a **date column** in your PostgreSQL database
for this event trigger to work properly.
### Ordering Records
Paragon displays new and updated records ordered by date in your workflow, with the newest records appearing first. You should order your records by a date column, such as `date_created` or `lastSeen`, to properly determine new or updated records.
 ### Testing Event-based Triggers
You can test your workflow on different records using the **Debugging Menu**. Click the "use a different record as test data" dropdown menu for a list of available records.
### Testing Event-based Triggers
You can test your workflow on different records using the **Debugging Menu**. Click the "use a different record as test data" dropdown menu for a list of available records.